Making Fun S’more Favor Packs #3 of the Series “The Gang’s All Here”

It was a balmy evening, the perfect evening for the last night of the year and the festivities we had planned…a wiener roast…another Family Corn Hole Tournament with red, white, and blue ribbons with York Peppermint Patties dangling as medals to be awarded and worn around the necks of the 1st and 2nd place winners…watching the fireworks on the lake…and sitting around the fire pit popping campfire popcorn, and making s’mores.

It’s that cozy time of year, again…time for stocking caps and mittens…time for steamy cups of cocoa…and time for sitting around the fire, toasting s’mores!

Continue reading “Making Fun S’more Favor Packs #3 of the Series “The Gang’s All Here””

May Day Gift Cones … DIY Project

by Trenda

“Dear old world … You are very lovely, And I am glad to be alive in you.”   ~ from Anne of Green Gables

white blossoms and steeple

It’s May!  The darling month when everything seems possible.  Look at this sweet description of May Day from The Old Farmer’s Almanac established in 1792.

“With winter’s retreat, colts and calves kick up their heels and frisk over fresh grass, seedlings seek the sun, and birds call for mates….And we humans join their revels for one day: during spring’s “May Day” festival, even serious-minded folk put work aside to enjoy Nature’s exuberance!”

May1.jpg

Still quoting The Farmer’s Almanac … “Here are some joyful May Day traditions marking the return of spring and the renewed gift of life.

  1. Neighbors may leave baskets of flowers on each other’s doorsteps or doorknobs.
  2. Kids can go barefoot on May Day for the first time.
  3. People will crown a “May Queen” for the day’s festivities.
  4. Beekeepers will move bees on May 1st.
  5. Fishermen expect to catch fish on May Day.
  6. On May Day morning, if a maiden gathers dew before sunup and sprinkles her face with it, she will enjoy luck and youthful beauty for the rest of the year.
  7. Farmers often plant corn, cucumbers, and turnips on this day.
  8. Villagers may hold theatrical battles between “summer” and “winter” that banish the winter.
  9. The Kentucky Derby starts off the month of May (the first Saturday of the month).
  10. On May 1st, people in Britain welcome spring by “Bringing in the May,” or gathering cuttings of flowering trees for their homes.
  11. May 1st in Hawaii is called “Lei Day,” and people will receive prizes this day for wearing the prettiest handmade leis.”

May2

Hanging May Day baskets is an enchanting custom that is fun to incorporate into your own family traditions.  Sweet paper cones made from stock card paper with scalloped edges and ribbons are easy to make and are a delightful surprise to find. 

brother sister

  Supplies Needed:

  • stock card paper (double sided paper if you want a pattern on the inside and outside of your May Day cone)
  • scissors
  • scalloped edged scissors
  • ribbon
  • shredded paper or tissue paper
  • craft glue 
  • florist vials, if using fresh flowers
  • candy, flowers, little gifts, etc.


Instructions:

  1. Cut stock card paper into a 7-inch square (I used double-sided stock paper to have prints on both the outside and inside of my May Day gift cones
  2. Use decorative scissors to cut scallops around the top edge of the square
  3. Place pencil tip at the bottom of the paper and begin rolling paper around pencil tip to form cone
  4. Secure outer flap of cone with glue 
  5. Punch holes along scalloped edge approximately 1″ apart, beginning at the top front center
  6. Thread a 22″ – 24″ length of 1/2″ ribbon through the holes
  7. Tie ribbon into bow in the front … leaving a 6″ loop at the back of the cone for hanging
  8. If using fresh flowers, use florist vials and fill with water and flower stems  to tuck into the cone, or fill with shredded paper or tissue paper and fill cone with silk flowers,candy, little gifts, etc.

instructions

What a lovely surprise to find hanging on your door … a May Day gift cone filled with silk flowers, a package of “Ferrero Rocher, fine hazlenut chocolates” and Unicorn Sparkle Nail Polish. (:

May Day Basket 2

 This sweet little May Day cone is filled with silk flowers, a tube of lipstick, and a small bottle of perfume.

May Day basket 1

Hope your May Day is filled with lots of sunshine and happy surprises!

From my cottage to yours May Day

From my cottage to yours ~ Trenda

dogwood scripture

Thank you for reading my blog!  To have all my posts delivered to your email address, just click FOLLOW in my post above … or click on my site:  cottagegreenonthelake.com

FOLLOW ME on PINTEREST!

Trenda@cottagegreenonthelake.com

cropped-cropped-img_0452-e1510254818805.png

This week I’m joining:

 Chloe Crabtree with Celebrate & Decorate


DIY Halloween Treat and Favor Bags

by Trenda

trick or treat

It’s almost time for our porch to be filled with ‘little feet’ and I always enjoy making special treats for everyone that ‘calls out, “Trick or Treat!”  These cute Halloween favors are fun to make and should cause all your little ghosts and goblins to break out in toothy grins that would rival any jack-o-lantern! (:

all treat bags


Supplies Needed:

  • Treat bags
  • Roll of “Cling Ons” (*picture below) assorted holiday trims w/self-adhesive backs on a spool 
  • Black tulle
  • Assorted Halloween ribbons
  • tag punch or a package of plain tags
  • standard hole puncher
  • Assorted Halloween stamps
  • alphabet stamps or black marker for lettering
  • black ink pad
  • scissors

Recollection tag punch and Halloween stamps …

pics of punch


Directions:

  1. If you are making your own tags, punch out gift tags using a die-cut punch or use a pattern to trace a tag for your treat bag.  I used a Recollection punch for my smaller tag and I traced a pattern out to make my larger tags.  Each of my treat bags had 2 tags; a larger white tag and a smaller orange tag.
  2. Stamp or write the words or design on your tags.  I stamped the word “BOO!” on each of my smaller, orange tags and I stamped “Happy Halloween” on the larger tag.

patterm

3. Choose the trim *(“Cling On”) that you want to decorate your bag.  I used a different trim for each treat bag.

cling on.png

4. Adhere the trim to the top of your favor bag.  Begin on the side so the final cut and matched ends will not show.

trim 5. Cut a 9″ length of tulle and a 8″ length of Halloween ribbon.  Place the tulle and the ribbon together. 

6. Slip both stamped tags onto the tulle and the ribbon (the larger tag beneath the smaller tag.)

7. Tie the tulle and ribbon into a simple knot on the left, front handle of the treat bag.

treat bag

8. Stuff treat bags with Halloween candy and favors.

all treat bags

I had fun stuffing my treat bags with Halloween candy, “Boo” notepads, pencils, and erasers, bubbles, playing cards, and stickers.  For more treats (click here for “No Tricks just Treats”)

final treat bags

“Let your light so shine before men, that they may see your good works, and glorify your Father which is in heaven.”  Matthew 5:16

Let your light so shine


From my cottage to yours  ~  Trenda

img_0452

  Thank you for taking some time to read my blog today!  To have all my posts delivered directly to your email address, just click FOLLOW in my post above … or click on my site: cottagegreenonthelake.com

FOLLOW ME on PINTEREST!

Trenda@cottagegreenonthelake.com


Halloween DIY Napkin Rings …………. by Trenda

Look who suddenly appeared, looking like he flew straight from the pages of Edgar Allan Poe’s poem and obligingly perched, right next to me.  While I slowly reached for my phone, my mind began the recitation of these remembered words …  “Once upon a midnight dreary, when I pondered, weak and weary …” . 

grackle

I love decorating the table for any occasion and for HALLOWEEN … I use all kinds of  “fol-der-ol and fid-dle-dy dee” to set the mood for a magical night that’s filled with possibilities and imagination!  During these next 3 weeks, I have several fun projects that I am going to be sharing with you that will help you create your own “boo-tiful” Halloween tablescape!  Today, I am going to show you how to make these spook-taular Halloween napkin rings!

Last cover

Supplies needed:

  • glue gun
  • glittered spiders 
  • copper wire (10 yds/20gauge)
  • beads (glass seed bead mix “Scream”)
  • assorted ribbons matching beads (I used Halloween polka dot & spider ribbon)
  • wire cutters
  • needle nose pliers

supplies.png

Instructions: (see pictures below)

  1. Cut 4 pieces of copper wire, each approximately 12 inches long
  2. Lay the 4 lengths of wire together and pull the wires up and around your fingers to form a circle large enough for a napkin to be inserted into the opening.
  3. Twist where the wires cross at the top of the circle 1 or 2 times to secure the circle in place.
  4. Splay out the 8 wires above the now-formed wire circle.
  5. Begin threading beads, creating your own color pattern.
  6. Leave enough wire at the top exposed to bend the wire with your needle nose pliers, forming a small closed loop to secure the beads in place.
  7. After each wire is filled with beads and the wire is crimped, wrap the beaded wire around your little finger to “coil” your wire. 
  8. Remove your finger and bend each of the 8 coiled “legs” into desired shape.
  9. Using your hot glue gun, place a small amount of glue on your ribbon and begin wrapping the copper circle.
  10. Continue wrapping until the entire wire circle (the napkin ring) is covered with ribbon. 
  11. Cut the ribbon and hot glue in place, at the top of the napkin ring.  Shape and adjust beaded “legs” how you like them, then hot glue on glittery spider.

1-6.png

Just look what a glitzy napkin ring this makes … perfect for all things “outlandish” for Halloween!

orange spider

Pumpkin patch and harmless spiders …

pumpkin.png

Even just stacked in a pedestal votive cup “the eensy, weensy, spiders …” look frighteningly festive!

votive.png

“Candy-Coated Ghost Peeps” click here for instructions

purple closeup

Little Ghost “Peeps” wearing “coats of chocolate” adorned with sprinkles and non-pareil’s make charming favors to take home or tuck into Halloween bags. 

orange ghost


final.png

Click on the links below for all things “HALLOWEEN” 

Halloween DIY Treat Bags

piccollage484

… DIY “Jolly Jack-o-Lantern” Halloween Wreath

piccollage422

Have fun getting your home ready and making these Halloween napkin rings!  Before you know it, while your nodding … “nearly napping, suddenly” there will be “a tapping, as of some one gently rapping, rapping at my chamber door” … shouting “Trick or Treat! (:

scripture napkin rings.png

From my cottage to yours  ~  Trenda

Trenda


Thank you for taking some time to read my blog today!  To have all my posts delivered directly to your email address, just click FOLLOW in the post above … or click on my site:  cottagegreenonthelake.com

This week I’m joining Courtney with Feathered Nest Friday

Chloe Crabtree at Celebrate & Decorate

All the supplies I used for making these Halloween napkin rings were bought from Hobby Lobby.


The 4th of July!!! ~ by Trenda

The 4th of July … America’s biggest, grandest party of the year!  

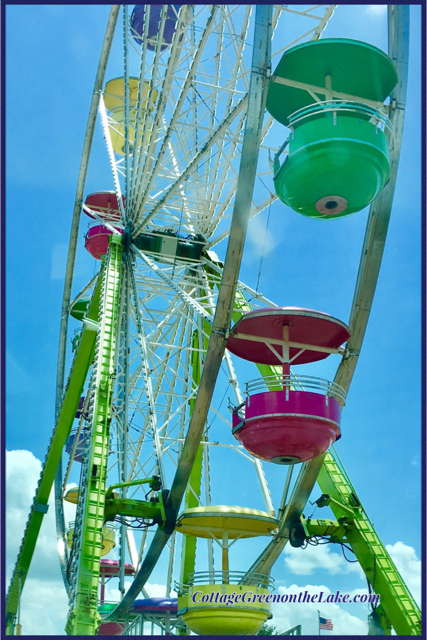
Around our town … a giant ferris wheel!

ferris wheel.png
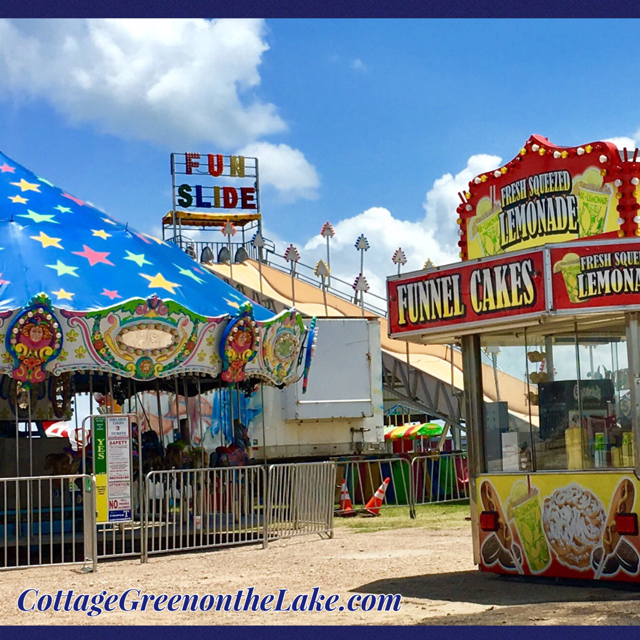
Merry-go-round, Fun Slide, Funnel Cakes, Fresh Squeezed Lemonade and Fried Oreos! (:

fun slide.png

And at Cottage Green … tablescapes, favors, treats, and decorations for our 4th of July celebration “from the dawn’s early light” … until “the twilight’s last gleaming!”

night collage.png

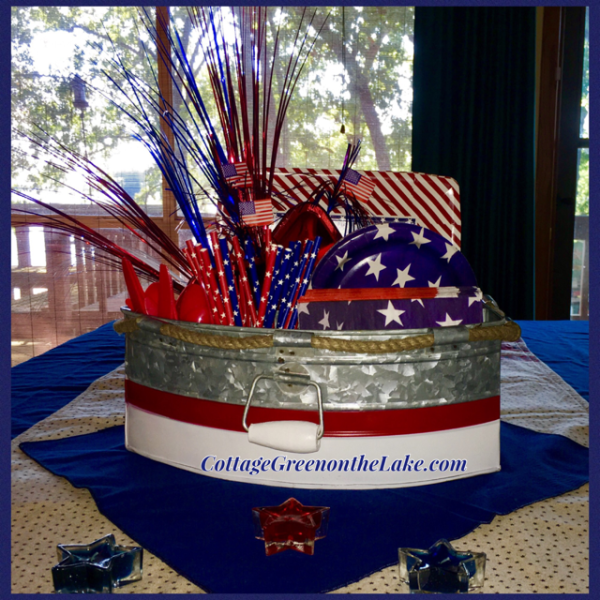
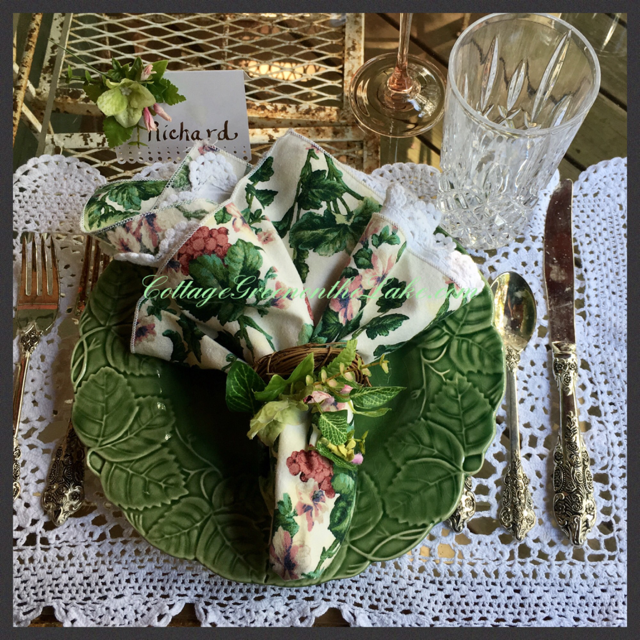
A simple tablescape apropos for July 4th on the Lake!  A metal rowboat filled with all “accouterments” needed for lakeside meals and desserts … both “stars” and “stripes” plates in assorted sizes, plastic cutlery, napkins, straws, with miniature flags and sprays of  “bling!” (:

boat tablescape background.png
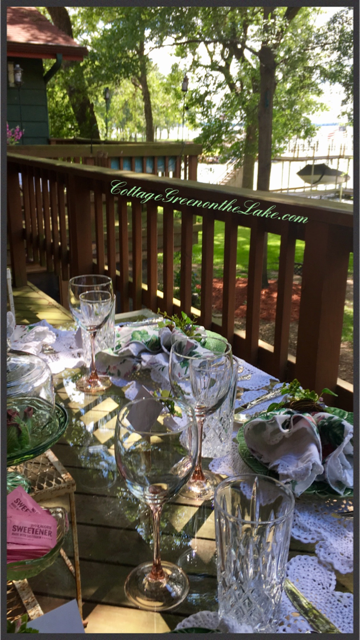
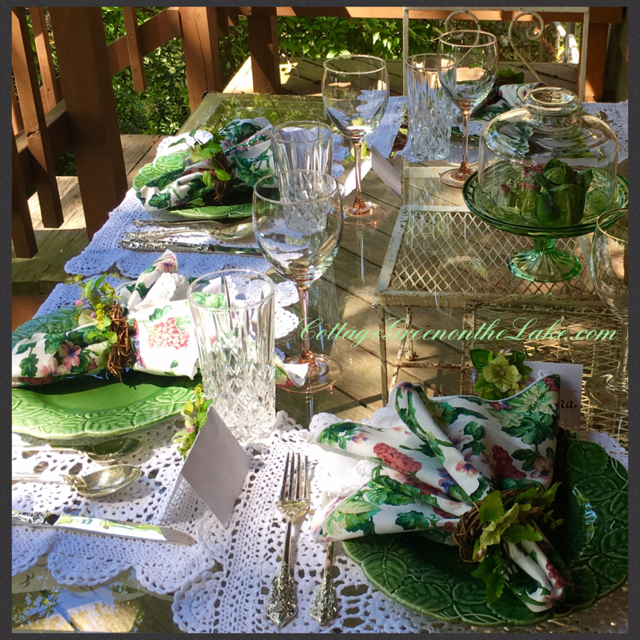
Outside, the table is covered in a quilted tablecloth and a “God Bless America” centerpiece of fireworks and stars.

final 2.pngRed, White, and Blue baskets await hamburgers, a cluster of red grapes and brownies.  Striped, paper bowls are perfect for individual portions of potato salad and make clean up, easy.  A blue wired basket holds cups, plates, cutlery, and patriotic straws.outdoor table setting.png

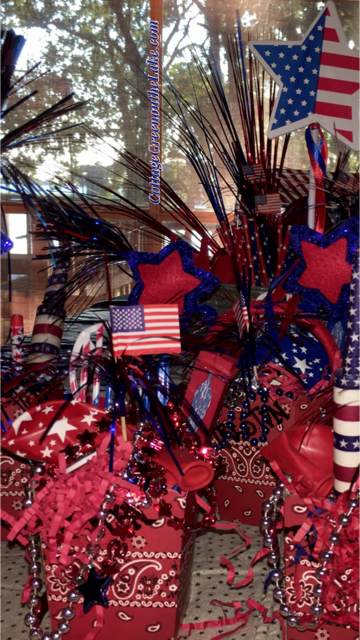
Scalloped-edged bandana boxes (I bought mine at Hobby Lobby) are filled with “fun things” for the 4th of July weekend … fans, balloons, bubbles, “USA” and star colored beads, sunglasses, pencils, flag pins, and Chinese yo-yo’s!

favors.png

… and special star headbands for the grand kids!

headbands.png

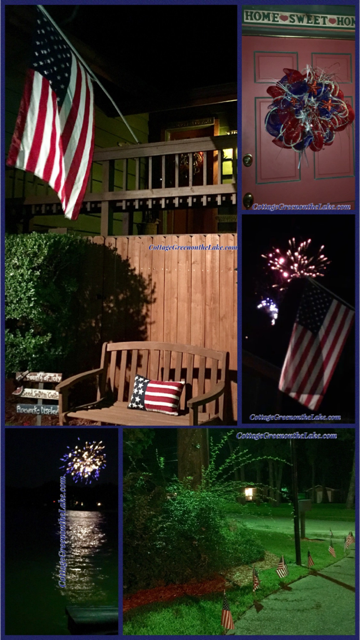
Fireworks exploding and reflecting over the lake.

fireworks.png

Hope you had a wonderful weekend and just enjoyed being FREE … free to gather in your own home or backyard with family and friends … free to pray over your hot dogs, hamburgers, watermelon, and homemade ice cream … freedom to “hoot” and holler” as you exclaim over beautiful fireworks, in the sky.

Land of the free

After looking at a display of  flags from all over the world, our 8 year old grand daughter, in her endearing and profound way, said … “Grandma, don’t you think we have the prettiest flag of ALL?”  “I certainly do!”  I quickly agreed.  Then she solemnly said … “Grandma, wouldn’t it be so sad if we ever saw another flag flying over our country,  instead of our flag?”  Oh my, my heart felt sick as I pondered her question and tried to imagine seeing another flag other than our “STARS and STRIPES forever” … being flown over our country!  With a grateful heart, I want to thank all our military and their families, throughout the ages, for the sacrifices they have made and given for our freedom so … “the prettiest flag of ALL” continues to fly over our great nation. “GOD BLESS AMERICA, LAND THAT I LOVE.” ❤

scripture and flag.png

From my cottage to yours  ~  Trenda

img_0452


I’m delighted you spent so me time reading my blog today.  To have all my posts delivered directly to your email address, just click on FOLLOW in the post above … or click on my site cottagegreenonthelake.com and follow the prompts.  
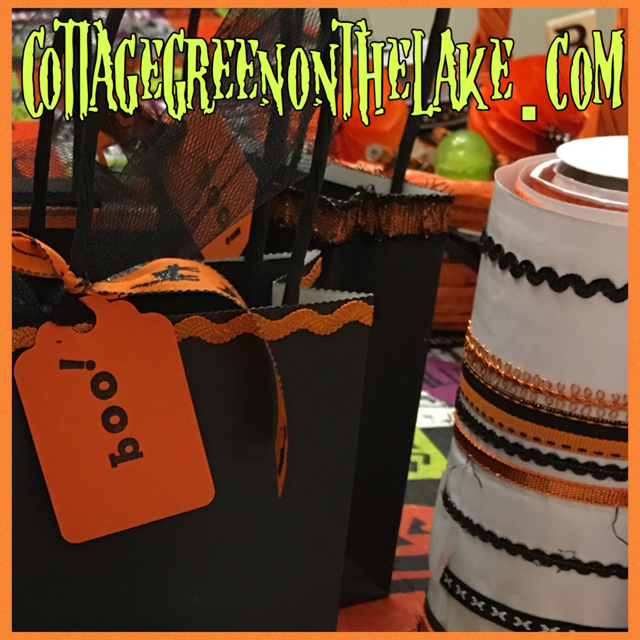


Mother’s Day Tablescape and DIY favors

~ Trenda

“All that I am or ever hope to be, I owe to my  angel mother.”  Abraham Lincoln

final longview.png

 Happy Mother’s Day!  It has been a beautiful weekend packed with time spent with all of our dear children and grandchildren … and today was a perfect day for a Mother’s Day dinner served outside on the deck!  Adding a touch of sweetness and “gracing” our table, I used the DIY place cards and DIY napkin rings (click here for instructions!) that I taught you how to make earlier this week! (:

Mother's Day collage.png

Crocheted Battenberg lace place mats match the “grid work” of the antique wrought iron chairs.  This beautiful table belonged to my grandmother … a cherished gift to me from my mother. 

Richard.png

A bright floral napkin ensconces each white napkin edged with Battenberg lace – both are slipped into DIY Spring napkin rings (click here for instructions!) and a matching DIY place card, “reserves” each seat!

Trenda.png

I was delighted when I found these charming green bowls on one of our “antique-ing excursions!”  The bowls look like little cabbages and for this tablescape, I used them to hold Sweeteners.  Carrying out the spring/garden theme and adding some whimsy,  I placed some miniature cabbage teapots under a domed pedestal plate.

lettuce bowls.png

Crystal glasses are ready to be filled with Southern iced tea and water.  The rose blush stemware is a beloved gift from a dear little boy … many Mother’s Days ago ❤  fulldeck view.png

Both tables on the deck are set … the round table holds all the “overflow” serving dishes and is used as a buffet with plenty of chairs and built-in benches to seat everyone.   A favorite Villeroy and Boch “Country French” covered dish waits for Homemade Chicken Florentine and Noodle Soup. 

round top

Ready for dinner!  Look how darling the napkin rings and place cards are!

north side.png

Now, one more DIY project to show you … I made these sweet little favor boxes to send home with each of our “guests!”  If you’ve been following my blog for any length of time, you know I love making favors or treat bags for our “get-together’s.

favors.png 
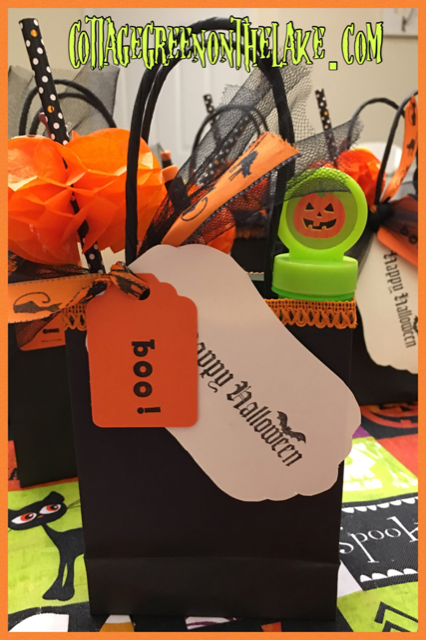
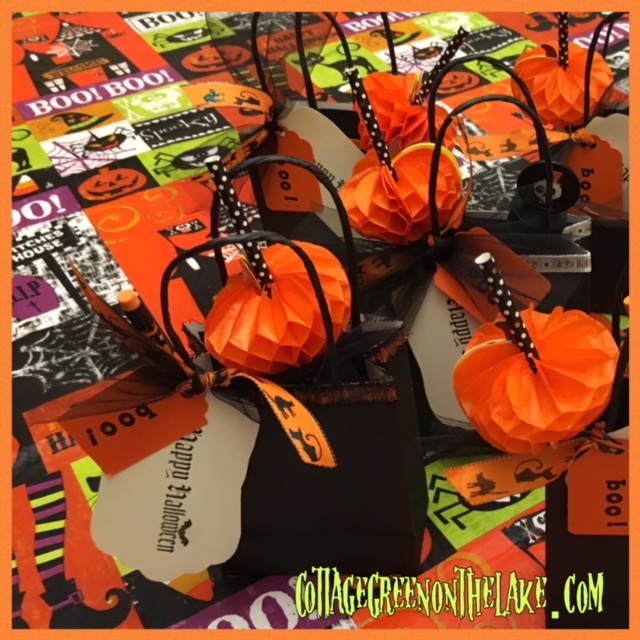
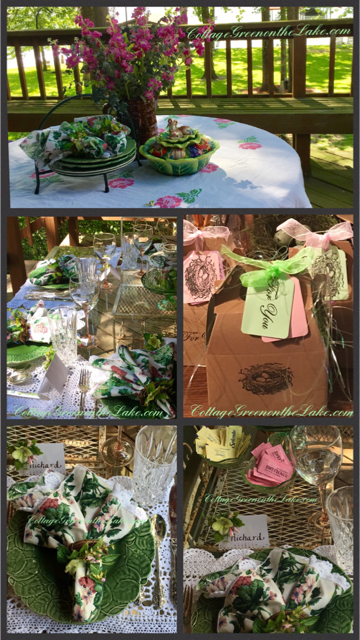
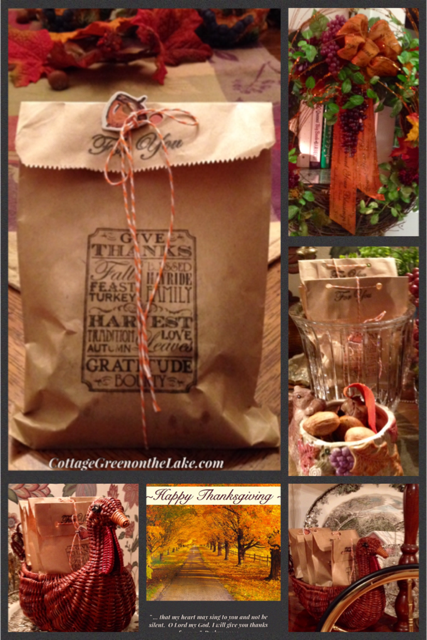
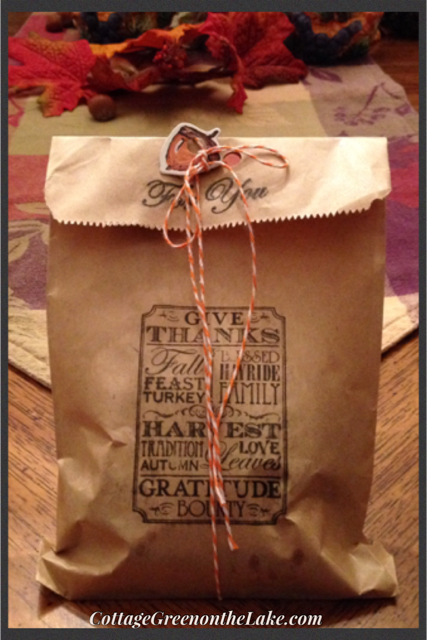
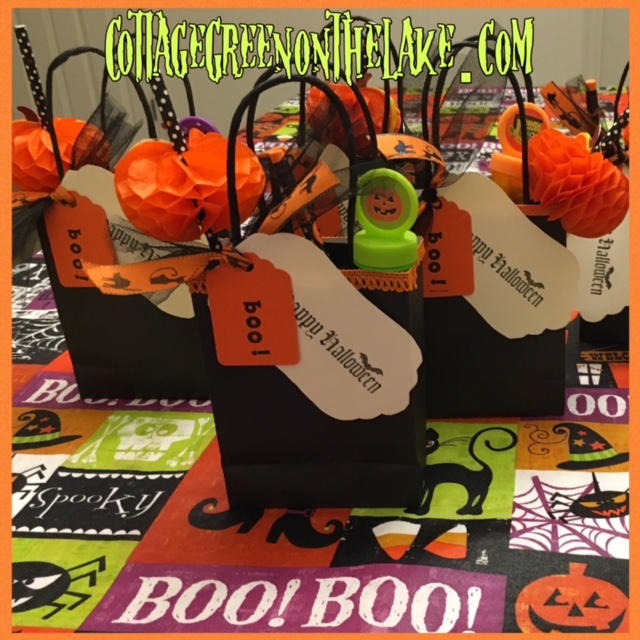
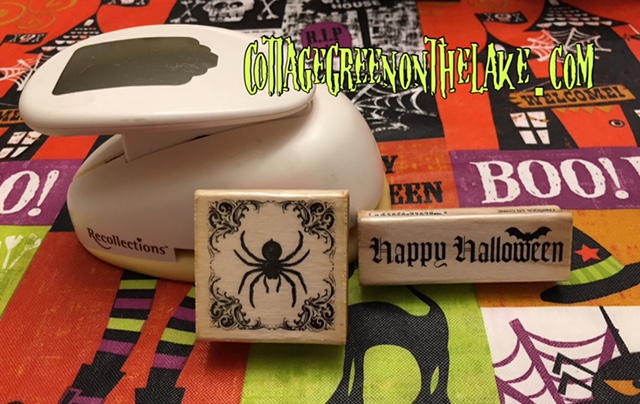
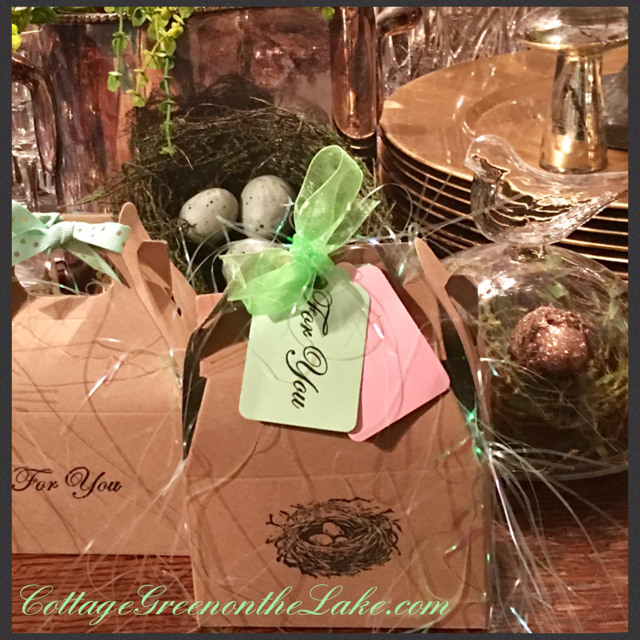
I bought a package of these little boxes at Hobby Lobby on the party aisle where the crepe paper and favor bags are.  They are called Gable boxes and they come 12 to a package for only $3.99. (Download the Hobby Lobby App to get 40 percent off  on one regular priced, that can be used each time you shop at Hobby Lobby!) Using my Recollection tag die-cutter, I punched out tags from stock card in a variety of Spring colors and stamped them with bird nests, “For You” and a filigree frame (I wrote each guest’s name inside the frame) and used my hole puncher to punch a hole in each colored tag. Then, I filled each favor box with a fine sparkly shredded grass, nestled in some individually wrapped chocolates, tied a ribbon around each box and added a “set” of tags (1 of each … a bird nest tag, a “For You” tag and a filigree frame with the guest’s name on it) and tied them on to the ribbon of each favor.

supplies.png

 “FOR YOU” … favor boxes are waiting by the front door to be given with goodbye’s and final hugs; a sweet remembrance of another special day together.

gifts

This is the second Mother’s Day my own dear mother has been in heaven; I miss her every day and continually think of her, particularly on this special day.  What a blessing it was to be her daughter!  Her love, inner strength, joy, contentment and faith in Christ continue to be an inspiration to me.  “I’ll love you forever, like you for always, Mom” ❤

” … her children arise and call her blessed; her husband also, and he praises her: ‘Many women do noble things, but you surpass them all.’  Charm is deceptive, and beauty is fleeting; but a woman who fears the Lord is to be praised.  Honor her for all that her hands have done …”  Proverbs 31:28-31

Mom.png

Sending you a bit of our lovely day!  Hope you had a wonderful Mother’s Day!

From my cottage to yours  ~  Trenda 

fish

I’m delighted you read my blog today!  Please click on FOLLOW in the post above or on my site cottagegreenonthelake.com and follow prompts to have all future posts delivered directly to your email address.


DIY Easter Bunny Treat Bags

Trenda

“Here comes Peter Cottontail, hoppin’ down the bunny trail and I am happily preparing for our little bunny’s that are coming to dye dozens of eggs and … all “us bunny’s” here at Cottage Green are anticipating our Family Easter Egg Treasure Hunt, complete with prizes and a trophy! (:  We have been out of town for the last 2 1/2 weeks so this week is going to be especially busy and “filled” with Easter preparations!

treat bags.png

These “Big-earred Bunny Bags are so cute and take just a few minutes to make!  They are reinforced paper sacks and hold lots of Easter goodies, dyed eggs, jelly beans, cupcakes, Peeps, Chicks, and sugary treats!  I bought my treat bags, pink and white gingham ribbon, tissue paper, felt hearts, pipe cleaners, and googly eyes at Michael’s.  (Tip: I used my glue gun instead of Elmer’s Glue-All to make my assembly time faster!) Plus, I also used a pair of scissors and a ruler.

Supplies needed:

supplies final.png

    To begin … adhere a pink felt heart in the center of each bag, for the bunny’s nose.  Position and glue 2 googly eyes above each nose.  Then, pull out two strands of shredded color paper.  Fold both shredded tissue strands in half to make 4 whiskers for each side of the bunny’s nose.  Place the 4 whiskers on one side of the heart, where they touch the “heart nose” and glue in place.  Repeat process, and glue 4 more whiskers on the other side of the heart nose.  Trim whiskers to desired length.

whiskers.png
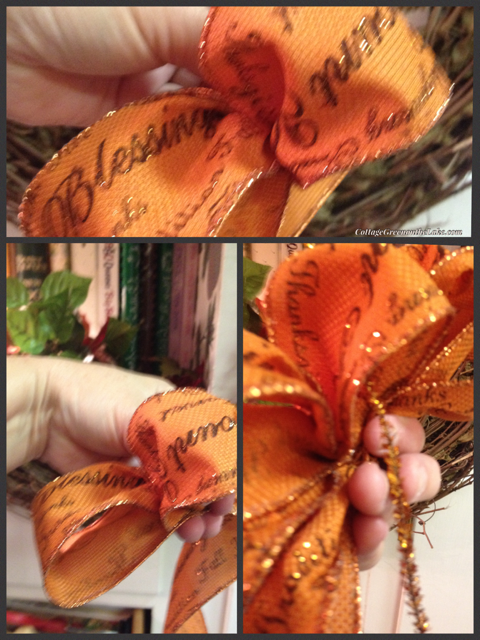
Simple Bow instructions:

  1. Measure and cut a 12″ length of ribbon.  Glue ends together to form a loop.
  2. Gather ribbon together in the middle of the circled loop.
  3. Hold tightly with fingers and secure with a pipe cleaner and twist.
  4. Trim the two ends of the pipe cleaner near the “twist” with scissors or wire cutters for a neat presentation.
  5. Cut another length of ribbon, approximately 2″ in length.
  6. Fold ribbon in thirds, lengthwise and glue edges together.  
  7. Wrap this short length of ribbon around the pipe cleaner.  Glue it on the underneath side of your bow, making sure it covers all of the pipe cleaner. 
  8. Glue bow to the top of your Bunny Treat Bag. (Since I have both little boy and little girl “bunny’s” … I made some of my Bunny Treat Bags without hair bows!)


instructions.png
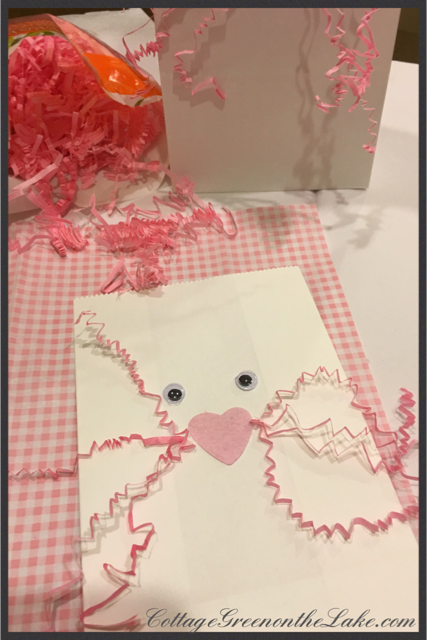
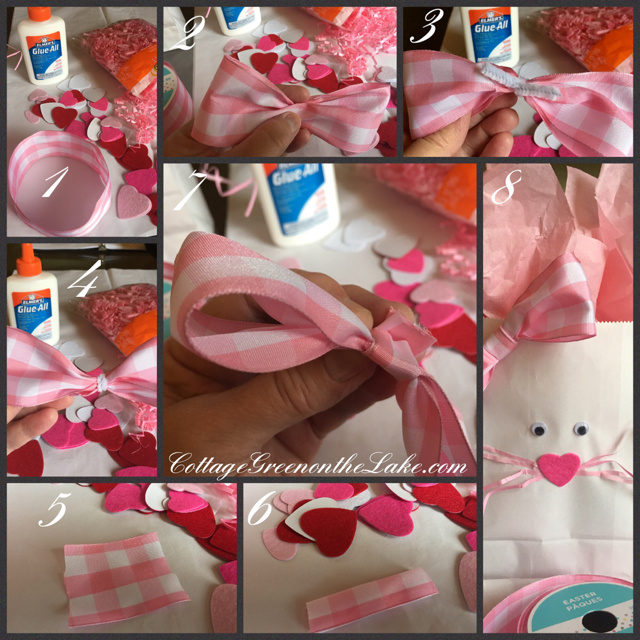
To complete my Bunny Treat Bags I “stuffed” each bag with bunny ears made from gift wrap tissue paper.  I  cut one sheet of white tissue paper in half and formed a “bunny ear” by grasping the 1/2 sheet of tissue paper in the center.  Then, while holding the center portion of the paper in one hand, I ran my other hand up over the tissue, while grasping it lightly to make loose folds.  Then, I stuffed my “ear” into the treat bag so that the pointy ends of the tissue were sticking out to resemble a long ear.  I repeated the entire process for the 2nd bunny ear, using the other 1/2 of the tissue paper.  To form the pink “interior ears” I  used my pink or my gingham gift tissue.  Again, I cut each piece of gift tissue in half, “fluffed” my tissue and inserted into the bag, in front of the white outer ears.  Use your imagination, they do look like Easter bunny ears!(;

gift bag.png 
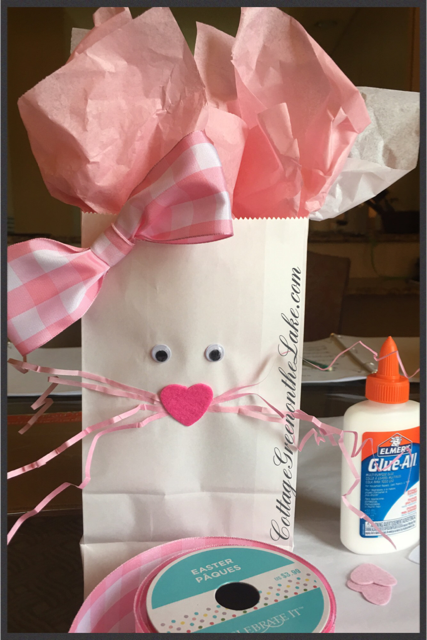
Last touch … I “stuck” one more felt heart on the back of my Bunny Treat Bag (I used the same color heart as I used for the bunny’s nose) and placed it near the bottom of the treat bag. Then I glued a little pom pom on the heart to make a fuzzy little bunny tail! (:

pompom Bunny tails.png

Get ready for more fun and festive ideas coming this week ’cause … “hippity, hoppity Easter’s on it’s way!” (;

Today was another glorious Sunday at our church with Richard and I having the added joy of singing with our choir and presenting our Easter cantata Hope Alive In Me by Travis Cottrell.  I love every aspect of Easter!  The bunnies, the baskets, the eggs … the Cross, the Tomb, and the resurrection of Jesus … The “Hope Alive in Me!”  It’s not all about the bunny, Easter is about The Lamb.” ❤ 

scripture.png

Thank you for spending some time with me today!

From my cottage to yours  ~  Trenda

img_0452


Easy Thanksgiving favors & DIY Autumn Wreath

by Trenda

collage

Today our first dear arrivals are coming for a much anticipated Thanksgiving week of being t-o-g-e-t-h-e-r!  I still have too many things that haven’t been crossed off of my “To do” list, but I have finished some of those special projects that I love doing from my “wanna-do” list. (:

Look at these cute little favor bags!  They were so easy to put together, I made them the night before everyone arrived!  I love the way they look displayed in this dear, quirky turkey basket my husband bought for me years ago … the ones that didn’t fit, I tucked into a crystal biscuit barrel.

solitaire turkey.pngteacart.png

Each little bag is filled with a sweet mixture of tiny maple cream cookies, some maple peanut clusters, Sixlets in sparkly autumn colors I found at Cracker Barrel and some darling maple leaf-shaped chocolates that Richard found for me at World Market … all in the “flavors of autumn!”

Materials and supplies needed: treat sacks, stamps, ink pad, twine, table confetti, scissors, hole punch, and ruler

supplies

Instructions:

  1. Begin by folding over the top of each bag (I bought my treat sacks at Hobby Lobby – $2.49 for 24 count) On the folded area at the top, I stamped For You.  Then, to decorate the front of the bag I stamped another image with the words Give Thanks, Gratitude, Blessed, Hayride, Family, and Tradition on it.  (Any Thanksgiving or autumn stamp can be used to decorate your treat bag!)       
  2. Fill bag with your treats before proceeding to the next steps.
  3. Punch 2 holes in/and through the folded layer at the top of the bag, with a hole puncher.
  4. For each bag, cut off 2 1/2 feet of twine (I bought my twine at Michael’s on sale for 5o cents) and “threaded” both ends of twine through the front of my bag.  Then cross the twine in back and pull one piece of twine back over the top of the bag and the other piece of twine, wrap around the back of the bag to meet up with the twine in front.(See pictures above)
  5. From a small package of table confetti with leaves and acorns (on sale at Michael’s for $1.00) I punched a hole in the paper acorns and added the acorns to my twine before tying the two ends of twine into a bow.

closeup bag.png

biscuit barrel treats.png

DIY Autumn Wreath

Now … the instructions I promised you in my last post, on how to make the autumn wreath that I pictured hanging over our living room mirror. (click here to see)

img_0009

This is my favorite spot to make my wreaths.  It’s in our kitchen over a little cookbook cubby that has a little counter for holding all my supplies and materials needed to make my wreath.  There’s also an outlet for my glue gun and the knob of the upper cabinet is the perfect height for hanging my wreath, while I work on it.  The first thing I do is to wrap a pipe cleaner through the back of my wreath, forming a loop to hang it from.  This pipe cleaner loop is also the hanger I’ll use to display my finished wreath.

img_0001

Making the bow …

  1.  The first step in making a bow is to pull out the ribbon needed for the “tail” of your bow.  I always “allow” a little extra ribbon since I can trim the length of my “tails” when the bow is completed and it is much easier than having to re-make my bow!  This is not a part of the bow you will be looping and twisting.
  2.  Begin working beyond the ribbon you have extended for the “tail.”  Grasp the length of ribbon (not at the end!) and loop the ribbon over your thumb and grasp the base of the small loop in your fingers.  This will be the center of your bow (the extra ribbon for tail will extend beyond this small center loop)
  3. Make your first bow loop.  This will determine how big your bow is. The larger the loop, the larger the bow.  Gather the ribbon together at the end of the loop and hold tightly in your fingers.
    Make sure your ribbon is facing right side up if you are using a single sided ribbon like mine, with printing facing up.  I slip a pipe cleaner into my center loop at this time.  It will balance there, resting on the twisted folds of ribbon, while you continue forming the bow.   bows.png
  4. Make your second loop on the opposite side, remembering to gather and twist the ribbon together in the middle where the imprinted side is facing up.
  5. Continue making loops, alternating sides until your bow is the size you want.  Make sure you have the same amount of loops on each side.
  6. When the bow is the size you want, allow extra ribbon length for your second “tail” before you cut the ribbon.  Twist the pipe cleaner in the center of your bow tightly (I use a pair of needle-nose pliers) several times to insure that it will hold your twisted ribbon; cut off excess pipe cleaner and push down the cut ends of pipe cleaner, so they won’t scratch you.
  7. Pull loops of bow to “fluff” to desired shape.

Hot glue your bow to your wreath.img_0006

I hot glued green leaves on first, as the “base” of my  wreath, making sure I kept both sides of my wreath balanced and “equal.”

greenleaves.png

Next, I glued on my colored autumn leaves.

autumn leaves.png

Last step … I tucked in a few chrysanthemums and some grape clusters, then added my “filler.”  “Filler” is usually diminutive, compared to the rest of the arrangement, and is added to blend and unify the look of the whole wreath.  On this wreath, my “filler” is glittered orange stems and a variegated ivy.

filler.png

I hope while crossing off  all your “have-to’s” … you get to enjoy some time decorating and creating some fun special “projects” while you are getting everything ready for the ones you love!

scripture.png

From my cottage to yours  ~  Trenda

Thank you so much for spending some time with me today!  I’d love to hear from you.  Please leave any questions or comments below.

“No Tricks just Treats”… by Trenda

It’s almost here … the most “spook-tacular”  evening of the year!  The days in October have slowly “peeled off the calendar” until finally, to the children’s delight, the “countdown” and last preparations for this very special night of costumes, late-night curfews, lots of candy, and fun are winding down.

PicCollage.png

It’s Halloween Night!

Unfurl the tablecloth, set out the plates,

put out the punch bowl, if tarnished, that’s great!

Pumpkins by moonlight, a cauldron of sweets!

There’s Reese’s, and candy corn, Kit’s Kat’s galore!

If there’s not plenty, the ghosts are forlorn!

C’mon, let’s hurry … it’s Halloween night!

Giggles and doorbells, signal the start.

Small faces peering ‘neath masks, some quite scary!

Proffer bags, shouting, “Boo … trick or treat!”    

by Trenda

PicCollage[608].png

Getting the “table set” for our traditional family chili dinner and desserts (before all the hay rides, dunking booths, bounce houses, and slides …at the Harvest Festival, held at our church.  It’s a “Happy Halloween” indeed when I get to see all our family and grandchildren! (:

PicCollage.png

Pumpkins, pumpkins, pumpkins …

PicCollage.png

I LOVE everything about these cupcake liners “Simply Baked – elegant entertaining everyday by Christy Designs, LLC.” … the playful design with scalloped edges and black stripes against the orange background; how sturdy they are compared to traditional cupcake liners, how easy it was to pour the batter in these little baking cups … and the easy clean up.  My cookie sheet was clean after baking my cupcakes!  I bought my Baking Cups (20 paper baking cups per container) at Home Goods for only $1.99!  Here they are setting on my cookie sheet, when I was filling them.  Directions on the clear plastic sleeve they are packaged in, says to fill each baking cup, 1/2 full.  Tip:  One of my favorite time savers and tricks is to use a baking funnel (I bought mine at a Kitchen Supply shop) to fill my baking cups and cupcake liners! 

PicCollage[614].png

Here are the cupcakes after baking, frosted with vanilla frosting and topped with miniature bats and ghost sprinkles. Tip 2:  When in a hurry, use your favorite tub of frosting.  Add 1 teaspoon of vanilla extract to the tub of frosting for a homemade flavor, stir well to combine.  To color white frosting, use food coloring (I use Wilton’s concentrated gel for coloring my frosting, to create the bold orange color I wanted, without thinning my icing.)

Halloween sweets … Chocolate cupcakes with vanilla frosting and “Cake Mix” Candy Corn CookiesPicCollage[612].png

Our Traditional Halloween Dinner Menu

Chili con Carne with toppings … Fritos, shredded cheese, sour cream, chopped onions, and diced jalapenos (recipe in subsequent post)

Tossed Salad with Iceberg Lettuce and Fresh Spinach, diced red onions, chopped celery, chopped red onions, sliced radishes and peperoncini

Desserts:  Chocolate Cupcakes w/vanilla buttercream frosting and “Cake Mix” Candy Corn Cookies (recipe in subsequent post)

PicCollage[618].png

” … the moon and the stars to govern the night; His love endures forever …”  Psalms 136:9

PicCollage[620].png

Hope you have a safe and fun-filled day and evening with those that make your face and heart smile!

From my cottage to yours  ~  Trenda

Thank you so much for spending some time with me today!  I’d love to hear from you and I am truly delighted, reading what you have to say.  Please leave any questions you may have or comments, below.  Don’t be dismayed if you don’t see your comment “appear” right away.  Word Press checks everything I receive for SPAM and all have to be approved, before posting.

Pumpkin Spice Latte with Candied Spoons & Decorative Autumn Chocolates … by Trenda

PicCollage.png

I love “the tastes of autumn” … yummy pumpkin pies and apple crisps, spicy chili’s and homemade stews, creamy hot chocolate’s and pumpkin latte’s!   This weekend you may be raking leaves, carving pumpkins, going to a Harvest Festival, or enjoying a hayride.  Whatever you’re doing, wouldn’t you love knowing you have a delicious pumpkin-spice latte simmering in your slow cooker, to enjoy after you’re finished?

PicCollage.png

Here is the recipe for Betty Crocker’s Pumpkin-Spice Latte that is prepared in a slow cooker!

Pumpkin-Spice Latte

Ingredients:

5 cups strong brewed coffee
4 cups milk (2% or whole)
1/2 cup heavy whipping cream
1/4 cup canned pumpkin (not pumpkin pie mix)
1/3 cup sugar
1 teaspoon vanilla
1 teaspoon pumpkin pie spice

Garnish: whipped cream topping, cinnamon or pumpkin spice, cinnamon stick

Directions:
1) In slow cooker, mix all ingredients except whipped cream topping. Beat with whisk until well combined.
2) Cover and cook on High heat setting 2 hours, stirring once after 1 hour.
3) Serve in mugs, top with whipped cream, add a cinnamon stick and sprinkle whipped cream with cinnamon or pumpkin spice, if desired.

Autumn Drink Station with White Chocolate stirring spoons and decorative chocolates …

piccollage

White Chocolate Dipped Stirring Spoons for Pumpkin-Spice Latte’s …

piccollage584

I love adding little “touches” that make every occasion special and memorable.  These decadent treats will add a festive touch to any get-together!  The chocolate spoons and candied stirrer’s look charming “gathered” and waiting in a container where your latte is simmering!  They’re delicious stirred into a mug of pumpkin-spice latte or scatter the candied leaves and pumpkins on a autumn platter to nibble on!

Candied Leaves and Pumpkins …

PicCollage[577].png

Instructions to make … Chocolate-coated Stirring Spoons

Supplies and ingredients needed … plastic spoons, wax paper, Wilton Melting Candy, and assorted sprinkles.  Optional: cellophane candy bags, ribbon in your choice of colors.  Pick colored spoons in your choice of colors.  I wanted my colors to be in autumn shades, so I used orange, yellow, and lime-green plastic spoons.  Pour your Wilton Melting Candy Discs into microwaveable containers. I bought my candy at Hobby Lobby on the candy making aisle and chose white chocolate colored in the same autumn colors as my spoons … orange, yellow, and lime-green.  Follow the melting directions on the back of each bag of candy.  After the candy has melted, stir until smooth and dip the colored spoon into the candy, coating the bowl of your spoon.  Set your candy-coated spoon on wax paper with  the candy side facing up.  You can leave your candy plain, or sprinkle the chocolate with your choice of decorations or colored sugars.  After my chocolate had hardened, I slipped a cellophane favor bag (found on the candy making aisle) over each spoon and tied a ribbon around it.

PicCollage.png

To make white chocolate autumn leaves you will need a candy mold.  I bought mine at Hobby Lobby, on  sale for only $2.00!  The package I bought had 2 sheets of molds and made 16 leaves and 12 pumpkins.  Instructions for molding candy are on the back of the package. Melt your candies according to directions on the back of the bag and spoon your candy into your mold.  Note: This is not an exact process and any over-filling or spills can be trimmed away with a sharp knife, after the candy has hardened.  After you have filled your molds, tap your sheet of candy gently on the counter to help the candy settle and remove any air bubbles.  Place candy sheet in the refrigerator for 10-15 minutes.  Release hardened chocolate by inverting mold and gently tapping it on the work surface.

PicCollage[570].png

The leaves with lollipop sticks were made using another candy mold sheet. These special candy mold sheets have slots to insert your sticks in, before pouring the candy into the mold.

PicCollage.png

PicCollage[586].png

I hope you enjoy this last weekend in October and that you have as much fun as I did making these special treats!  I’m looking forward to my cup of Pumpkin-Spice Latte! (:

From my cottage to yours  ~  Trenda

Thank you so much for spending some time with me today!  I’d love to hear from you and I am truly delighted, reading what you have to say.  Please leave any questions you may have or comments, below.  Don’t be dismayed if you don’t see your comment “appear” right away.  Word Press checks everything I receive for SPAM and all have to be approved, before posting.


%d bloggers like this: