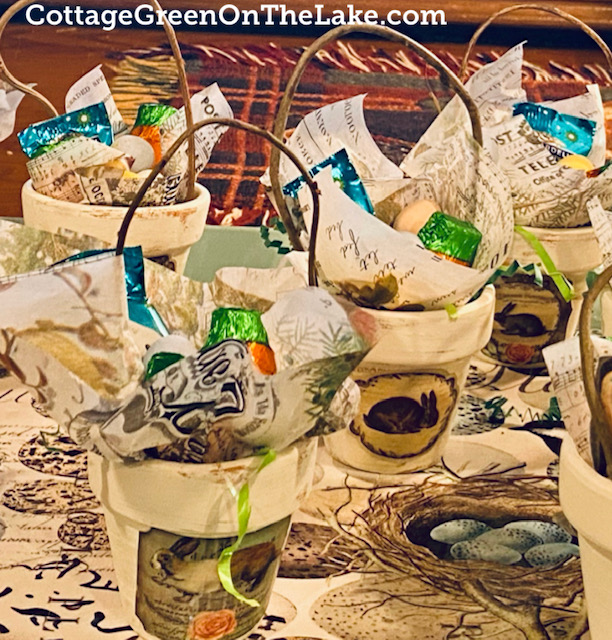
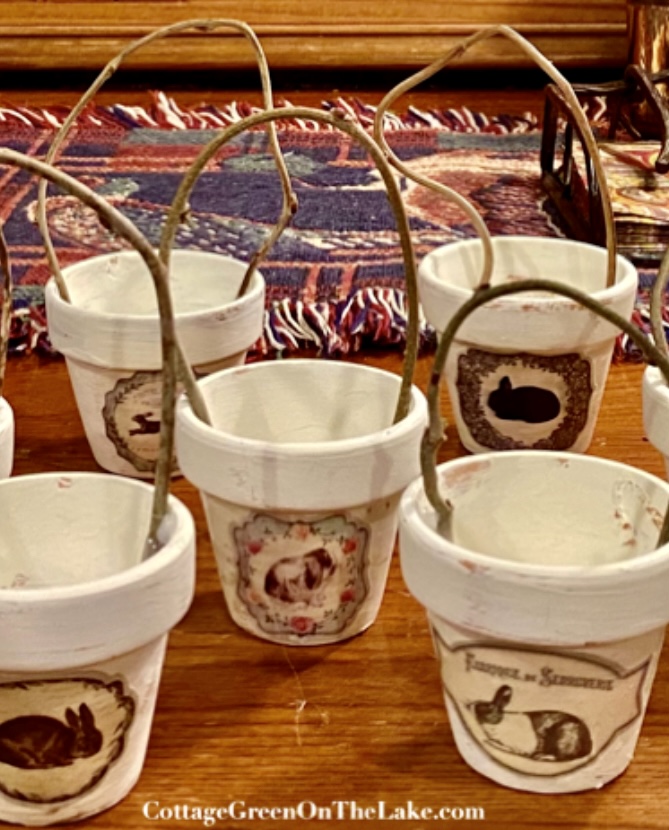
It’s hard to believe it’s time to celebrate another glorious Easter! Here’s a fun and easy DIY favor that is so whimsical and garden-esque, even Peter Rabbit would happily forgo marauding Mr. McGregor’s garden patch to come sit at your Easter table! These little flowerpots, covered in chippy white paint and decoupaged labels, have twiggy handles adorning their tops and look like rustic, little baskets! Guest’s names are written on the back and the flowerpots serve double-duty as charming “place cards” (showing every bunny where to sit) and can also be given as favors, and a sweet remembrance of the day.
Though the world decoupage sounds “fancy” and difficult to do, it is a very simple technique used to decorate objects.
Decoupage according to Meriam-Webster:

decoupage [dey-koo-pahzh; French dey-koo-pazh].

1. is the art of decorating surfaces by applying cutouts (as of paper) and then coating with usually several layers of finish (such as lacquer or varnish.)

2.  work produced by decoupage
Supplies Needed:
- small terra cotta planters (I ordered mine from Amazon, but they are available at all garden centers, and even Dollar Tree)
- Mod Podge (I used Mod Podge Matte – water base sealer, glue, & finish) *See note below if you don’t have any Mod-Podge
- white acrylic paint (I used Apple Barrel “antique parchment”)
- bristle paint brush (sponge brushes do not produce the desired texture and streaking effect)
- scissors
- glue gun
- paper to protect work surface you paint on (I used wax paper)
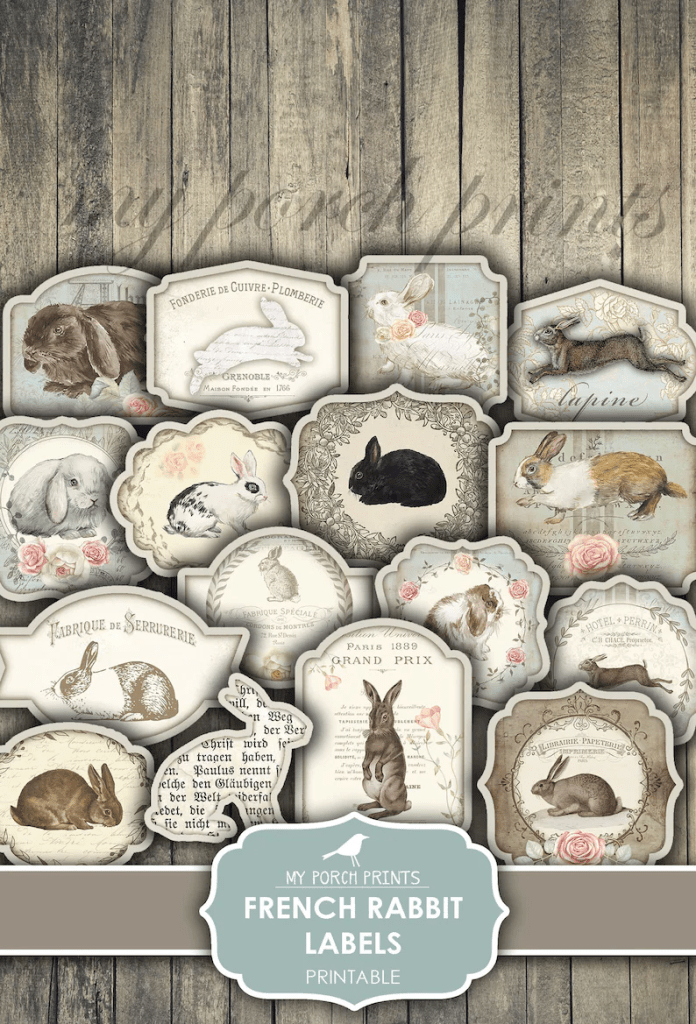
- Easter or Spring cut-outs from magazines, greeting cards, napkins, etc…. or use printables available from Pinterest or Etsy…I used My Porch Prints Printable of French Rabbit labels on Etsy (see link and note below**)
- wisteria, or any other thin, flexible branches
- flower pruners
- white copy paper and printer needed, if using printables
*TIP: if you don’t have any Mod-Podge you may use any household glue (such as Elmer’s Glue) instead. Add enough water to the glue so it is thin enough to be spread with a paintbrush. Use this thinned glue mixture to adhere your cut-outs, or labels to your planter…also use this glue mixture to add a clear sealer over the entire planter.
**To decorate your pots…cut out any spring or Easter images you have from magazines, Easter stickers, greeting cards, wrapping paper, or even paper napkins. You may also want to use any of the variety of free printables available on Pinterest. The French Rabbit labels I used were from My Porch Prints on Etsy. These French Rabbit labels were only $2.00…plus, when the file is purchased, My Porch Prints gives her permission to save it and print as many copies as you like…for as long as you like! Here is a link to My Porch Prints. When you click on the link, it’s the 2nd item listed in her shop, and it looks like this:
Directions:
- Place desired number of terra cotta containers on a work surface covered with wax paper, or other protective covering
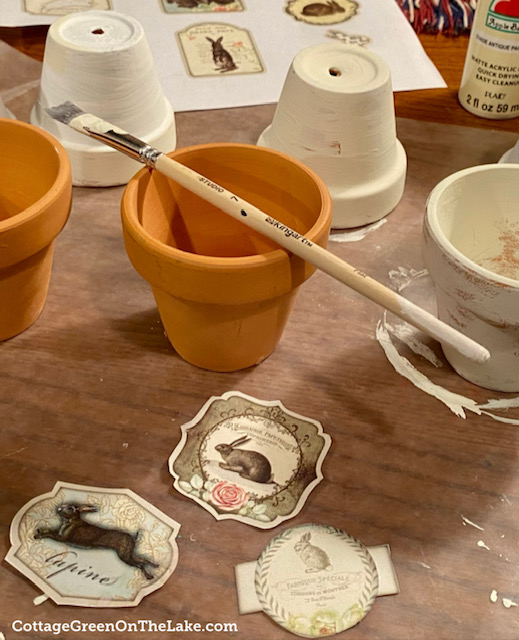
- Dip paint brush into paint, wiping away any excess paint on the brush before applying the paint to the planter. This dry brush technique of painting will keep the paint from being applied thickly, and will create the chippy, rustic look desired on the planters
- Continue painting planters using the dry brush technique– paint predominantly in the same direction, except for some random strokes “here and there” to add dimension and depth–apply paint thicker in some areas than others–and allow the terra cotta color to show through in different areas to resemble an aged pot
- Paint inside of planter
- Allow paint to dry (it dries quickly)
- Cut out the desired prints you want to use (I used the French Rabbit labels) and apply Mod Podge, or *thinned glue mixture to the back of the cut-out/label and adhere it to the planter
- Brush white paint very lightly over the adhered cut-out/label to make it “blend” into the pot
- To add a sealer to your image on the terra cotta container , use Mod Podge, or thinned glue mixture and brush it over the entire terra cotta container-allow time to dry
- Using a hot glue gun…glue one end of a thin, flexible twig to the inside of the terra cotta pot, curving the twig into an arched shape
- Glue the other end of the twig to the opposite side of the pot to form a rustic handle
- Optional: After gluing the twig handles in place…cover the glued ends of your twigs with any adhesive tape, or washi for added strength and to create a smoother finish over the glue
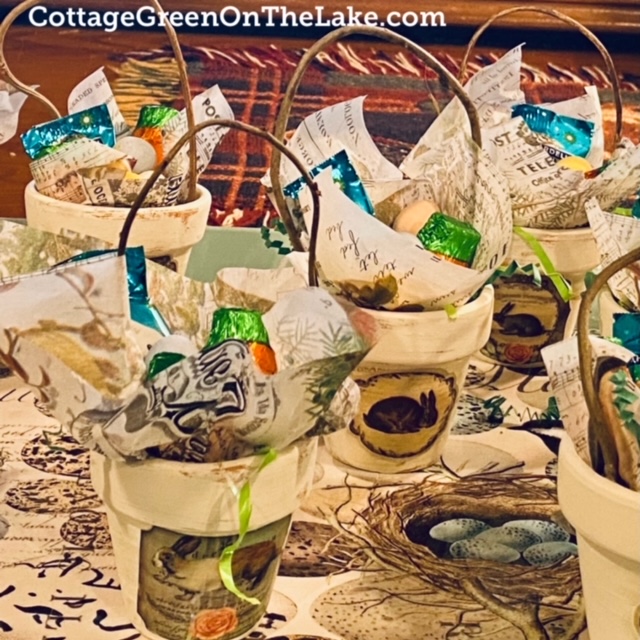
- Fill completed pots with filler, ie: tissue paper, Spanish moss, or Easter grass and fill with candies or small favors
Painting terra cotta pots.
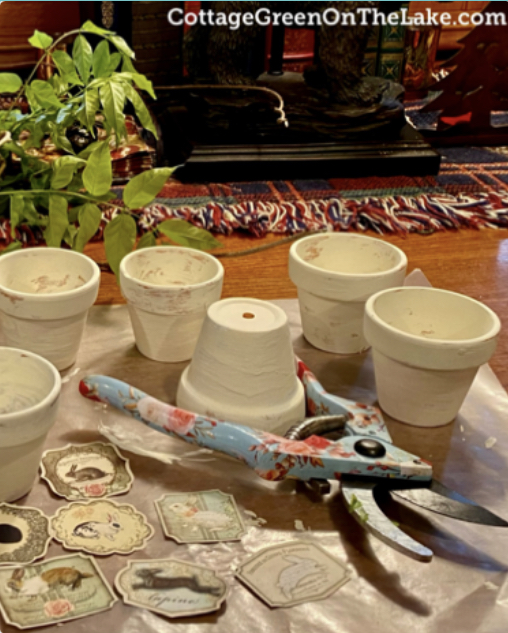
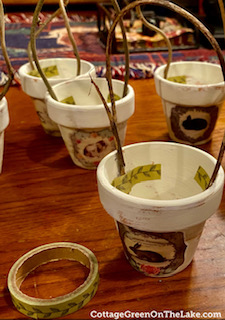
Painted pots drying, labels cut out, and garden pruners ready to cut the wisteria branches into shorter lengths, that are needed to make the basket handles.
The branches arched over the flowerpots and the white paint soften the look of the terra cotta and add a whimsical touch.
Covering the glued branch edges with washi tape for more stability and a smoother finish.
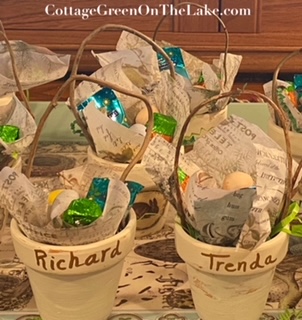
Adding names to the back of the favors with gold paint pen.
Terra cotta favor pots filled with decorative tissue paper and chocolates. These little flower pots are so versatile, they can be used for any Spring celebration…Easter, Mother’s Day, May Day, an afternoon tea, or a Peter Rabbit Tea Party. (:
Ready for Easter and perched on a stack of plates in the cupboard, this little planter would look fitting in Old Mrs. Rabbit’s shop alongside her… “rabbit-wool mittens and muffatees…her herbs, and rosemary tea, and rabbit-tobacco (which is what we call lavender.)” (;

Old Mrs. Rabbit was a widow; she earned her living by knitting rabbit-wool mitten and muffatees (I once bought a pair at a bazaar).  She also sold herbs, and rosemary tea, and rabbit-tobacco (which is what we call lavender).

~  Beatrix Potter
Hope you all have a wonderful and blessed Easter! For more Easter DIY’s, tablescapes, treat bags, and desserts…click on the links below:
This Way to the Easter Egg Hunt! Plus … DIY “Carrot Cutlery” & “Carrot” Bubble Wand
Bunny Tablescape and Easter Desserts … Carrot-patch Cupcakes & Cottontail Spice Cookies
A Tablescape and Spring Buffet Plus, Decorating Tips for your Home
But, it’s not all about the bunny…it’s about the LAMB. <3
“Blessed be the God and Father of our Lord Jesus Christ! According to his great mercy, he has caused us to be born again to a living hope through the resurrection of Jesus Christ from the dead.” 1 Peter 1:3
From my cottage to yours ~ Trenda

Would you like to have each new post I write delivered directly to your email address? Just click FOLLOW in the post above and follow the prompts.
PLUS…
Follow me on Pinterest: Trenda@cottagegreenonthelake.com
on Twitter: Trenda@4theseasons
on Instagram: cottagegreenonthelake.com

Discover more from Cottage Green on the Lake
Subscribe to get the latest posts sent to your email.

