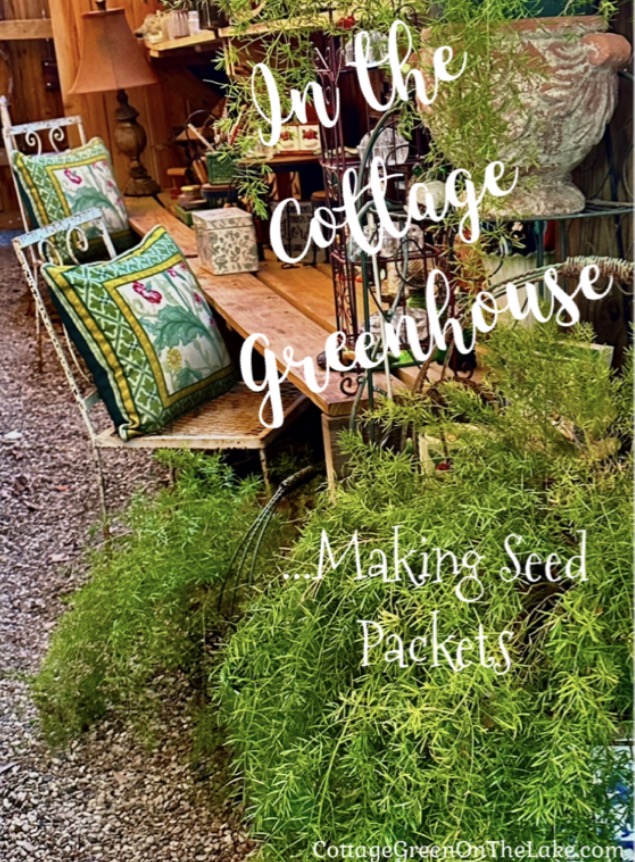
Easter Place Cards and Favors-DIY Mini Flower Pots

Ready for Easter and perched on a stack of plates in the cupboard, this little planter would look fitting in Old Mrs. Rabbit’s shop alongside her… “rabbit-wool mittens and muffatees…her herbs, and rosemary tea, and rabbit-tobacco (which is what we call lavender.)”

It’s hard to believe it’s time to celebrate another glorious Easter! Here’s a fun and easy DIY favor that is so whimsical and garden-esque, even Peter Rabbit would happily forgo marauding Mr. McGregor’s garden patch to come sit at your Easter table! These little flowerpots, covered in chippy white paint and decoupaged labels, have twiggy handles adorning their tops and look like rustic, little baskets! Guest’s names are written on the back and the flowerpots serve double-duty as charming “place cards” (showing every bunny where to sit) and can also be given as favors, and a sweet remembrance of the day.

Continue reading “Easter Place Cards and Favors-DIY Mini Flower Pots”

Easy Halloween Project…”Not so Spooky” Eensy, Weensy Spider Treat Stand

Here’s one last quick and fun Halloween project that you’ll have time to finish, before you hear the doorbell ring, signaling the arrival of your first trick or treaters!

Continue reading “Easy Halloween Project…”Not so Spooky” Eensy, Weensy Spider Treat Stand”

Getting Ready for Halloween…DIY “Not So Spooky” Halloween Wreath

It’s almost Halloween, and this week I’m getting ready for our family’s traditional chili fest…always a fun, pumpkin filled evening with lots to eat, and festive treats. Our dinner menu for this special evening is always the same…steamy bowls filled with Chili con Carne served alongside a topping bar, a large salad, and a crockpot filled with delicious Pumpkin Spice Latte. No tricks are allowed, but it’s, “all about the treats” for the grandchildren. There will be Candy Corn Sugar Cookies and Harvest Moon Pies. For the adults, there’s cheesecake covered in a caramel and toffee drizzle, and for toasting, later, there’s Ghost Peep S’mores…all treats worthy of a night reserved for goosebumps and thrills.

Continue reading “Getting Ready for Halloween…DIY “Not So Spooky” Halloween Wreath”

Making Fun S’more Favor Packs #3 of the Series “The Gang’s All Here”

It was a balmy evening, the perfect evening for the last night of the year and the festivities we had planned…a wiener roast…another Family Corn Hole Tournament with red, white, and blue ribbons with York Peppermint Patties dangling as medals to be awarded and worn around the necks of the 1st and 2nd place winners…watching the fireworks on the lake…and sitting around the fire pit popping campfire popcorn, and making s’mores.

It’s that cozy time of year, again…time for stocking caps and mittens…time for steamy cups of cocoa…and time for sitting around the fire, toasting s’mores!

Continue reading “Making Fun S’more Favor Packs #3 of the Series “The Gang’s All Here””

Mini Tackle Box Favors – #2 of the Series “The Gang’s All Here”

It was a wonderful, made in heaven, one-of-a-kind, perfect day, from the dawn’s early light to the twilight’s last gleaming.

Hail, hail, the gang's all here, 
Never mind the weather, here we are together;
Hail, hail, the gang's all here,
Sure we're glad that you're here, too!

Hello my sweet friends! So much has happened and so much time has passed since I last wrote you. Even though you didn’t know exactly what was going on, I can never thank you enough for the cards and notes you sent to me. ❤ Each time I read that you missed reading my posts…you hoped everything was all right…or that you were praying for me, meant so much to me and brightened my day. I’ll try to catch you up in this post of “what’s been going on”…then I have a darling “mock” tackle box to show you that is filled with gummy worms…Trolli frogs…Swedish Fish…and Sour Brite Crawlers. It’s a cute and whimsical favor to pass out after a summer day spent together with your family or friends.

Continue reading “Mini Tackle Box Favors – #2 of the Series “The Gang’s All Here””

DIY French Flower Pots & Fun, Easy Valentine Gifts

I’ve always wanted to grow my own herbs and have fancied having a pair of those cute little herb scissors to clip fresh rosemary to sprinkle over hot plates of spaghetti or to cut a sprig of mint to add to tall glasses of ice tea in the summer.

Some Parisienne whimsy and a sweet Valentine gift, these chic French flower pots are charming and they are so easy and fun to make. I’ve always wanted to grow my own herbs and have fancied having a pair of those cute little herb scissors to clip fresh rosemary to sprinkle over hot plates of spaghetti or to cut a sprig of mint to add to tall glasses of ice tea in the summer. So when I saw these free, printable labels from The Graphics Fairy (click here for link and full size printable PDF) it was just the motivation I needed to get busy and make some sweet little containers to start my very own ‘herboristerie’ – French n. herbalist’s shop (; I’ve already used the labels on 3 terra cotta pots I painted and the look of the aged and vintage patina with the French labels peeking through is perfecto!

French labels from The Graphics Fairy

Supplies Needed for Making French Flower Pots using Labels:

  • terra cotta planters and saucers
  • Mod Podge (I used Mod Podge Matte – water base sealer, glue, & finish)
  • white acrylic paint (I used Apple Barrel “antique parchment”)
  • bristle paint brush (sponge brushes do not produce the desired texture and streaking effect)
  • scissors
  • paper to protect work surface you paint on (I used wax paper)
  • Graphic Fairy labels (click here for full size printable PDF copies of labels)
  • copy paper
  • printer

Directions:

  1. Cover work surface with wax paper or other protective covering
  2. Dip paint brush into the paint, wiping away any excess paint on the brush before applying the paint to the planter.
  3. Continue painting planter with this dry brush technique, wiping away any excess paint on the paint brush before applying the paint to the planter – paint predominantly in the same direction, except for some random strokes “here and there” to add dimension and depth – apply paint thicker in some areas than others – and allow the terra cotta color to show through in parts to resemble an aged pot
  4. Paint inside of planter for uniformity
  5. Allow paint to dry (it dries quickly)
  6. Cut out desired French label and apply Mod Podge to the back of the label and adhere the label to the planter
  7. Paint over the label with Mod Podge to seal and allow label to dry
  8. Brush white paint lightly over label in different areas to make the label “blend” into the pot
  9. Allow label to dry

Cutting out labels and adhering with Mod Podge

As soon as the Mod Podge was dry, I took my little pots out to the Cottage Greenhouse, sat down at my potting table and began filling them with potting soil. I did have a rosemary plant to plop into my first container for future plates of spaghetti, and though I didn’t have a peppermint plant, yet (I have one ordered) I was happy I had a snapdragon loaded with buds, and 2 golden orange pansies that were waiting for my new containers.

My sweet little rosemary planted in a Specialite De Patiences French Pot with a Queen Bee on the front.

This battered, old cubby holds all kinds of fun garden paraphernalia and the rosemary planter fits right in among my collection of floral frogs and antique salt and pepper shakers. The Depression Glass green shakers are my favorites with their shabby little screw caps that are dented and worn. They all look pretty and winsome sitting about, but they are dual purposed and make great containers for tiny things. I use them in the Cottage Greenhouse to store the seeds I gather from my flowers and trees.

In the greenhouse looking glass.

My plants winter residence. (:

The other night it was supposed to get close to freezing so I went out to my greenhouse after dark, to turn the heater up. Richard put lights in the greenhouse for me, but I didn’t bother to turn them all on, and only flipped on 1 switch. The corners were shadowed and the back of the greenhouse was dark. I enjoyed seeing this new, nighttime look in the greenhouse without the sun pouring in. I felt like a kid under the sheets with a flashlight peeking around at the looming shapes, while I walked to the dark back corner of the greenhouse.

I have a clock hanging over my potting table that has 12 pictures of birds on the face of the clock. Each hour, a bird song is “trilled out” corresponding to the bird pictured for the hour. (See picture of the bird clock, 2 pictures above) Right as I was walking by my potting table, the bird of the hour, the Wood Thrush started trilling out his song and scared the wits out of me. After I got over my fright, I had to smile as the lines to Edgar Allen Poe’s poem, “The Raven” came to mind…”Once upon a midnight dreary, while I pondered, weak and weary.”

I hastily turned on another light and “Presently my soul grew stronger, hesitating then no longer” I turned the thermostat on the heater up, and after all…still thought my cottage greenhouse looked enchanting by nightfall.

I took a picture for you to see; notice the dark shadows toward the back of the greenhouse when all the lights are not on. By the way, the thermometer in there read 63 degrees and my plants looked very cozy when I turned out the lights and let myself out. (:

My shabby chic white-washed French planters that only cost me a $1.48 each! Fill them with fresh herbs and they would make delightful Valentine’s Day gifts for your friends and neighbors! To make things even easier for you, most grocery stores keep live herb plants stocked in their Produce Section. I ordered my live rosemary plant when I made out my Wal Mart grocery order and it was only $2.98 ! (P.S. I have already added the Mint and Basil live herbs to my shopping cart for my next on-line order!)

Au revoir! (:

From my cottage to yours ~ Trenda

I am delighted you read my blog today and I’d love to hear from you! Please leave any questions or comments you have in the comment section below. Don’t be dismayed if you don’t see your comment immediately after you write since all comments go through Word Press and have to be approved before posting. If you would like to read each new post I write and have it delivered directly to your email address, just click FOLLOW in my post above and follow the prompts.

Follow me on PINTEREST:

Trenda@cottagegreenonthelake.com

In the Cottage Greenhouse … DIY Plant Markers and Propagating Hydrangea

It was a delightful day for working in the cottage greenhouse.
Breezes from the north swept past the greenhouse door and I could see the lake winking at me while I worked at my garden desk.

I love hydrangeas and each spring I look forward to the gorgeous purple-blue blooms that fill our bushes. However, between the weather and furry folks, my hydrangea hedge has dwindled down to one lone bush. When I looked on-line to order more hydrangea’s, the nursery selections were limited and costly. With both those incentives, it seemed like the perfect opportunity to propagate some hydrangea cuttings from my Mophead Hydrangea … something I’ve wanted and meant to do every summer. It was a delightful day for working in the cottage greenhouse. Breezes from the north swept past the greenhouse door and I could see the lake winking at me while I worked at my garden desk.

Before beginning my propagation project I ordered a set of peat pot trays, though I could have used a pot or any other container for my cuttings, provided they had good drainage. My seedling trays came with a set of bedding plant markers. I was disappointed when I opened my package and saw the plant markers were made of plastic and were stark white. I had envisioned something a little more “earthy” and rustic for my first greenhouse project. Undaunted, I went out in the yard, gathered up some twigs, and whittled my own set of charming plant markers!

These plant markers made from twigs are just what I had envisioned, they are so rustic and winsome … AND so simple and fun to make! The only thing you’ll need for this project is twigs, a pocket knife for whittling, and a permanent marker. Are you ready? (: …. Go outside and pick up some twigs that are all about the same length and diameter, and that are reasonably straight (though some crooks and knot holes in your twigs add character!) Then sit down and begin whittling away the bark at the wider end of your stick. Carve enough bark away on your twig to expose the smooth wood underneath. You’ll only want to whittle away enough of the rough bark so you can easily write the names of the plants or seeds on your twig marker for identification. In the little red pail below, are ALL of the twig plant markers I made. I wrote Hydrangea and Morning Glory on 2 of them and I left the other markers with empty “nameplates” for future projects. Before I made these plant markers, I had never whittled anything in my life. I found the task mesmerizing and had to stop myself from carving away too much of the twig! P.S. – See the white plastic marker that came with the seedling trays that I placed next to my twig plant markers! (:

PROPAGATING HYDRANGEAS … SUPPLIES NEEDED:

  1. seedling trays or other container w/good drainage
  2. Potting Mix (I used Miracle Gro)
  3. pruners
  4. container of water
  5. rooting hormone (I used Garden Safe Rooting Hormone)
  6. Sharp stick or pencil

The best time to take “cuttings” from a hydrangea is around the first day of summer. The first day of summer is the longest day of the year in the northern hemisphere and is also known as Summer Solstice … and this year Summer Solstice is today, June 20th! Around this time is when the leaves of the hydrangea are lush and green and it’s also the fastest time for the hydrangea to begin generating roots. Starting your hydrangea cutting’s at this time allows enough time for the cuttings (also known as strikes) to develop root systems before the hydrangea’s go dormant in the fall. Look for new, tender green limbs, known as “soft wood” on your hydrangea, as opposed to the brown, rigid woody sticks known as “old growth.” Cut 3″- 5″ stems, making the cut right below a leaf node (leaf nodes are horizontal segments on the stem where the leaves grow out) and include 3 leaf nodes in the stem you cut.

Carry a cup or container of water with you as you make your cuttings and place your hydrangea cuttings in the water so they won’t become taxed or wilted.

After you have as many cuttings as you want, trim your cuttings, taking off all the leaves except for the top 2. If your leaves are very small, you can leave them whole. However, if you are propagating large leaf hydrangea varieties, cut these leaves to about 1/4 of their original size so the cutting won’t be strained trying to supply water to the large leaf. Return your cuttings to the water after cutting the leaves. Fill your seedling trays or other container with potting mix and use a pencil (I used the the sharp end of my new whittled twig plant markers!) to poke a hole into the potting mix … 1 hole for each of your cutting’s, then dampen your potting mix before inserting your hydrangea cuttings.

Dip each wet hydrangea stem into the rooting hormone and insert cutting, coated with rooting hormone into your prepared potting mix. At least one set of leaf nodes, preferably 2, need to be covered in the potting mix since the nodes and stem are where the new roots will begin growing.

Gently push the potting mix around the cutting to hold it firmly in place, and continue until all cuttings are planted, then water thoroughly until the water flows freely from the drainage hole. If you use peat pots or trays like I did, I watered my cuttings until the sides of the tray were sodden. Keep your cuttings in a bright, warm place, but out of direct sunlight, and make sure your potting mix is moist at all times.

Don’t disturb your hydrangea strikes and continue to let them grow in your container or trays, making sure they are kept moist; I watered mine once each day. In 4 weeks your hydrangea cuttings, or strikes, should have produced new roots. At this time you can transfer your hydrangea’s to a bigger container. When you feel like your new hydrangea plants have become strong enough, or they have outgrown their container, they can be planted in your yard. This method of propagation works for all varieties of hydrangeas. I planted 10 hydrangea cuttings which hopefully will grow into 10 more Mophead Hydrangea bushes for our yard. Did you know a 1 gallon plant of Endless Summer Mophead Hydrangeas cost $29.99 on Amazon?!!! Go get on your garden gloves! (:

I love puttering around in my cottage greenhouse and below I have included some pictures of some of the knick-knacks I’ve added for some greenhouse charm. This wrought iron chair under my garden desk ~ is 1 of 4 that belongs with a beautiful glass topped garden table that my grandmother always had on her covered front porch. My mother gave the cherished table set to me and Richard sweetly sanded it and gave it a new coat of white paint. Now, I keep the table inside and use it in my music/craft room. I have dear memories of my grandmother and me sitting on her porch as she worked with her plants, sitting in this very chair! ❤

An Angel Wing Begonia looks beautiful tucked in a planter until I have the time to transplant it to an antique washtub outside my Potting Shed. See the sweet antique planter with the little bear sitting on top of the log? I love to find and collect these whimsical planters when we go antiqu’ing, and I have them in all kinds of unexpected places, not only in the greenhouse!

A grapevine wrapped pencil cup holds carved colored pencils and a chunky votive burns citronella and vanilla candles when I’m in the greenhouse. Here’s another one of my antique planters … a sweet little birdhouse with a red roof and a little birdie perched by the front door.

An old handmade wheelbarrow holds a spool of jute and scissors ready for tying up plants and other garden projects.

I love this tiny little flower vase with the kissing birds and I love to tuck tiny flowers inside. The colors of the birds and the coral-orange of the impatien’s bloom match perfectly with the box of wildflower seeds.

This is the canvas I told you about in my post “Charcuterie Charm” (click here to see) that my dear friend, Patricia made from the picture I sent her of the metal table I covered with broken pieces of blue and white pottery. Patricia told me she had this canvas made for me to hang in my greenhouse. I love it (and the giver) ❤ Doesn’t it make a great backdrop for my folksy handmade windmill with adjoining planter that holds an Asparagus Fern?

This miniature bistro table belonged to our daughter when she was little. ❤ The tabletop was always set with her Beatrix Potter tea set, ready for impromptu Teddy Bear Tea Party’s. I couldn’t think of parting with it, or the memories of sweet days gone by. Now, I love seeing it on my garden desk with a nest propped on one of the bistro chairs, a little bird keeping watch from the feathery fronds of a Plumosa Asparagus Fern, and another planter topped with little frogs, and filled with carved colored pencils.

Hope you enjoyed your day … your Summer Solstice, and the beginning of summer! Look who obligingly walked right into the picture below as I was taking our beautiful sunset. A Great Blue Heron we’ve fondly named Whiskers. He comes to our backyard buffet every evening, looking for dinner!

From my cottage to yours ~ Trenda

Thank you for reading my blog. To have all my posts delivered directly to your email address, just click on FOLLOW in the post above … or click on my site: cottagegreenonthelake.com

Follow me on PINTEREST at Trenda@cottagegreenonthelake.com

.

Thanksgiving Ideas, Tablescapes, Decorating Tips, DIY Projects and Recipes plus … Autumn in the Ozarks

I’ve gathered an assortment of Thanksgiving ideas, decorating tips, recipes, tablescapes, centerpieces, and DIY projects from “Thanksgiving’s Past” at Cottage Green. For the full instructions and details about each, click on the highlighted links. I am so sorry, some of these older pictures are really “grainy” and are not very clear.

A Welcome Home for Thanksgiving has some ideas on how to “dress up” your front porch and a simple DIY project using grapevine around your front door frame.

Click on Easy Thanksgiving Centerpiece for one of my favorite ways to create a centerpiece. It assembles in minutes!

Here’s an easy appetizer to enjoy while awaiting the feast Easy Caramel Toffee Cream Cheese Dessert Dip served with apples. It’s harder to say than it is to put together! (;

Decadent ruby red Apple Cranberry Salad is the perfect mixture of cranberry tartness mixed with the sweet fillings of jello, pineapple, crispy apples and pecan pieces.

Click on autumn-napkin-rings for these charming, grapevine napkin rings. The silk autumn leaves and sprig of bittersweet brighten each table setting and they are so easy to make!

An Autumn Tablescape gives tips and how to’s for creating your own beautiful table for Thanksgiving.

Click on Easy Thanksgiving Favors to learn how to make these sweet little favors. Miniature Kraft bags are tied with colored twine and topped with a whimsical acorn and assemble in minutes.

Plus, on the same blog … learn how to make this decorative bow and this beautiful autumn wreath filled with glittered stalks of wheat, purple clusters of grapes and autumn leaves. Both the favors bags and the autumn wreath instructions are on Easy Thanksgiving Favors & DIY Autumn Wreath.

Now for a re-cap and some pictures of “all things autumn” from our recent trip to Missouri. Autumn is our favorite season to travel and we love seeing the beautiful colors of the Ozark deepen each day we’re there. Look at this blazing Maple Tree!

Chrysanthemums in rustic pails perched above squat-y pumpkins.

Fuchsia colored Coleus that almost glowed.

Short pumpkins, tall pumpkins, Cinderella’s and Baby Boo’s gathered beside more gorgeous Coleus.

Dark green, light green, orange, and white pumpkins contrast beautifully with a huge decorative pot of flowering Kale and burgundy Coleus.

Look at these amazing pumpkin displays we saw at Silver Dollar City.

Pumpkins stacked to the treetops …

And my favorite … a darling little pumpkin cottage with a fern lined roof!

This spot was so enchanting, Richard and I walked along the creek bed and the only sounds were the burbling creek and the evening crickets.

A lone Sycamore leaf drifting along in the crystal clear waters.

Look at this perfectly charming cafe … Sugar Leaf Cafe & Bakery where we had lunch one day.

… and came back for dessert on another day! (:

We loved the beauty and mystique of “Pumpkin Nights” at Silver Dollar City in Branson … with owls dangling from the treetops.

One King Owl ruling over his parliament of owls.

A camp site with glowing pumpkin flames.

And the last picture … this “Chapel in the Woods” we were thrilled to find.

Hope you enjoyed the pictures of our vacation and the Thanksgiving ideas will inspire and motivate you as you begin planning your own Thanksgiving.

From my cottage to yours ~ Trenda

Thank you for reading my blog! Click on the Follow button above to have all my posts delivered directly to your email address AND follow me on Pinterest … Trenda@CottageGreenontheLake.com

May Day Gift Cones … DIY Project

by Trenda

“Dear old world … You are very lovely, And I am glad to be alive in you.”   ~ from Anne of Green Gables

white blossoms and steeple

It’s May!  The darling month when everything seems possible.  Look at this sweet description of May Day from The Old Farmer’s Almanac established in 1792.

“With winter’s retreat, colts and calves kick up their heels and frisk over fresh grass, seedlings seek the sun, and birds call for mates….And we humans join their revels for one day: during spring’s “May Day” festival, even serious-minded folk put work aside to enjoy Nature’s exuberance!”

May1.jpg

Still quoting The Farmer’s Almanac … “Here are some joyful May Day traditions marking the return of spring and the renewed gift of life.

  1. Neighbors may leave baskets of flowers on each other’s doorsteps or doorknobs.
  2. Kids can go barefoot on May Day for the first time.
  3. People will crown a “May Queen” for the day’s festivities.
  4. Beekeepers will move bees on May 1st.
  5. Fishermen expect to catch fish on May Day.
  6. On May Day morning, if a maiden gathers dew before sunup and sprinkles her face with it, she will enjoy luck and youthful beauty for the rest of the year.
  7. Farmers often plant corn, cucumbers, and turnips on this day.
  8. Villagers may hold theatrical battles between “summer” and “winter” that banish the winter.
  9. The Kentucky Derby starts off the month of May (the first Saturday of the month).
  10. On May 1st, people in Britain welcome spring by “Bringing in the May,” or gathering cuttings of flowering trees for their homes.
  11. May 1st in Hawaii is called “Lei Day,” and people will receive prizes this day for wearing the prettiest handmade leis.”

May2

Hanging May Day baskets is an enchanting custom that is fun to incorporate into your own family traditions.  Sweet paper cones made from stock card paper with scalloped edges and ribbons are easy to make and are a delightful surprise to find. 

brother sister

  Supplies Needed:

  • stock card paper (double sided paper if you want a pattern on the inside and outside of your May Day cone)
  • scissors
  • scalloped edged scissors
  • ribbon
  • shredded paper or tissue paper
  • craft glue 
  • florist vials, if using fresh flowers
  • candy, flowers, little gifts, etc.


Instructions:

  1. Cut stock card paper into a 7-inch square (I used double-sided stock paper to have prints on both the outside and inside of my May Day gift cones
  2. Use decorative scissors to cut scallops around the top edge of the square
  3. Place pencil tip at the bottom of the paper and begin rolling paper around pencil tip to form cone
  4. Secure outer flap of cone with glue 
  5. Punch holes along scalloped edge approximately 1″ apart, beginning at the top front center
  6. Thread a 22″ – 24″ length of 1/2″ ribbon through the holes
  7. Tie ribbon into bow in the front … leaving a 6″ loop at the back of the cone for hanging
  8. If using fresh flowers, use florist vials and fill with water and flower stems  to tuck into the cone, or fill with shredded paper or tissue paper and fill cone with silk flowers,candy, little gifts, etc.

instructions

What a lovely surprise to find hanging on your door … a May Day gift cone filled with silk flowers, a package of “Ferrero Rocher, fine hazlenut chocolates” and Unicorn Sparkle Nail Polish. (:

May Day Basket 2

 This sweet little May Day cone is filled with silk flowers, a tube of lipstick, and a small bottle of perfume.

May Day basket 1

Hope your May Day is filled with lots of sunshine and happy surprises!

From my cottage to yours May Day

From my cottage to yours ~ Trenda

dogwood scripture

Thank you for reading my blog!  To have all my posts delivered to your email address, just click FOLLOW in my post above … or click on my site:  cottagegreenonthelake.com

FOLLOW ME on PINTEREST!

Trenda@cottagegreenonthelake.com

cropped-cropped-img_0452-e1510254818805.png

This week I’m joining:

 Chloe Crabtree with Celebrate & Decorate


Spring Celebrations … DIY tips for making centerpieces

by Trenda 

With the coming of Spring there are a lots of opportunities for celebrations.  Whether you host a Spring Luncheon, a Tea Party, a Cinco de Mayo Fiesta, a Kentucky Derby Party, a Mother’s Day Brunch, a Graduation dinner, or wedding buffet (whew!) one of the first things you’ll need is a centerpiece to “anchor” your tablescape.  Putting together a centerpiece can be daunting task.  Recently, I was asked to make the floral arrangements and decorations needed for a Mother/Daughter Tea for the Women’s Ministry at our church.  Today I am going to share some of the tips I used when I made the 25 centerpieces needed for the Tea … tips that helped make this job easy and fun!

MotherDaughter Tea.jpg

1.  The first thing that you need to decide in making your centerpiece is what color and type of flowers you are going to use.  Unless your arrangement is all roses, the general rule of thumb in flower arranging is to use at least 3 different sizes of flowers for visual interest.  Do you want your centerpiece to be elegant, rustic, casual, playful, spring-y, lush, or whimsical?  These questions will help you decide what type of container to place your flowers in.  The theme we wanted to portray for our Mother/Daughter Tea was a combination of three themes: a springtime/rustic/casual elegance theme.  Springtime flowers were chosen … daisy’s, daffodils, tulips, narcissus, and wisteria (none too fussy!) in a profusion of spring colors!

2

2.  Mason jars dispel any hint of stuffiness and had dainty embossed filigree on the fronts and added just the right touch of casual elegance.  Then, to add texture and a hint of rustic flair, I hot-glued a strip of burlap ribbon edged with lace around each Mason jar.

3

3Whenever you work with flowers that are a part of a bouquet, cut each stem from the bunch and trim off all the leaves to make them easier to arrange.  To determine the length I wanted my flowers in the centerpiece to be, I gathered the stems of my largest sized flowers (the Daisy’s) and bent the heads of the flowers so they looked natural.  Then I cut the stems so my flowers would stand upright in the Mason jar, with the blooms gently draping over the rim.

5

4.  The Mason jars I used will be used again for other events.  For ease in changing out arrangements, I wrapped clear packing tape near the flower heads (so the tape wouldn’t be seen) to keep each arrangement together and so they can be easily removed.

4

5.  The smaller flowers … the tulips, narcissus, and daffodils had much smaller stems and were easy to tuck into the arrangement of larger flowers already taped together.  These smaller flowers extended beyond the tops of the daisy’s so they would “peek” over the top of the arrangement, adding dimension and interest to the bouquet.

6

6.  The last thing to add to any centerpiece is the “filler.”  The filler ties the whole arrangement together.  Like the name suggests, filler “fills” in the gaps of the arrangement and  “softens” the look of all the separate flowers and unites and blends them into one arrangement.  The filler can be … small flowers … baby’s breath … grasses … decorative filament … eucalyptus … seed pods … or any variety of decorative picks.

7

The filler I used for these centerpieces were tiny flowers and buds with leaves.

8

Look at all these sweet little arrangements … jars of Spring ready to be placed on the table!  Wouldn’t they look charming dangling from a shepherd’s hook lining the walkway to a woodland wedding or filled with sunflowers along the way to a bbq and barn dance?  Hmmm … perhaps another DIY on a future post! 🙂

burlap trim

Wishing you “beaucoups of bouquets” and many happy Spring celebrations! (:

From my cottage to yours ~ Trenda 

scripture Solomon flowers

Thank you for reading my blog!  To have all my posts delivered to your email address, just click FOLLOW in my post above … or click on my site:  cottagegreenonthelake.com

FOLLOW ME on PINTEREST!

Trenda@cottagegreenonthelake.com

cropped-img_0452-e1510254818805.png

This week I’m joining:

Marie-Helene from Kingsbury Brook Farm

Chloe Crabtree from Celebrate & Decorate

%d bloggers like this: