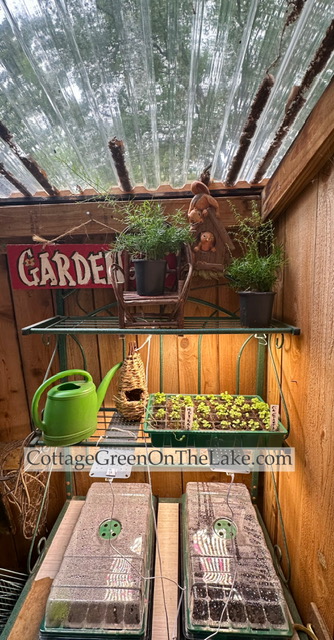
The seeds I planted in April are almost ready to be planted in their new homes outside! The little seeds have spent a cozy Spring on warm heat mats and cosseted under cozy moisture domes. Now the last step I need to do is to thin out the seedlings and harden off the plants before they’re transplanted outside.
Continue reading “Spring Gardening in the Cottage Greenhouse: How to Prepare Seedlings for Outdoors”Tag: lake living

DIY Homemade Seed Packets: A Fun Gardening Project
“What a playhouse is to a child, a potting shed is to a gardener”
~ Unknown
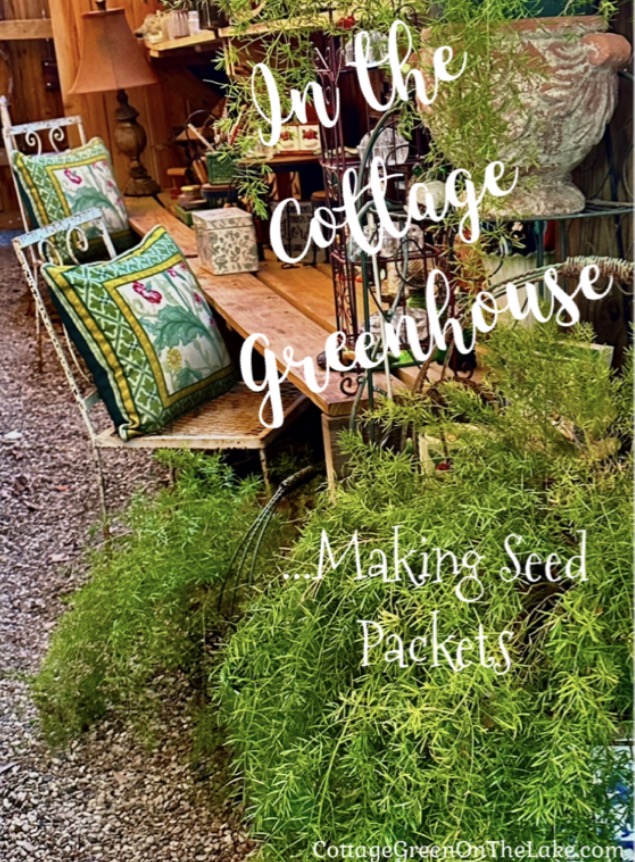
After days of colder-than-normal temperatures, the sunshine beckoned and it seemed like a good day to “go outside and play”…in the greenhouse. It was still chilly outside, but the temperature in the Cottage Greenhouse was 72 degrees…and a perfect day for dreaming of Spring flowers.
Continue reading “DIY Homemade Seed Packets: A Fun Gardening Project”One must maintain a little bit of summer, even in the middle of winter.” ~ Henry David Thoreau
Share this:

Thanksgiving Tablescape…Tips for Styling & Setting a Stunning Tablescape
“Let gratitude be the pillow upon which you kneel to say your nightly prayer.” Maya Angelou
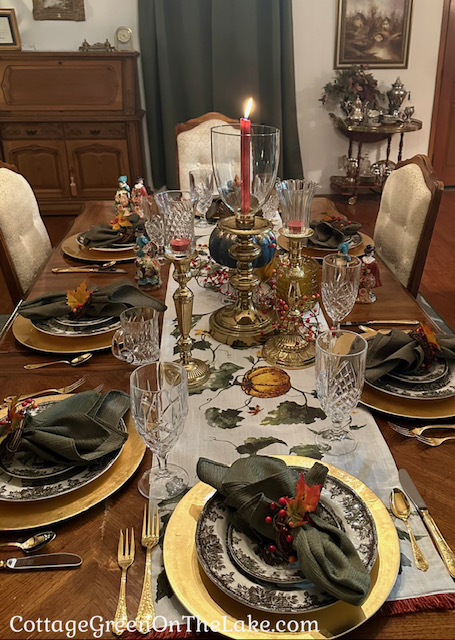
Yesterday was a very special day in The United States of America…a holiday aptly named “Thanksgiving.” Thanksgiving is celebrated every year in America on the fourth Thursday in November. It’s the day we set aside to thank the Lord for all He has blessed us with and brought us through in the past year…a grand day celebrated with feasting, family, and friends!
Today, I’m going to show you how I decorated our Thanksgiving table and give you some tips that will help you style your own table beautifully for any occasion.
Continue reading “Thanksgiving Tablescape…Tips for Styling & Setting a Stunning Tablescape”Share this:

How to Make Succulent Arrangements…Summer Project in the Greenhouse

During these hot, summer months this garden project allows you to “get your hands in the dirt” without much exertion…and even if you don’t feel like you “have a green thumb” you’ll find making these succulent arrangements, easy and rewarding.
Continue reading “How to Make Succulent Arrangements…Summer Project in the Greenhouse”There’s something satisfying about getting your hands in the soil.”
~ E. A. Bucchianeri
Share this:

Setting a Cozy Winter Tablescape and Decorating the Mantle
Our kitchen nook glowed invitingly, with winter weather just a windowpane away…

Setting a cozy winter tablescape and decorating a mantle that brims with rustic charm and elegance is easy using a cozy plaid, a fir swag, and a variety of different sized candlesticks, silver pieces, and crystal.
Continue reading “Setting a Cozy Winter Tablescape and Decorating the Mantle”Share this:

Creating an Outdoor Centerpiece for Thanksgiving
Today was another beautiful November day and the perfect day for assembling a centerpiece for our outside table. The centerpiece splays across the table and is made up of “twig-ery and poke-ery” and other autumn finery, and candlelight twinkles over the tabletop. An outside dining area easily becomes an extension of your living area and an enchanting way to beckon company outside.
Continue reading “Creating an Outdoor Centerpiece for Thanksgiving”Share this:

Sitting on the Dock of the Bay…Dockside Tablescape and Picnic
The lake looked so cool and inviting; the waters kept “waving” at us, beckoning us to come out and enjoy… “Sittin’ on the dock of the bay.”

If you are like me, as soon as you read the title of this post, you began whistling Otis Redding’s famous song, “(Sittin’ On) The Dock of the Bay.” Friday was a beautiful, hot summer day and our daughter and granddaughter were over visiting. The lake looked so cool and inviting; the waters kept “waving” at us, beckoning us to come out and enjoy…”Sittin’ on the dock of the bay.”
Continue reading “Sitting on the Dock of the Bay…Dockside Tablescape and Picnic”Share this:

Cottage Green on the Lake…Summer Re-Cap 2023
..this was wild and beautiful, unlike the beaches of Florida we were accustomed to seeing. We drove down lanes covered with sand, past groves of orange trees in sunny fields, then our pathway would wind back under the shade of trees covered with moss. I was amazed to see beautiful palmetto palms and ferns growing wild everywhere I looked. The writer within me loved the mystic appeal and charm of it all.
Our summer days are always so busy, I never seem to get a chance to write on my blog until the new school year has begun. Today, before I can embrace September and begin writing about all things autumn, I’m writing about our summer. Wanderlust and floating on the lake days…watermelon and homemade ice cream days…lots of red, white, and blue days…hammock and firework days…sandy toes and sunburned nose days. Summer days that were forged in a blaze of heat that faded into sultry evenings and the beautiful blue of twilight would descend upon the lake and the fireflies would flick on, one by one.

Continue reading “Cottage Green on the Lake…Summer Re-Cap 2023”Ah, but after sundown, that’s when those brilliant flirts, the fireflies come out.
Vivian Swift
Share this:

Getting Ready for Halloween…DIY “Not So Spooky” Halloween Wreath

It’s almost Halloween, and this week I’m getting ready for our family’s traditional chili fest…always a fun, pumpkin filled evening with lots to eat, and festive treats. Our dinner menu for this special evening is always the same…steamy bowls filled with Chili con Carne served alongside a topping bar, a large salad, and a crockpot filled with delicious Pumpkin Spice Latte. No tricks are allowed, but it’s, “all about the treats” for the grandchildren. There will be Candy Corn Sugar Cookies and Harvest Moon Pies. For the adults, there’s cheesecake covered in a caramel and toffee drizzle, and for toasting, later, there’s Ghost Peep S’mores…all treats worthy of a night reserved for goosebumps and thrills.
Continue reading “Getting Ready for Halloween…DIY “Not So Spooky” Halloween Wreath”Share this:

DIY Woodland Swag and Autumn Tablescape

~ by Trenda
It’s that cozy, all things pumpkin, sweater weather, cider sipping time of year…and time to decorate Cottage Green for autumn. Seeing the shadows of autumn sunshine coming through our shutters, while smelling the apple cider fragrance in our diffuser, I was inspired to make a woodland swag. A swag that looked like it was made with treasures found during a walk in an autumn forest…some bittersweet, wild blossoms, red, golden, and orange leaves, pinecones, wild grapes, and hawthorn berries, all weaved into a fir garland and mixed with discarded pheasant feathers and antlers shed from the deer in autumn.
Continue reading “DIY Woodland Swag and Autumn Tablescape”Where the heart is the mind works best.
Louisa May Alcott

