
It’s almost Halloween, and this week I’m getting ready for our family’s traditional chili fest…always a fun, pumpkin filled evening with lots to eat, and festive treats. Our dinner menu for this special evening is always the same…steamy bowls filled with Chili con Carne served alongside a topping bar, a large salad, and a crockpot filled with delicious Pumpkin Spice Latte. No tricks are allowed, but it’s, “all about the treats” for the grandchildren. There will be Candy Corn Sugar Cookies and Harvest Moon Pies. For the adults, there’s cheesecake covered in a caramel and toffee drizzle, and for toasting, later, there’s Ghost Peep S’mores…all treats worthy of a night reserved for goosebumps and thrills.
Continue reading “Getting Ready for Halloween…DIY “Not So Spooky” Halloween Wreath”Tag: treats

Summertime at the Lake and Easy Rice Krispie Favors
Family vacation…swimming and lazy afternoons on the dock…watermelon and water guns…cookouts and ice cream…July 4th and fireworks…corn hole and fishing…it’s summertime at the lake!

Share this:

Halloween DIY Napkin Rings …………. by Trenda

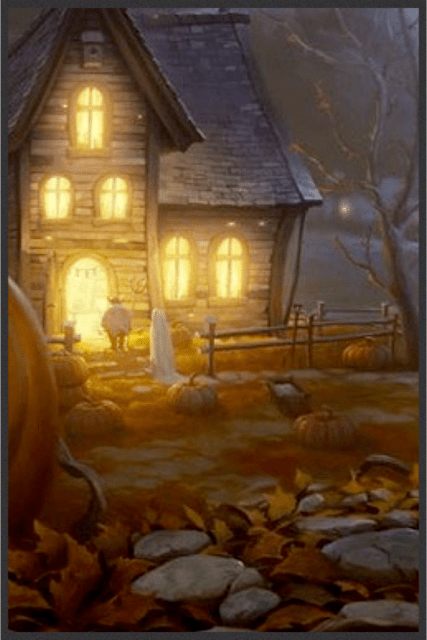
Look who suddenly appeared, looking like he flew straight from the pages of Edgar Allan Poe’s poem and obligingly perched, right next to me. While I slowly reached for my phone, my mind began the recitation of these remembered words … “Once upon a midnight dreary, when I pondered, weak and weary …” .
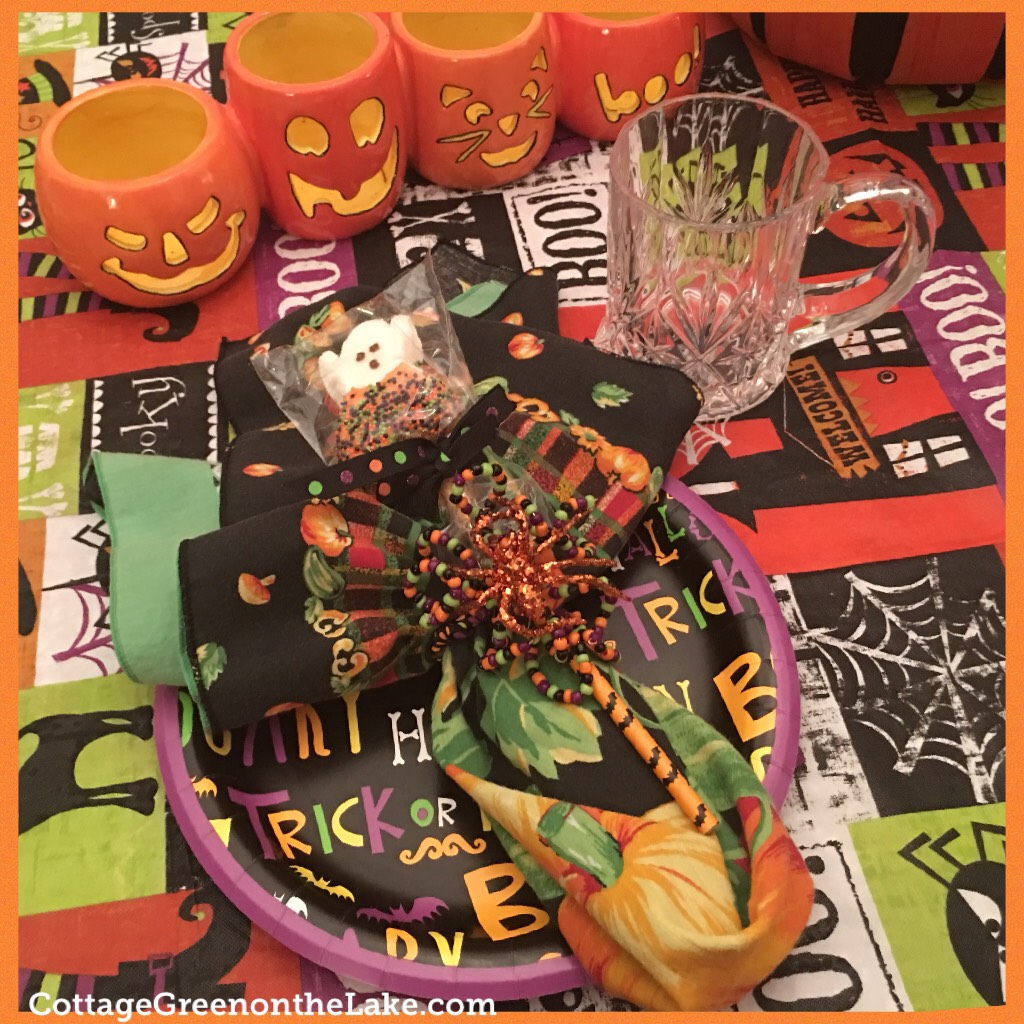
I love decorating the table for any occasion and for HALLOWEEN … I use all kinds of “fol-der-ol and fid-dle-dy dee” to set the mood for a magical night that’s filled with possibilities and imagination! During these next 3 weeks, I have several fun projects that I am going to be sharing with you that will help you create your own “boo-tiful” Halloween tablescape! Today, I am going to show you how to make these spook-taular Halloween napkin rings!

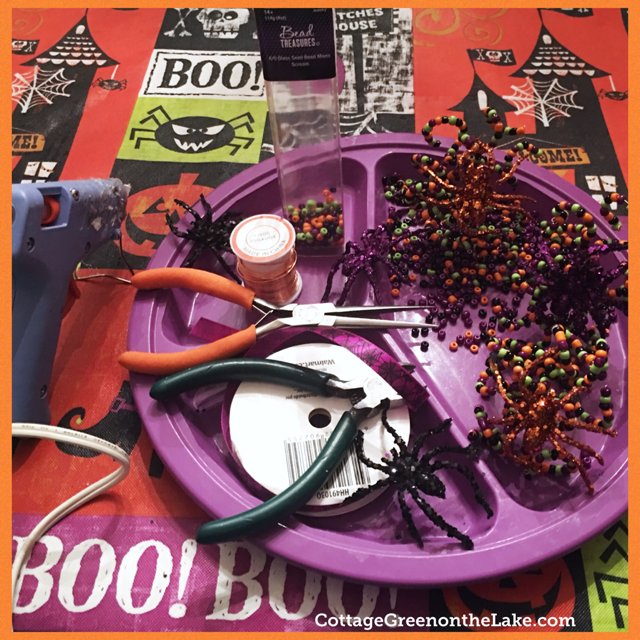
Supplies needed:
- glue gun
- glittered spiders
- copper wire (10 yds/20gauge)
- beads (glass seed bead mix “Scream”)
- assorted ribbons matching beads (I used Halloween polka dot & spider ribbon)
- wire cutters
- needle nose pliers
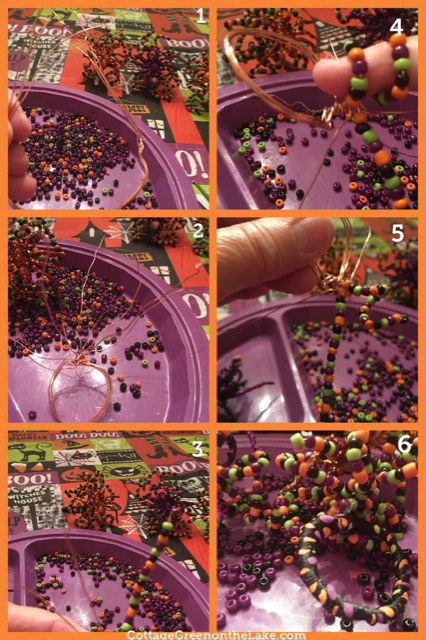
Instructions: (see pictures below)
- Cut 4 pieces of copper wire, each approximately 12 inches long
- Lay the 4 lengths of wire together and pull the wires up and around your fingers to form a circle large enough for a napkin to be inserted into the opening.
- Twist where the wires cross at the top of the circle 1 or 2 times to secure the circle in place.
- Splay out the 8 wires above the now-formed wire circle.
- Begin threading beads, creating your own color pattern.
- Leave enough wire at the top exposed to bend the wire with your needle nose pliers, forming a small closed loop to secure the beads in place.
- After each wire is filled with beads and the wire is crimped, wrap the beaded wire around your little finger to “coil” your wire.
- Remove your finger and bend each of the 8 coiled “legs” into desired shape.
- Using your hot glue gun, place a small amount of glue on your ribbon and begin wrapping the copper circle.
- Continue wrapping until the entire wire circle (the napkin ring) is covered with ribbon.
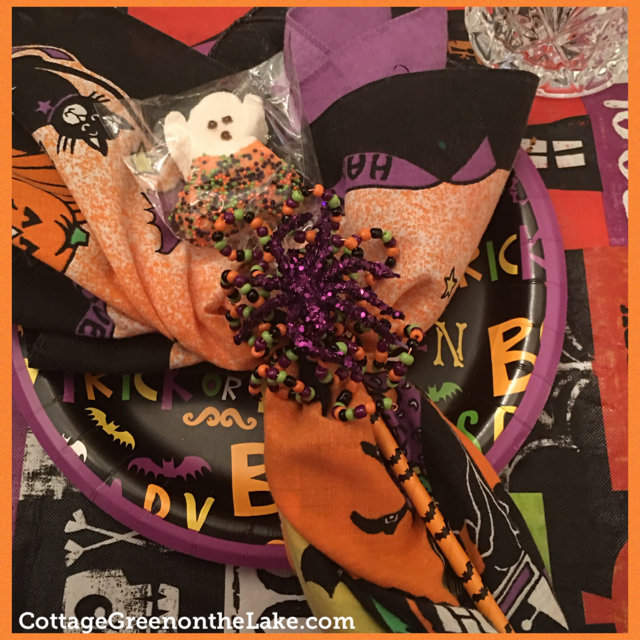
- Cut the ribbon and hot glue in place, at the top of the napkin ring. Shape and adjust beaded “legs” how you like them, then hot glue on glittery spider.
Just look what a glitzy napkin ring this makes … perfect for all things “outlandish” for Halloween!

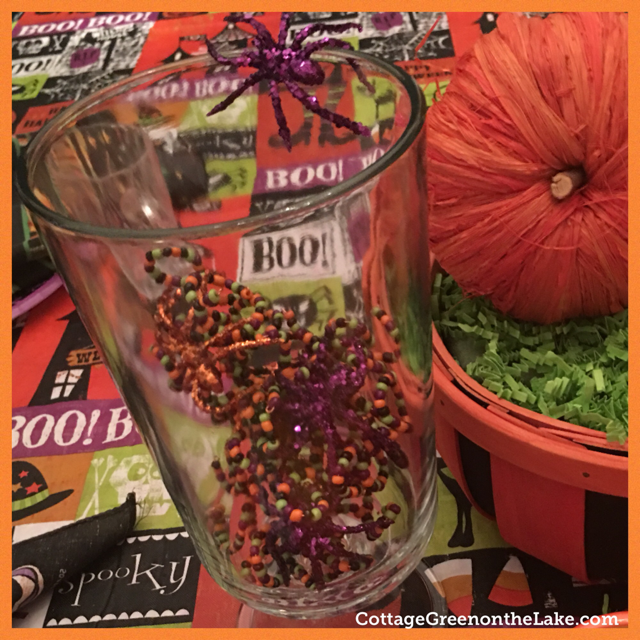
Pumpkin patch and harmless spiders …

Even just stacked in a pedestal votive cup “the eensy, weensy, spiders …” look frighteningly festive!
“Candy-Coated Ghost Peeps” click here for instructions
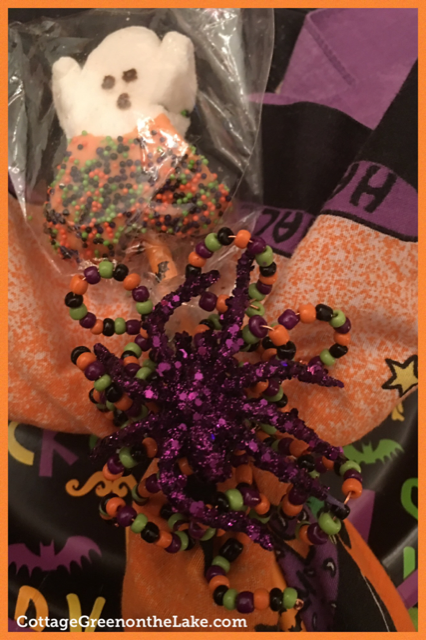
Little Ghost “Peeps” wearing “coats of chocolate” adorned with sprinkles and non-pareil’s make charming favors to take home or tuck into Halloween bags.
Click on the links below for all things “HALLOWEEN”

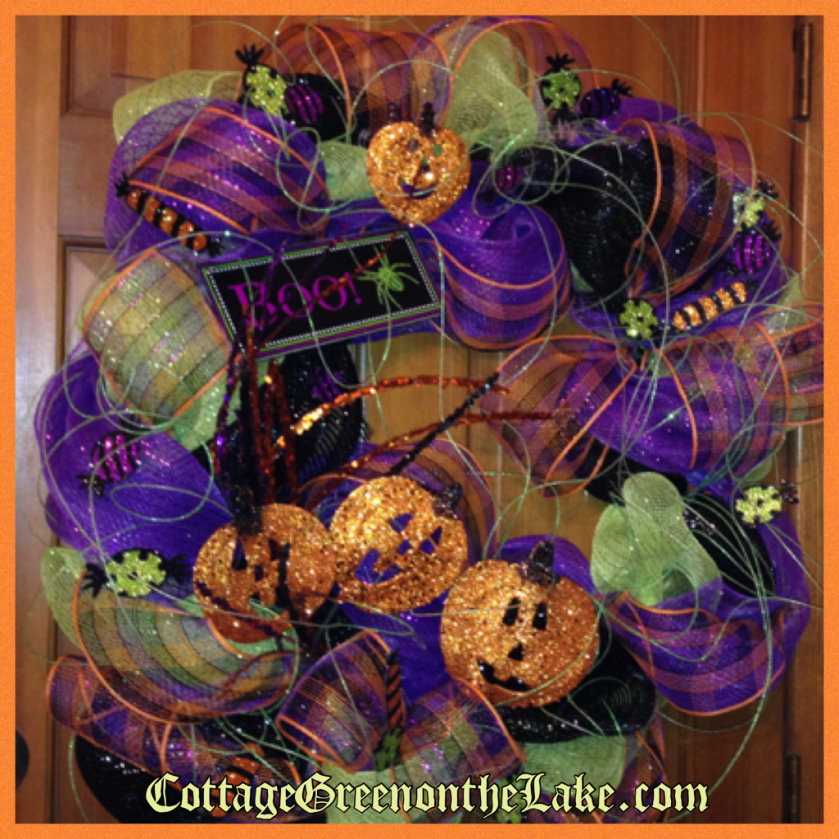
… DIY “Jolly Jack-o-Lantern” Halloween Wreath
Have fun getting your home ready and making these Halloween napkin rings! Before you know it, while your nodding … “nearly napping, suddenly” there will be “a tapping, as of some one gently rapping, rapping at my chamber door” … shouting “Trick or Treat! (:

From my cottage to yours ~ Trenda

Thank you for taking some time to read my blog today! To have all my posts delivered directly to your email address, just click FOLLOW in the post above … or click on my site: cottagegreenonthelake.com
This week I’m joining Courtney with Feathered Nest Friday
Chloe Crabtree at Celebrate & Decorate
All the supplies I used for making these Halloween napkin rings were bought from Hobby Lobby.
Share this:

Mother’s Day Tablescape and DIY favors

~ Trenda
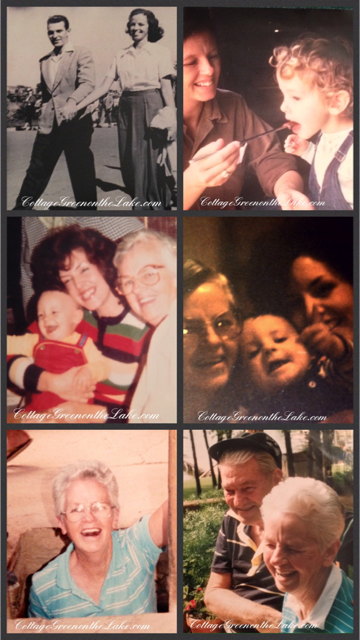
“All that I am or ever hope to be, I owe to my angel mother.” Abraham Lincoln
Happy Mother’s Day! It has been a beautiful weekend packed with time spent with all of our dear children and grandchildren … and today was a perfect day for a Mother’s Day dinner served outside on the deck! Adding a touch of sweetness and “gracing” our table, I used the DIY place cards and DIY napkin rings (click here for instructions!) that I taught you how to make earlier this week! (:
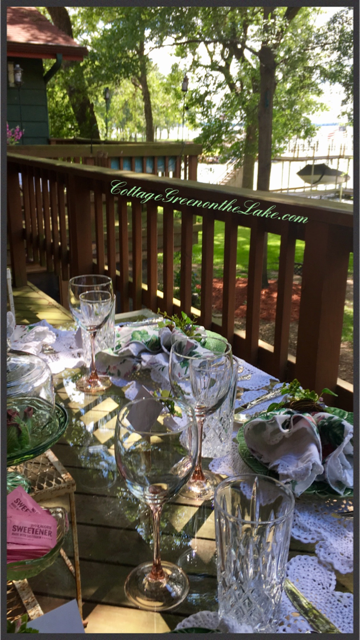
Crocheted Battenberg lace place mats match the “grid work” of the antique wrought iron chairs. This beautiful table belonged to my grandmother … a cherished gift to me from my mother.
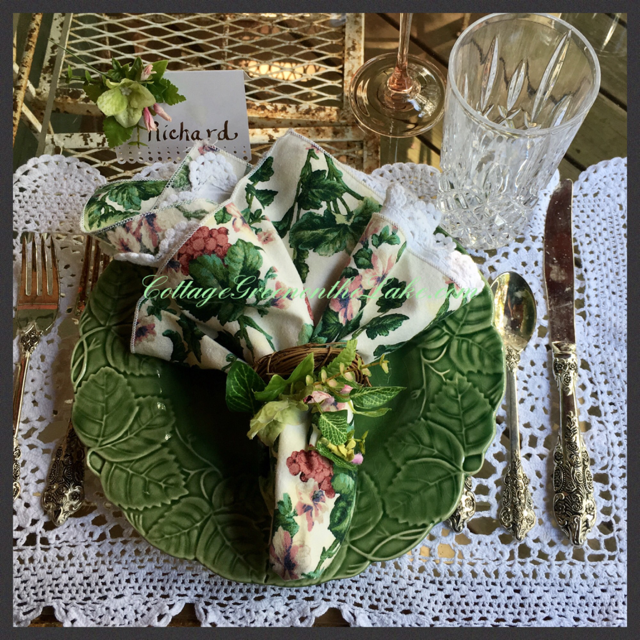
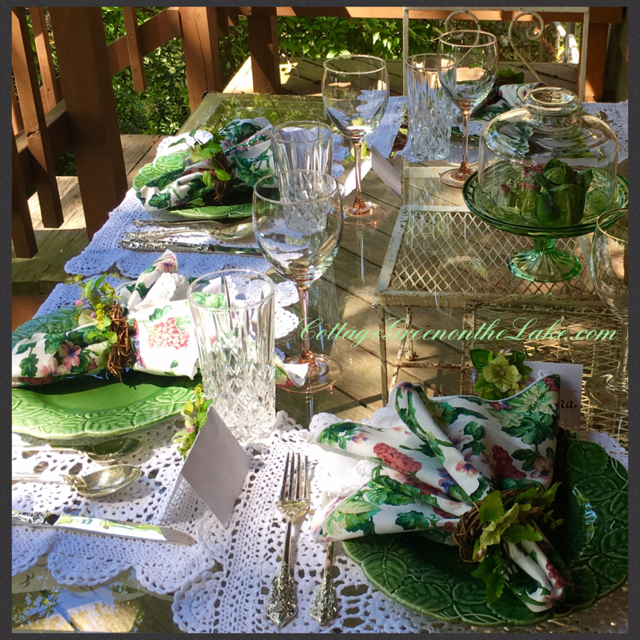
A bright floral napkin ensconces each white napkin edged with Battenberg lace – both are slipped into DIY Spring napkin rings (click here for instructions!) and a matching DIY place card, “reserves” each seat!

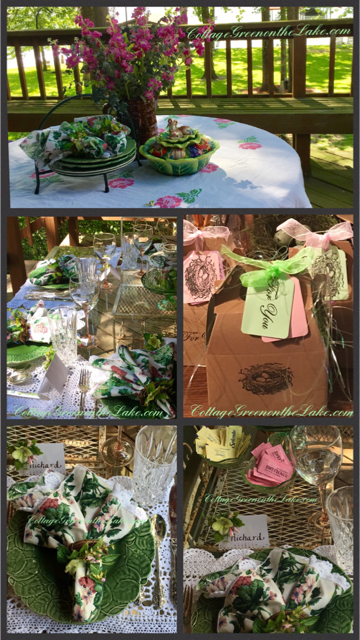
I was delighted when I found these charming green bowls on one of our “antique-ing excursions!” The bowls look like little cabbages and for this tablescape, I used them to hold Sweeteners. Carrying out the spring/garden theme and adding some whimsy, I placed some miniature cabbage teapots under a domed pedestal plate.

Crystal glasses are ready to be filled with Southern iced tea and water. The rose blush stemware is a beloved gift from a dear little boy … many Mother’s Days ago <3 
Both tables on the deck are set … the round table holds all the “overflow” serving dishes and is used as a buffet with plenty of chairs and built-in benches to seat everyone. A favorite Villeroy and Boch “Country French” covered dish waits for Homemade Chicken Florentine and Noodle Soup.

Ready for dinner! Look how darling the napkin rings and place cards are!
Now, one more DIY project to show you … I made these sweet little favor boxes to send home with each of our “guests!” If you’ve been following my blog for any length of time, you know I love making favors or treat bags for our “get-together’s.
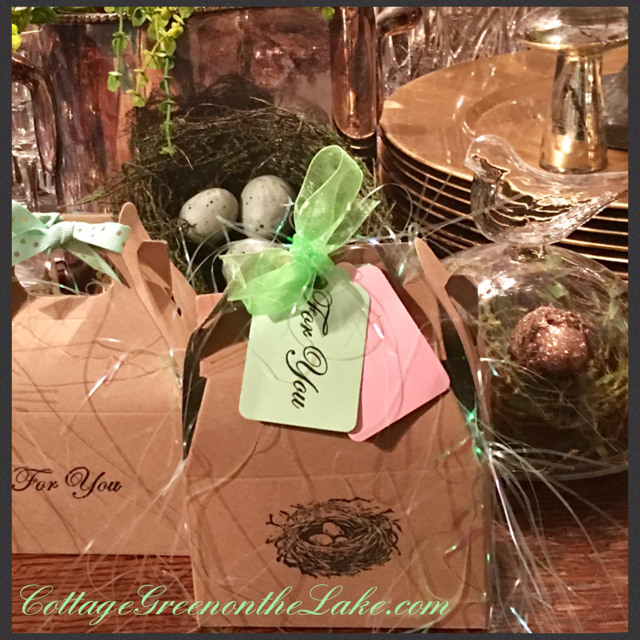 I bought a package of these little boxes at Hobby Lobby on the party aisle where the crepe paper and favor bags are. They are called Gable boxes and they come 12 to a package for only $3.99. (Download the Hobby Lobby App to get 40 percent off on one regular priced, that can be used each time you shop at Hobby Lobby!) Using my Recollection tag die-cutter, I punched out tags from stock card in a variety of Spring colors and stamped them with bird nests, “For You” and a filigree frame (I wrote each guest’s name inside the frame) and used my hole puncher to punch a hole in each colored tag. Then, I filled each favor box with a fine sparkly shredded grass, nestled in some individually wrapped chocolates, tied a ribbon around each box and added a “set” of tags (1 of each … a bird nest tag, a “For You” tag and a filigree frame with the guest’s name on it) and tied them on to the ribbon of each favor.

“FOR YOU” … favor boxes are waiting by the front door to be given with goodbye’s and final hugs; a sweet remembrance of another special day together.

This is the second Mother’s Day my own dear mother has been in heaven; I miss her every day and continually think of her, particularly on this special day. What a blessing it was to be her daughter! Her love, inner strength, joy, contentment and faith in Christ continue to be an inspiration to me. “I’ll love you forever, like you for always, Mom” <3
” … her children arise and call her blessed; her husband also, and he praises her: ‘Many women do noble things, but you surpass them all.’ Charm is deceptive, and beauty is fleeting; but a woman who fears the Lord is to be praised. Honor her for all that her hands have done …” Proverbs 31:28-31
Sending you a bit of our lovely day! Hope you had a wonderful Mother’s Day!
From my cottage to yours ~ Trenda
I’m delighted you read my blog today! Please click on FOLLOW in the post above or on my site cottagegreenonthelake.com and follow prompts to have all future posts delivered directly to your email address.
Share this:

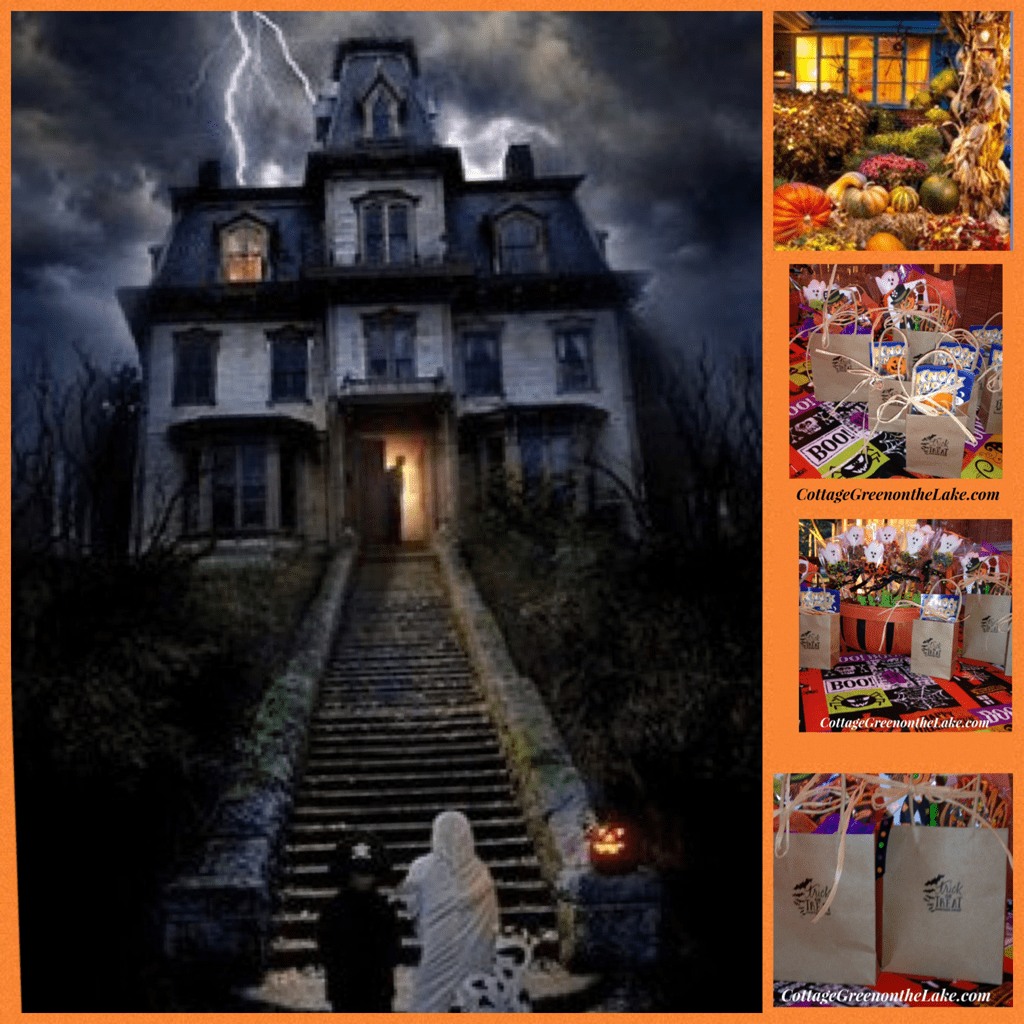
“No Tricks just Treats”… by Trenda
It’s almost here … the most “spook-tacular” evening of the year! The days in October have slowly “peeled off the calendar” until finally, to the children’s delight, the “countdown” and last preparations for this very special night of costumes, late-night curfews, lots of candy, and fun are winding down.

It’s Halloween Night!
Unfurl the tablecloth, set out the plates,
put out the punch bowl, if tarnished, that’s great!
Pumpkins by moonlight, a cauldron of sweets!
There’s Reese’s, and candy corn, Kit’s Kat’s galore!
If there’s not plenty, the ghosts are forlorn!
C’mon, let’s hurry … it’s Halloween night!
Giggles and doorbells, signal the start.
Small faces peering ‘neath masks, some quite scary!
Proffer bags, shouting, “Boo … trick or treat!”
by Trenda
![PicCollage[608].png](https://cottagegreenonthelake.com/wp-content/uploads/2016/10/piccollage608.png)
Getting the “table set” for our traditional family chili dinner and desserts (before all the hay rides, dunking booths, bounce houses, and slides …at the Harvest Festival, held at our church. It’s a “Happy Halloween” indeed when I get to see all our family and grandchildren! (:
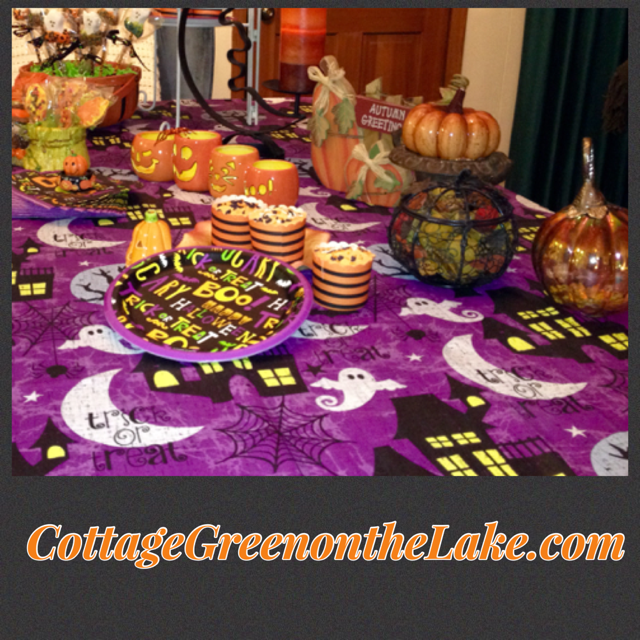
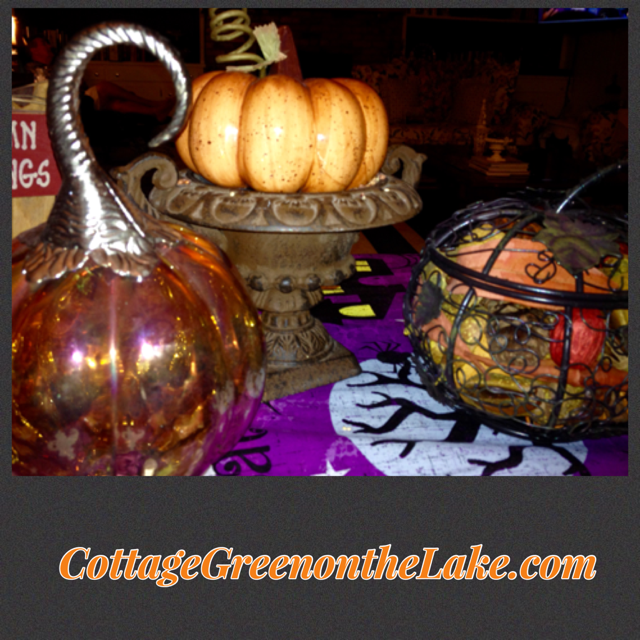
Pumpkins, pumpkins, pumpkins …
I LOVE everything about these cupcake liners “Simply Baked – elegant entertaining everyday by Christy Designs, LLC.” … the playful design with scalloped edges and black stripes against the orange background; how sturdy they are compared to traditional cupcake liners, how easy it was to pour the batter in these little baking cups … and the easy clean up. My cookie sheet was clean after baking my cupcakes! I bought my Baking Cups (20 paper baking cups per container) at Home Goods for only $1.99! Here they are setting on my cookie sheet, when I was filling them. Directions on the clear plastic sleeve they are packaged in, says to fill each baking cup, 1/2 full. Tip: One of my favorite time savers and tricks is to use a baking funnel (I bought mine at a Kitchen Supply shop) to fill my baking cups and cupcake liners!
![PicCollage[614].png](https://cottagegreenonthelake.com/wp-content/uploads/2016/10/piccollage614.png)
Here are the cupcakes after baking, frosted with vanilla frosting and topped with miniature bats and ghost sprinkles. Tip 2: When in a hurry, use your favorite tub of frosting. Add 1 teaspoon of vanilla extract to the tub of frosting for a homemade flavor, stir well to combine. To color white frosting, use food coloring (I use Wilton’s concentrated gel for coloring my frosting, to create the bold orange color I wanted, without thinning my icing.)
Halloween sweets … Chocolate cupcakes with vanilla frosting and “Cake Mix” Candy Corn Cookies![PicCollage[612].png](https://cottagegreenonthelake.com/wp-content/uploads/2016/10/piccollage612.png)
Our Traditional Halloween Dinner Menu
Chili con Carne with toppings … Fritos, shredded cheese, sour cream, chopped onions, and diced jalapenos (recipe in subsequent post)
Tossed Salad with Iceberg Lettuce and Fresh Spinach, diced red onions, chopped celery, chopped red onions, sliced radishes and peperoncini
Desserts: Chocolate Cupcakes w/vanilla buttercream frosting and “Cake Mix” Candy Corn Cookies (recipe in subsequent post)
![PicCollage[618].png](https://cottagegreenonthelake.com/wp-content/uploads/2016/10/piccollage618.png)
” … the moon and the stars to govern the night; His love endures forever …” Psalms 136:9
![PicCollage[620].png](https://cottagegreenonthelake.com/wp-content/uploads/2016/10/piccollage620.png)
Hope you have a safe and fun-filled day and evening with those that make your face and heart smile!
From my cottage to yours ~ Trenda
Thank you so much for spending some time with me today! I’d love to hear from you and I am truly delighted, reading what you have to say. Please leave any questions you may have or comments, below. Don’t be dismayed if you don’t see your comment “appear” right away. Word Press checks everything I receive for SPAM and all have to be approved, before posting.
Share this:

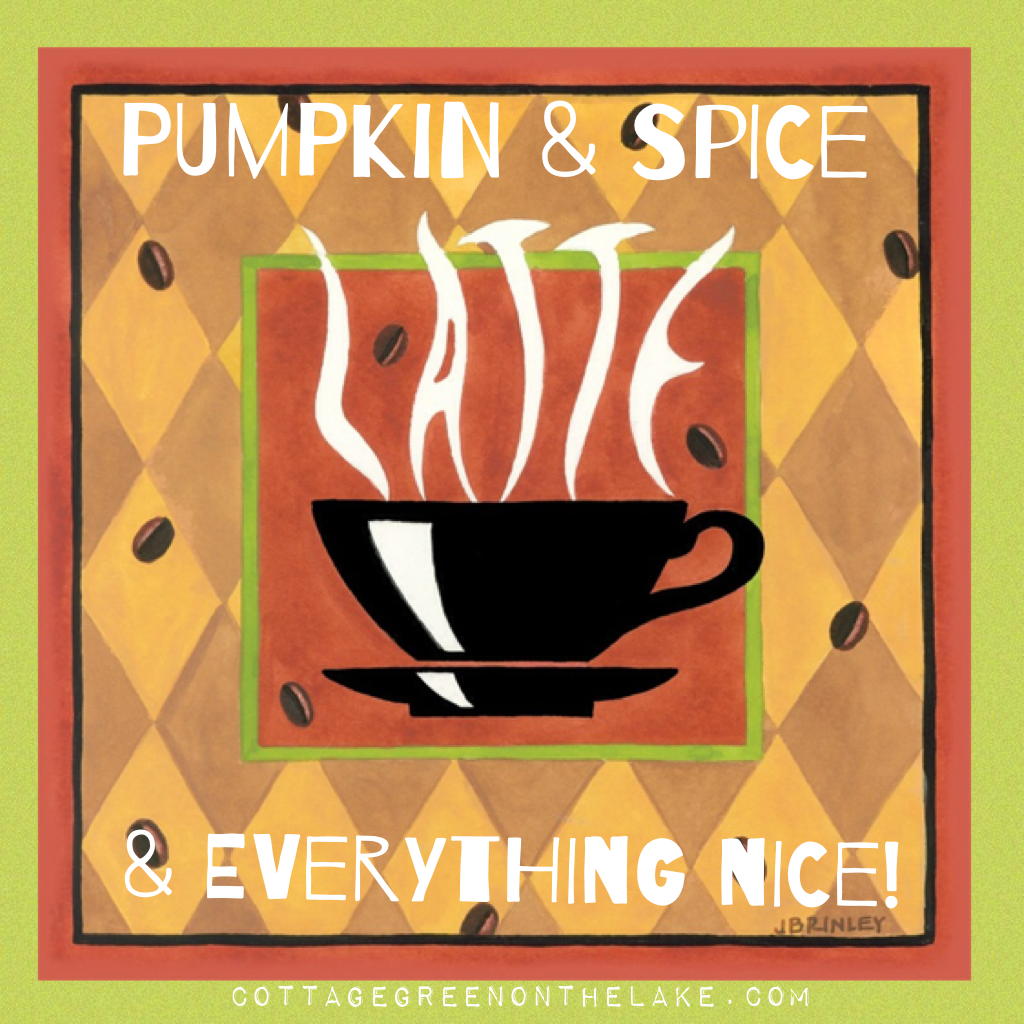
Pumpkin Spice Latte with Candied Spoons & Decorative Autumn Chocolates … by Trenda


I love “the tastes of autumn” … yummy pumpkin pies and apple crisps, spicy chili’s and homemade stews, creamy hot chocolate’s and pumpkin latte’s! This weekend you may be raking leaves, carving pumpkins, going to a Harvest Festival, or enjoying a hayride. Whatever you’re doing, wouldn’t you love knowing you have a delicious pumpkin-spice latte simmering in your slow cooker, to enjoy after you’re finished?

Here is the recipe for Betty Crocker’s Pumpkin-Spice Latte that is prepared in a slow cooker!
Pumpkin-Spice Latte
Ingredients:
5 cups strong brewed coffee
4 cups milk (2% or whole)
1/2 cup heavy whipping cream
1/4 cup canned pumpkin (not pumpkin pie mix)
1/3 cup sugar
1 teaspoon vanilla
1 teaspoon pumpkin pie spice
Garnish: whipped cream topping, cinnamon or pumpkin spice, cinnamon stick
Directions:
1) In slow cooker, mix all ingredients except whipped cream topping. Beat with whisk until well combined.
2) Cover and cook on High heat setting 2 hours, stirring once after 1 hour.
3) Serve in mugs, top with whipped cream, add a cinnamon stick and sprinkle whipped cream with cinnamon or pumpkin spice, if desired.
Autumn Drink Station with White Chocolate stirring spoons and decorative chocolates …

White Chocolate Dipped Stirring Spoons for Pumpkin-Spice Latte’s …

I love adding little “touches” that make every occasion special and memorable. These decadent treats will add a festive touch to any get-together! The chocolate spoons and candied stirrer’s look charming “gathered” and waiting in a container where your latte is simmering! They’re delicious stirred into a mug of pumpkin-spice latte or scatter the candied leaves and pumpkins on a autumn platter to nibble on!
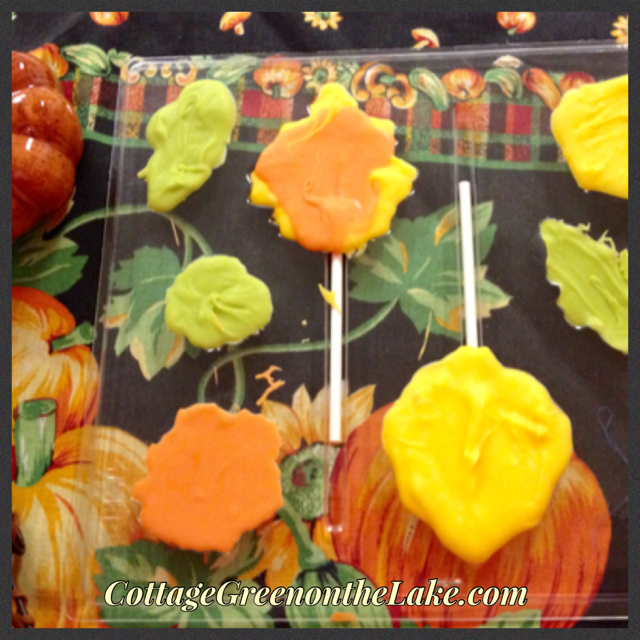
Candied Leaves and Pumpkins …
![PicCollage[577].png](https://cottagegreenonthelake.com/wp-content/uploads/2016/10/piccollage577.png)
Instructions to make … Chocolate-coated Stirring Spoons
Supplies and ingredients needed … plastic spoons, wax paper, Wilton Melting Candy, and assorted sprinkles. Optional: cellophane candy bags, ribbon in your choice of colors. Pick colored spoons in your choice of colors. I wanted my colors to be in autumn shades, so I used orange, yellow, and lime-green plastic spoons. Pour your Wilton Melting Candy Discs into microwaveable containers. I bought my candy at Hobby Lobby on the candy making aisle and chose white chocolate colored in the same autumn colors as my spoons … orange, yellow, and lime-green. Follow the melting directions on the back of each bag of candy. After the candy has melted, stir until smooth and dip the colored spoon into the candy, coating the bowl of your spoon. Set your candy-coated spoon on wax paper with the candy side facing up. You can leave your candy plain, or sprinkle the chocolate with your choice of decorations or colored sugars. After my chocolate had hardened, I slipped a cellophane favor bag (found on the candy making aisle) over each spoon and tied a ribbon around it.

To make white chocolate autumn leaves you will need a candy mold. I bought mine at Hobby Lobby, on sale for only $2.00! The package I bought had 2 sheets of molds and made 16 leaves and 12 pumpkins. Instructions for molding candy are on the back of the package. Melt your candies according to directions on the back of the bag and spoon your candy into your mold. Note: This is not an exact process and any over-filling or spills can be trimmed away with a sharp knife, after the candy has hardened. After you have filled your molds, tap your sheet of candy gently on the counter to help the candy settle and remove any air bubbles. Place candy sheet in the refrigerator for 10-15 minutes. Release hardened chocolate by inverting mold and gently tapping it on the work surface.
![PicCollage[570].png](https://cottagegreenonthelake.com/wp-content/uploads/2016/10/piccollage570.png)
The leaves with lollipop sticks were made using another candy mold sheet. These special candy mold sheets have slots to insert your sticks in, before pouring the candy into the mold.
![PicCollage[586].png](https://cottagegreenonthelake.com/wp-content/uploads/2016/10/piccollage586.png)
I hope you enjoy this last weekend in October and that you have as much fun as I did making these special treats! I’m looking forward to my cup of Pumpkin-Spice Latte! (:
From my cottage to yours ~ Trenda
Thank you so much for spending some time with me today! I’d love to hear from you and I am truly delighted, reading what you have to say. Please leave any questions you may have or comments, below. Don’t be dismayed if you don’t see your comment “appear” right away. Word Press checks everything I receive for SPAM and all have to be approved, before posting.
Share this:

Halloween DIY Treat Bags and Candy-Coated Ghost Peeps …….. by Trenda from Cottage Green on the Lake
Part 2 of “A Halloween of Memory Past” (Click on Part 1 of … A Halloween of Memory Past from previous post “Jolly Jack-o-Lantern Halloween Wreath” by Trenda)
![PicCollage[439].png](https://cottagegreenonthelake.com/wp-content/uploads/2016/10/piccollage439.png) Halloween of Memory Past by Trenda ~ cont’d from previous post “DIY Jolly Jack-o-Lantern Halloween Wreath”
Halloween of Memory Past by Trenda ~ cont’d from previous post “DIY Jolly Jack-o-Lantern Halloween Wreath”
As we walked up the sidewalk, I would size up each house, trying to determine if first … anyone was home and would answer the door and second … what kind of treat would be handed out. My experiences had already taught me that behind the door of an unwelcoming house, there always seemed to be a stale bit of peanut butter taffy wrapped in orange or black paper. Whereas, the brightly lit homes with welcoming porch lights and cheer-y doorbells seemed to house people who would fane surprise that there were spooks at their door and would generously grab into their bowl of treats and distribute a handful of goodies! …………………………… by Trenda
![PicCollage[437].png](https://cottagegreenonthelake.com/wp-content/uploads/2016/10/piccollage437.png)
Recalling my memories of Halloween’s Past, I love making special treats and stuffing little treat bags for each of the masquerader’s coming to 0ur home! Look at these cute little Halloween bags. They were so easy and fun … to make and fill! My treat bags are filled with a little trac of Knock-knock jokes, vampire teeth (complete with a packet of red watermelon-flavored goo, to squish out like blood!) Halloween candies, and Jack-o-Lantern rings. I also made some bigger sized bags for our own precious goblins (a cheerleader and a vampire!) and concocted these extra-special treats … Candy-Coated Ghost Peeps and Harvest Moon Pies
I bought the larger sized handled Kraft bags at Hobby Lobby, 5 for $1.99 and the smaller ones at Michael’s, 6 for $2.99. I stamped each bag with black ink from my “Pigment” black ink pad and used 2 cute stamps I “found” on sale at Hobby Lobby! To dress up my little bag, but wanting to keep it, simple … I tied a piece of raffia into a bow on each handle. I love the “scarecrow-look” of this rustic little bag with the straw bow!
![PicCollage[486].png](https://cottagegreenonthelake.com/wp-content/uploads/2016/10/piccollage486.png)
Now, for some fun and easy treats to make and put into each treat bag! These darling little Ghost Peeps are dressed for Halloween with a “coat” of candy (; and are adorned with bright polka dots, sprinkles, nonpareils’ and a fun assortment of Halloween pumpkins, bats, and mini ghosts.
![PicCollage[481].png](https://cottagegreenonthelake.com/wp-content/uploads/2016/10/piccollage481.png)
Pictured below are all the supplies needed to make the Ghost Peep Pops. Tip: I melted my candy melts in tea cups so I wouldn’t have to use so many melts, but would have enough “candy depth” to coat the bottom of each ghost.
![PicCollage[490].png](https://cottagegreenonthelake.com/wp-content/uploads/2016/10/piccollage490.png)
Then I inserted a Halloween straw (I bought mine from Home Goods) into the bottom of each ghost and propped the chocolate coated Ghost Pops up, while the candy hardened. Tip: I found that my toaster made a perfect drying rack! (: I made sure my toaster was unplugged and then inserted each Ghost Peep Pop into the toaster slots. The candy hardened up perfectly, without having any side flattened.
![PicCollage[491].png](https://cottagegreenonthelake.com/wp-content/uploads/2016/10/piccollage491.png)
After the candy hardened, I wrapped each ghost in a cellophane candy bag and tied it with a brightly colored polka dot ribbon.
![PicCollage[495].png](https://cottagegreenonthelake.com/wp-content/uploads/2016/10/piccollage495.png)
![PicCollage[502].png](https://cottagegreenonthelake.com/wp-content/uploads/2016/10/piccollage502.png)
From my cottage to yours ~ Trenda
Thank you so much for spending some time with me today! I’d love to hear from you and I am truly delighted, reading what you have to say. Please leave any questions you may have or comments, below. Don’t be dismayed when your comment doesn’t “appear” right away. Word Press checks everything I send or receive for SPAM and all have to be approved, before posting.
Share this:

Halloween DIY Treat Bags and Candy-Coated Ghost Peeps …….. by Trenda from Cottage Green on the Lake
Part 2 of “A Halloween of Memory Past” (Click on Part 1 of … A Halloween of Memory Past from previous post “Jolly Jack-o-Lantern Halloween Wreath” by Trenda)
Halloween of Memory Past by Trenda ~ cont’d from previous post “DIY Jolly Jack-o-Lantern Halloween Wreath”
As we walked up the sidewalk, I would size up each house, trying to determine if first … anyone was home and would answer the door and second … what kind of treat would be handed out. My experiences had already taught me that behind the door of an unwelcoming house, there always seemed to be a stale bit of peanut butter taffy wrapped in orange or black paper. Whereas, the brightly lit homes with welcoming porch lights and cheer-y doorbells seemed to house people who would fane surprise that there were spooks at their door and would generously grab into their bowl of treats and distribute a handful of goodies! …………………………… by Trenda
Recalling my memories of Halloween’s Past, I love making special treats and stuffing little treat bags for each of the masquerader’s coming to 0ur home! Look at these cute little Halloween bags. They were so easy and fun … to make and fill! My treat bags are filled with a little trac of Knock-knock jokes, vampire teeth (complete with a packet of red watermelon-flavored goo, to squish out like blood!) Halloween candies, and Jack-o-Lantern rings. I also made some bigger sized bags for our own precious goblins (a cheerleader and a vampire!) and concocted these extra-special treats … Candy-Coated Ghost Peeps and Harvest Moon Pies
I bought the larger sized handled Kraft bags at Hobby Lobby, 5 for $1.99 and the smaller ones at Michael’s, 6 for $2.99. I stamped each bag with black ink from my “Pigment” black ink pad and used 2 cute stamps I “found” on sale at Hobby Lobby! To dress up my little bag, but wanting to keep it, simple … I tied a piece of raffia into a bow on each handle. I love the “scarecrow-look” of this rustic little bag with the straw bow!
Now, for some fun and easy treats to make and put into each treat bag! These darling little Ghost Peeps are dressed for Halloween with a “coat” of candy (; and are adorned with bright polka dots, sprinkles, nonpareils’ and a fun assortment of Halloween pumpkins, bats, and mini ghosts.
Pictured below are all the supplies needed to make the Ghost Peep Pops. Tip: I melted my candy melts in tea cups so I wouldn’t have to use so many melts, but would have enough “candy depth” to coat the bottom of each ghost.
Then I inserted a Halloween straw (I bought mine from Home Goods) into the bottom of each ghost and propped the chocolate coated Ghost Pops up, while the candy hardened. Tip: I found that my toaster made a perfect drying rack! (: I made sure my toaster was unplugged and then inserted each Ghost Peep Pop into the toaster slots. The candy hardened up perfectly, without having any side flattened.
After the candy hardened, I wrapped each ghost in a cellophane candy bag and tied it with a brightly colored polka dot ribbon.
From my cottage to yours ~ Trenda
Thank you so much for spending some time with me today! I’d love to hear from you and I am truly delighted, reading what you have to say. Please leave any questions you may have or comments, below. Don’t be dismayed when your comment doesn’t “appear” right away. Word Press checks everything I send or receive for SPAM and all have to be approved, before posting.
Share this:

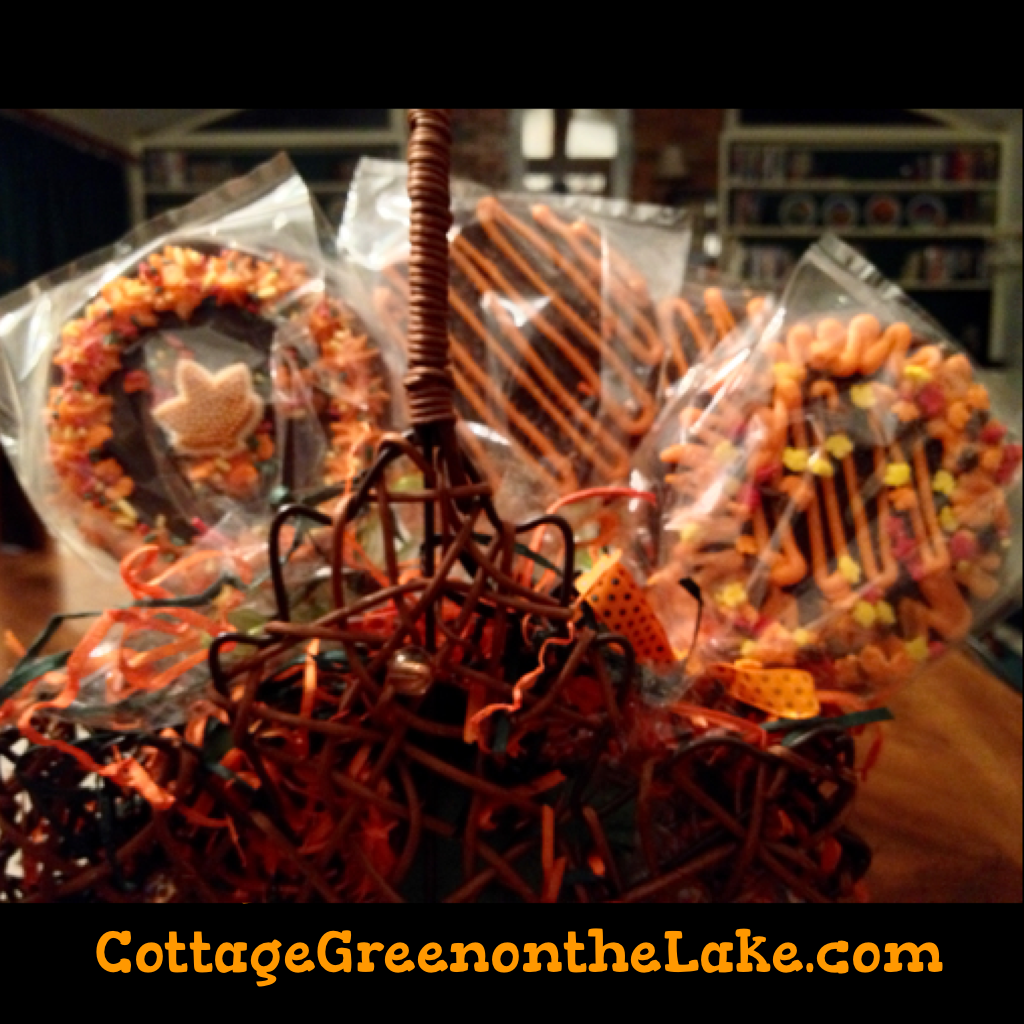
“Fall” … in love & Harvest Moon Pies by Trenda from Cottage Green on the Lake

“Fall” … in love with the autumn season, colored leaves, cooler days and all things cozy. Here in Texas, September is just the prelude of the overture to come, but change is in the air; hayfields are filled with freshly baled hay, the little winter coots have returned and last night a gorgeous “harvest moon” rose slowly over the lake. <!–more–>
Now, I think you are going to “Fall” … in love with these darling treats … Harvest Moon Pies. This idea is from a past addition of Southern Living Magazine and I was delighted to find that these desserts were easy to assemble and almost too cute to eat! I know we’re going to need more Moon Pies for Halloween … to decorate with all things spooky!

These decorated Moon Pies are a fun addition to any holiday and are a wonderful project for you and your children to enjoy doing together. Have fun decorating each Moon Pie differently and you’ll finally have a use (if you’re like me!) for all those adorable holiday sprinkles, that seem to amass in your cabinets! (:
I used a wire Maple leaf basket I had tucked away in my “4 the seasons” closet – my sweet hubby built for me! I put a block of florist foam in the bottom of the basket to anchor and display my Harvest Moon Pies and covered the foam with some shredded black and orange paper I had. Then, I wrapped each of my decorated Harvest Moon Pies in a cellophane favor bag. (I bought my cellophane bags from Hobby Lobby, they were located on the candy-making aisle along with the Wilton Candy Melts and “lollipop” sticks) and added autumn-colored ribbons around each handle.
I love the novelty of this charming and creative centerpiece, but I also love that they can be given as party favors, since I individually wrapped each of my Harvest Moon Pies!
HARVEST MOON PIES/ LEVEL: EASY/ YIELD: 1 DOZEN
INGREDIENTS AND ITEMS NEEDED:

INGREDIENTS & ITEMS NEEDED:
- 12 lollipop sticks
- 2 packages Chocolate Flavor Moon Pies (6 to each small package)
- 1 package vanilla candy melts – orange colored (I used Wilton’s Candy Melts)
- 1 zip-type plastic bag or cake decorator bag
- scissors
- wax paper
- assorted sugar cake decorations (I used Wilton’s leaf shaped decorations)
- assorted seasonal sprinkles
- ribbon in autumn colors
- Decorator Icing
DIRECTIONS:
- Insert 1 lollipop stick, 2 to 3 inches into marshmallow center of Moon Pie
- Microwave candy melts in a glass bowl at Medium (50 percent power) 1 minute or until melted, stirring once. (read detailed instructions on the back of candy bag) Spoon into your plastic bag or cake decorator bag, push air out and seal.
- Snip a small hole in 1 corner of the bag; pipe melted candy around where the lollipop stick meets the Moon Pie to hold it securely in place. Lay flat on wax paper and let stand until firm. *SEE NOTE BELOW
- Pipe a fun border of melted candy around the edges of the Moon Pie or pipe squiggles across the top; then add sprinkles, cake sugar or attach candy decorations (ie: candy corn, pumpkins, etc.) using melted candies or frosting
*Be sure and help your little ones insert the candy stick into their Harvest Moon Pie and pipe melted candy around lollipop stick for them.
I hope you “Fall” … in love with these Harvest Moon Pies and enjoy making and eating them, as much as we did! (:
There are so many thing to love about Fall!
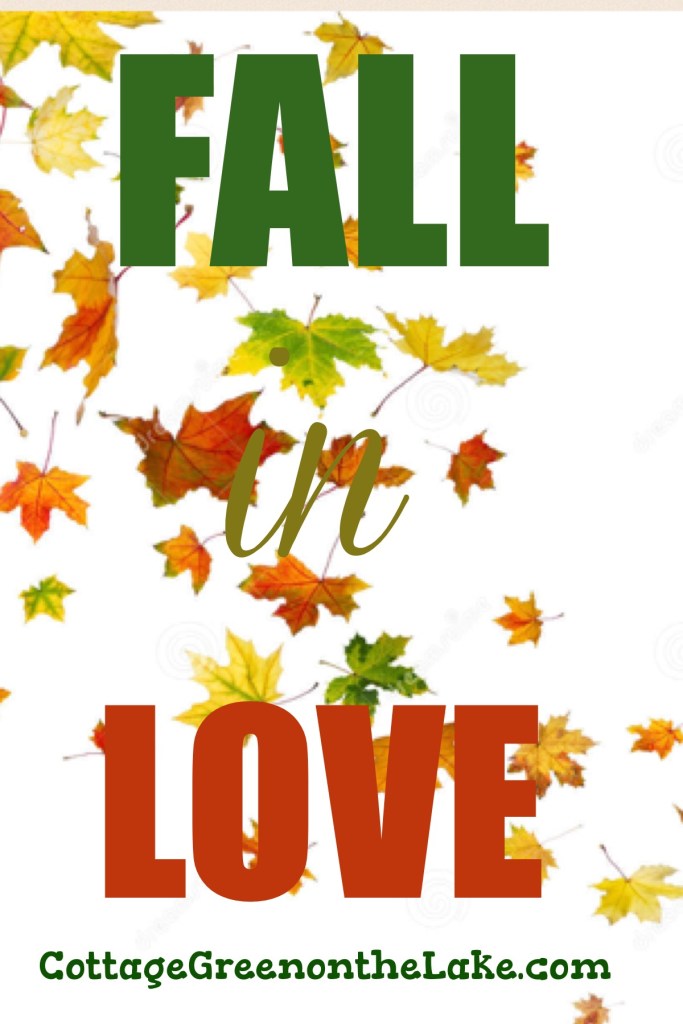
“Fall … in love with all things pumpkin!
“Fall … in love with harvest moons and breezy nights

“Fall” … in love with hay bales gleaming.

“Fall” … in love with yellow leaves, lying on the grass.

“Fall” … in love with children playing … laughing, giggling.
“Fall” … in love with FALL!
From my cottage to yours ~ Trenda

