Halloween DIY Napkin Rings …………. by Trenda

Look who suddenly appeared, looking like he flew straight from the pages of Edgar Allan Poe’s poem and obligingly perched, right next to me.  While I slowly reached for my phone, my mind began the recitation of these remembered words …  “Once upon a midnight dreary, when I pondered, weak and weary …” . 

grackle

I love decorating the table for any occasion and for HALLOWEEN … I use all kinds of  “fol-der-ol and fid-dle-dy dee” to set the mood for a magical night that’s filled with possibilities and imagination!  During these next 3 weeks, I have several fun projects that I am going to be sharing with you that will help you create your own “boo-tiful” Halloween tablescape!  Today, I am going to show you how to make these spook-taular Halloween napkin rings!

Last cover

Supplies needed:

  • glue gun
  • glittered spiders 
  • copper wire (10 yds/20gauge)
  • beads (glass seed bead mix “Scream”)
  • assorted ribbons matching beads (I used Halloween polka dot & spider ribbon)
  • wire cutters
  • needle nose pliers

supplies.png

Instructions: (see pictures below)

  1. Cut 4 pieces of copper wire, each approximately 12 inches long
  2. Lay the 4 lengths of wire together and pull the wires up and around your fingers to form a circle large enough for a napkin to be inserted into the opening.
  3. Twist where the wires cross at the top of the circle 1 or 2 times to secure the circle in place.
  4. Splay out the 8 wires above the now-formed wire circle.
  5. Begin threading beads, creating your own color pattern.
  6. Leave enough wire at the top exposed to bend the wire with your needle nose pliers, forming a small closed loop to secure the beads in place.
  7. After each wire is filled with beads and the wire is crimped, wrap the beaded wire around your little finger to “coil” your wire. 
  8. Remove your finger and bend each of the 8 coiled “legs” into desired shape.
  9. Using your hot glue gun, place a small amount of glue on your ribbon and begin wrapping the copper circle.
  10. Continue wrapping until the entire wire circle (the napkin ring) is covered with ribbon. 
  11. Cut the ribbon and hot glue in place, at the top of the napkin ring.  Shape and adjust beaded “legs” how you like them, then hot glue on glittery spider.

1-6.png

Just look what a glitzy napkin ring this makes … perfect for all things “outlandish” for Halloween!

orange spider

Pumpkin patch and harmless spiders …

pumpkin.png

Even just stacked in a pedestal votive cup “the eensy, weensy, spiders …” look frighteningly festive!

votive.png

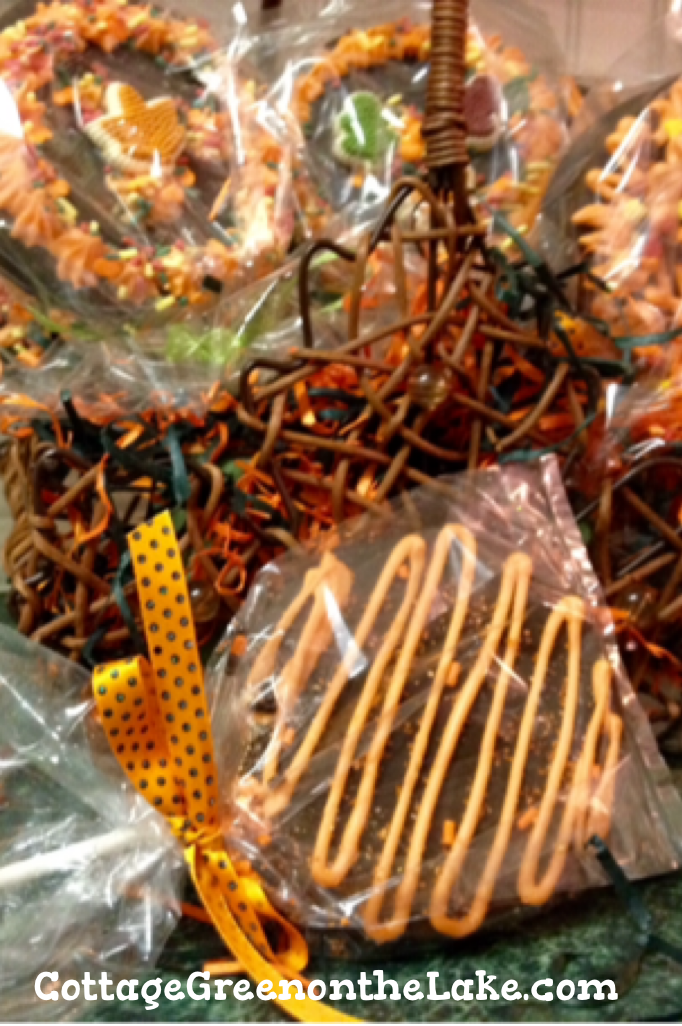
“Candy-Coated Ghost Peeps” click here for instructions

purple closeup

Little Ghost “Peeps” wearing “coats of chocolate” adorned with sprinkles and non-pareil’s make charming favors to take home or tuck into Halloween bags. 

orange ghost


final.png

Click on the links below for all things “HALLOWEEN” 

Halloween DIY Treat Bags

piccollage484

… DIY “Jolly Jack-o-Lantern” Halloween Wreath

piccollage422

Have fun getting your home ready and making these Halloween napkin rings!  Before you know it, while your nodding … “nearly napping, suddenly” there will be “a tapping, as of some one gently rapping, rapping at my chamber door” … shouting “Trick or Treat! (:

scripture napkin rings.png

From my cottage to yours  ~  Trenda

Trenda


Thank you for taking some time to read my blog today!  To have all my posts delivered directly to your email address, just click FOLLOW in the post above … or click on my site:  cottagegreenonthelake.com

This week I’m joining Courtney with Feathered Nest Friday

Chloe Crabtree at Celebrate & Decorate

All the supplies I used for making these Halloween napkin rings were bought from Hobby Lobby.


The 4th of July!!! ~ by Trenda

The 4th of July … America’s biggest, grandest party of the year!  

Around our town … a giant ferris wheel!

ferris wheel.pngMerry-go-round, Fun Slide, Funnel Cakes, Fresh Squeezed Lemonade and Fried Oreos! (:

fun slide.png

And at Cottage Green … tablescapes, favors, treats, and decorations for our 4th of July celebration “from the dawn’s early light” … until “the twilight’s last gleaming!”

night collage.png

A simple tablescape apropos for July 4th on the Lake!  A metal rowboat filled with all “accouterments” needed for lakeside meals and desserts … both “stars” and “stripes” plates in assorted sizes, plastic cutlery, napkins, straws, with miniature flags and sprays of  “bling!” (:

boat tablescape background.pngOutside, the table is covered in a quilted tablecloth and a “God Bless America” centerpiece of fireworks and stars.

final 2.pngRed, White, and Blue baskets await hamburgers, a cluster of red grapes and brownies.  Striped, paper bowls are perfect for individual portions of potato salad and make clean up, easy.  A blue wired basket holds cups, plates, cutlery, and patriotic straws.outdoor table setting.png

Scalloped-edged bandana boxes (I bought mine at Hobby Lobby) are filled with “fun things” for the 4th of July weekend … fans, balloons, bubbles, “USA” and star colored beads, sunglasses, pencils, flag pins, and Chinese yo-yo’s!

favors.png

… and special star headbands for the grand kids!

headbands.png

Fireworks exploding and reflecting over the lake.

fireworks.png

Hope you had a wonderful weekend and just enjoyed being FREE … free to gather in your own home or backyard with family and friends … free to pray over your hot dogs, hamburgers, watermelon, and homemade ice cream … freedom to “hoot” and holler” as you exclaim over beautiful fireworks, in the sky.

Land of the free

After looking at a display of  flags from all over the world, our 8 year old grand daughter, in her endearing and profound way, said … “Grandma, don’t you think we have the prettiest flag of ALL?”  “I certainly do!”  I quickly agreed.  Then she solemnly said … “Grandma, wouldn’t it be so sad if we ever saw another flag flying over our country,  instead of our flag?”  Oh my, my heart felt sick as I pondered her question and tried to imagine seeing another flag other than our “STARS and STRIPES forever” … being flown over our country!  With a grateful heart, I want to thank all our military and their families, throughout the ages, for the sacrifices they have made and given for our freedom so … “the prettiest flag of ALL” continues to fly over our great nation. “GOD BLESS AMERICA, LAND THAT I LOVE.” ❤

scripture and flag.png

From my cottage to yours  ~  Trenda

img_0452


I’m delighted you spent so me time reading my blog today.  To have all my posts delivered directly to your email address, just click on FOLLOW in the post above … or click on my site cottagegreenonthelake.com and follow the prompts.  


Hello June! … Delicious BBQ Beans & DIY Place Cards for Father’s Day

~ Trenda

Hello June!  We’ve been looking forward to seeing you! (:

hello June!.png

“Roll out those lazy, hazy, crazy days of summer …” It’s time to slow down, kick back, and relax!

 WONDERFUL SUMMER!  ~ by Trenda

“It’s the beginning of another …

Snow-cone dripping,

bare foot skipping, 

iced tea sipping,

front porch sitting, 

flip flop plopping,

baseball watching,

mattress floating,

snorkel snorting,

pink nose glowing, 

green grass mowing,

warm breeze blowing,

hot dog munching,

cricket chirping,

sparkler waving,

firework gazing,

sunset blazing …

 wonderful summer!” 

final Wonderful Summer! .png

The days of June are marked off the calendar with the “procession” of different celebrations and “happenings.”  Flag Day – June 14th … Father’s Day – June 18th … and the longest day of the year, Summer Solstice – June 21st.  Keep the “red, white, and blue” decorations handy and get out those summer recipes and “Father’s Favorites!”  Two of our favorite’s here at Cottage Green are … my recipe for Delicious BBQ Beans and Sand Pail Ice Cream

bbq beans cover

We love the smoky flavor of these “Delicious BBQ Beans” and the enhanced layer of flavor that the bell pepper adds!  I also love that the beans are cooking in the crock pot while I’m away or I’m busy preparing other dishes.

BBQ beans.JPG

Now, for some elegant DIY place cards that are easy to make that will add an “air” of sophistication to your “Father’s Day” table.  If you’ve been following my blog for any length of time, you know I love “dressing” the table!  One of the easiest ways to make your table festive and make every guest feel important is by adding place cards to your tablescape.  I made these simple, but elegant place cards for a graduation party and they are perfect and serving “double-duty” … for our Father’s Day celebration!

welcome fatehr's day placecards.png

Here are supplies needed to make these place cards:

supplies.png

I bought my miniature decorative tassels in the “Notions” section at Hobby Lobby (where the fabrics/buttons/ribbons are located).  I also bought my place cards and my clear stamp pads at Hobby Lobby, in the stationery section.

place cards.png Instructions:

  1. Punch a hole in upper left-hand corner of each place card, making sure you punch the hole through the front and back of the place card.
  2. Insert the opposite end of the tassel through the punched hole in the front of the card (insert, front to back) so that the tassel is in the front of the place card.
  3. Bring the looped end of cord over the top of the place card and insert (thread) the tassel through the corded opening and pull gently to secure the “tassel in place.  Make sure the knot is not taut, so the tassel drapes loosely down the front of the place card. * (see photo below)
  4. Stamp the front of each place card with a filigree frame of your choice from your selection of clear stamp pads.  Make sure you allow enough time for the ink to dry before handling.
  5. After ink has thoroughly dried, write each person’s name centered in the stamped frame.

*Close-up photo of #3 instructions:closeup tying

I love the elegant and “man-ly” look of these place cards and can’t wait to show you how they look “gracing” our Father’s Day tablescape!

closeup placecards.png

Now hang up your hammock, get out the ice cream maker, and drape your patio in party lights and “Roll out those lazy, hazy, crazy days of summer … you’ll wish that summer could always be here.” ~ Nat King Cole

scripture.png

From my cottage to yours ~ Trenda

cottage-green

I’m delighted that you read my blog today!  Please click on FOLLOW in the post above or on my site cottagegreenonthelake.com to have all posts delivered directly to your email address.


Mother’s Day Tablescape and DIY favors

~ Trenda

“All that I am or ever hope to be, I owe to my  angel mother.”  Abraham Lincoln

final longview.png

 Happy Mother’s Day!  It has been a beautiful weekend packed with time spent with all of our dear children and grandchildren … and today was a perfect day for a Mother’s Day dinner served outside on the deck!  Adding a touch of sweetness and “gracing” our table, I used the DIY place cards and DIY napkin rings (click here for instructions!) that I taught you how to make earlier this week! (:

Mother's Day collage.png

Crocheted Battenberg lace place mats match the “grid work” of the antique wrought iron chairs.  This beautiful table belonged to my grandmother … a cherished gift to me from my mother. 

Richard.png

A bright floral napkin ensconces each white napkin edged with Battenberg lace – both are slipped into DIY Spring napkin rings (click here for instructions!) and a matching DIY place card, “reserves” each seat!

Trenda.png

I was delighted when I found these charming green bowls on one of our “antique-ing excursions!”  The bowls look like little cabbages and for this tablescape, I used them to hold Sweeteners.  Carrying out the spring/garden theme and adding some whimsy,  I placed some miniature cabbage teapots under a domed pedestal plate.

lettuce bowls.png

Crystal glasses are ready to be filled with Southern iced tea and water.  The rose blush stemware is a beloved gift from a dear little boy … many Mother’s Days ago ❤  fulldeck view.png

Both tables on the deck are set … the round table holds all the “overflow” serving dishes and is used as a buffet with plenty of chairs and built-in benches to seat everyone.   A favorite Villeroy and Boch “Country French” covered dish waits for Homemade Chicken Florentine and Noodle Soup. 

round top

Ready for dinner!  Look how darling the napkin rings and place cards are!

north side.png

Now, one more DIY project to show you … I made these sweet little favor boxes to send home with each of our “guests!”  If you’ve been following my blog for any length of time, you know I love making favors or treat bags for our “get-together’s.

favors.png 
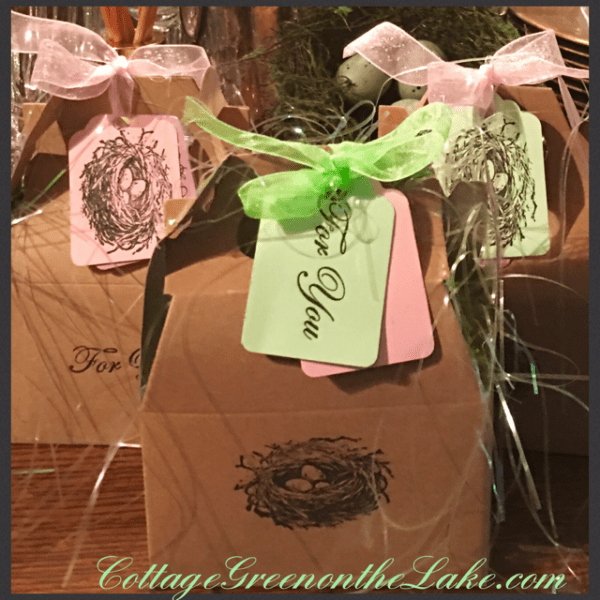
I bought a package of these little boxes at Hobby Lobby on the party aisle where the crepe paper and favor bags are.  They are called Gable boxes and they come 12 to a package for only $3.99. (Download the Hobby Lobby App to get 40 percent off  on one regular priced, that can be used each time you shop at Hobby Lobby!) Using my Recollection tag die-cutter, I punched out tags from stock card in a variety of Spring colors and stamped them with bird nests, “For You” and a filigree frame (I wrote each guest’s name inside the frame) and used my hole puncher to punch a hole in each colored tag. Then, I filled each favor box with a fine sparkly shredded grass, nestled in some individually wrapped chocolates, tied a ribbon around each box and added a “set” of tags (1 of each … a bird nest tag, a “For You” tag and a filigree frame with the guest’s name on it) and tied them on to the ribbon of each favor.

supplies.png

 “FOR YOU” … favor boxes are waiting by the front door to be given with goodbye’s and final hugs; a sweet remembrance of another special day together.

gifts

This is the second Mother’s Day my own dear mother has been in heaven; I miss her every day and continually think of her, particularly on this special day.  What a blessing it was to be her daughter!  Her love, inner strength, joy, contentment and faith in Christ continue to be an inspiration to me.  “I’ll love you forever, like you for always, Mom” ❤

” … her children arise and call her blessed; her husband also, and he praises her: ‘Many women do noble things, but you surpass them all.’  Charm is deceptive, and beauty is fleeting; but a woman who fears the Lord is to be praised.  Honor her for all that her hands have done …”  Proverbs 31:28-31

Mom.png

Sending you a bit of our lovely day!  Hope you had a wonderful Mother’s Day!

From my cottage to yours  ~  Trenda 

fish

I’m delighted you read my blog today!  Please click on FOLLOW in the post above or on my site cottagegreenonthelake.com and follow prompts to have all future posts delivered directly to your email address.


Mother’s Day DIY place cards and napkin rings

~ Trenda

tablescape .png
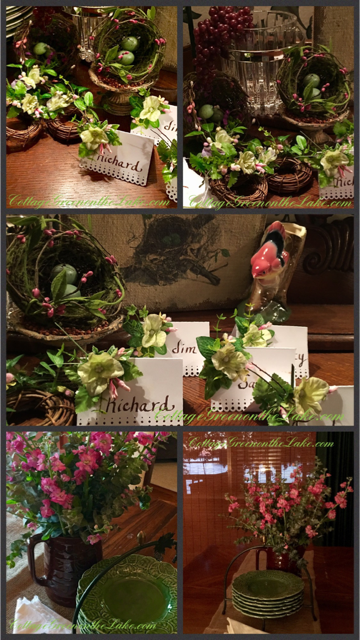
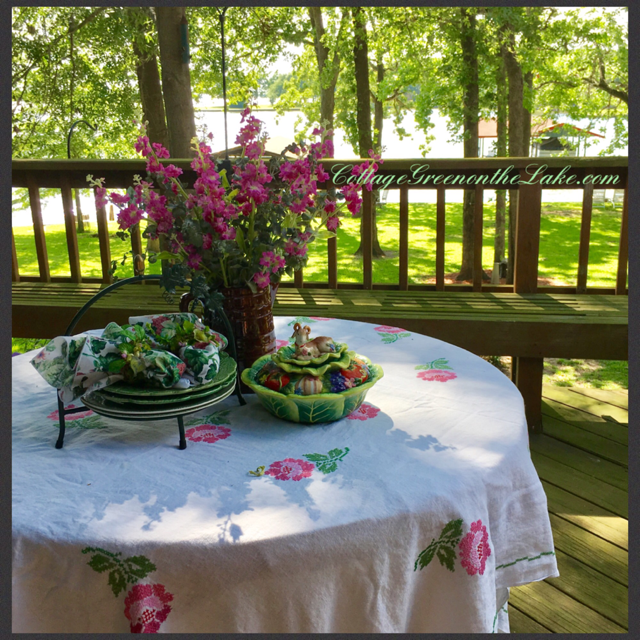
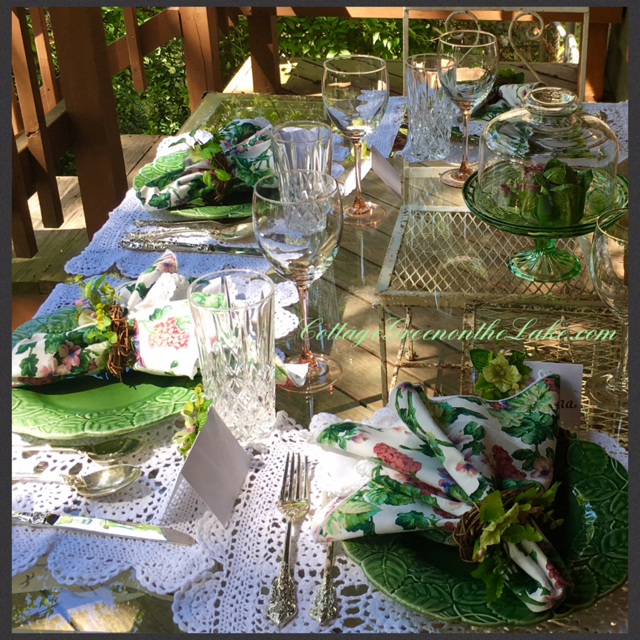
“Tra la! It’s May! The lusty month of May!”  Vanessa Redgrave sang in the Broadway musical, CAMELOT. The charming but now archaic definition of lusty, according to Merriam-Webster is merry and joyous.  Looking out our open screen door to blue skies and hearing the birds joyously “tra-la’ing” as they go merrily about picking up choice “bits and pieces” to line and feather their nests, it is definitely “the lusty month of May!”  The month of May is filled with promise, celebrations and events. One of the preparations I enjoy the most before any holiday or get together is getting the table ready and “dressed” for the occasion. Look at these darling place cards I made with matching grapevine napkin rings; perfect for a woodland theme Bridal shower, a Spring Tea Party or Mother’s Day Brunch!

place cards napkin holders.png

I bought a package of plain white place-cards and my mini grapevine wreaths from Hobby Lobby.  Then I took my scalloped die-cut punch and punched along the bottom of the place-card.  To decorate each place card I hot glued “a bit” of ivy in the left hand corner of the place-card, placing it so the greenery “peeked” over the top and softened the corner of the card.  On each piece of greenery, I glued a single blossom from a silk hydrangea and some tiny pink flower buds.  For the final touch and to “blend” the look of the tiny posy … I glued individual pieces of assorted “fillers” I had from making other floral arrangements.  ie: tiny ivy leaves, eucalyptus, birch twigs … Then I wrote the name of each of our “guests” on the place-cards.

place cards.png

After I finished all the place cards I needed, I started making my mini-grapevine napkin rings. I used the same technique and materials making these that I used making my place cards, so all would match.

grapevine 2.png

“Tra-la!”  (:   All done!  Time to set the table with all these charming “accroutements!” for an enchanting, Mother’s Day tablescape … pictures on my next blog!  (;  

collage.png

“… let us press on to know the Lord; his going out is sure as the dawn; he will come to us as the showers, as the spring rains that water the earth.”

desktop.png

From my cottage to yours  ~  Trenda

img_0452

I’m delighted you read my blog today!  Please click on FOLLOW in my post above or on my site cottagegreenonthelake.com and follow prompts to have all my blogs delivered directly to your email address.

Scarecrow Themed Tablescape – perfect for autumn get-together’s … plus DIY paper favor cones

collage.png

by Trenda

This fun scarecrow-themed table sets the playful mood for any of your autumn get-together’s, wiener roasts, or autumn evenings spent around the bonfire, toasting s’mores!  While I set my “scarecrow table” the scarecrow’s song from “The Wizard of Oz” kept going through my mind!  The scarecrow’s lament (sigh!) was that his head was stuffed with straw.   If  he only had a brain, he stated  “Oh, I — could tell you why –the ocean meets the shore.  I could tell you things I’d never thought before — and then I’d sit — and think some more!” (: 

tscape2.png

Keeping with the theme of the scarecrow and his “patched” clothes, I covered my table with a “patchwork” quilt that a dear neighbor made and gave to me, set the table with cheerful Fiestaware, and tucked cutlery into a bright basket make of straw (:    Look at these cute paper favor cones!  They are so easy to make and … simply using different paper and trimmings, can be used for so many different occasions!

cones2.png

To  make these favor cones, I chose stock paper in bright harvest colors (I bought mine in a packet at Hobby Lobby) Roll the colored sheet of paper to form a cone and glue the edge down with white craft glue. I used a hole puncher to punch 1 hole on either side of the glued edge and knotted different colors of raffia to trim my colorful paper cones (line favor cones with parchment paper and fill with candied popcorn or pumpkin flavored Chex mix! (click here for pumpkin-spice Chex mix recipe)   The raffia replicates the look of the straw stuffing of the scarecrows, but it is actually a product of the native Raffia Palm Trees, from the tropical areas of Africa!

cones.png

Generous sized napkins with frayed edges (like the tattered clothes of the scarecrow!) are slipped into my DIY mini-grapevine napkin rings (click here for DIY autumn napkin rings) and have a charming little scarecrow adornment, tucked among the layers of napkin.  Remember the cute DIY autumn drink markers we learned how to make?  See where I have clipped them around the base of each stemmed glass to add some seasonal flair to my autumn setting.  (Click here for DIY Autumn Leaf Drink Markers)

plates.png

The centerpiece is just a collection of different sized scarecrows gathered together to  ward off any unwanted “critters” that might want to attend the party! (;

lakeview.png

If the weather cooperates, our tabletop of scarecrows will be presiding over a wiener roast and a tray full of these individualized s’more packets!  (Click here for printable S’more labels)

s'mores.png

As I finish this post, I’m still humming the scarecrow’s song from “The Wizard of Oz” and I have to smile as I remember his last words … “with the thoughts I’d be thinkin’ I’d become another Lincoln, if I only had a brain …” (:

Hope You Have A … ”  by Trenda

 wonderful weekend!

Autumn Poem by Trenda .png

From my cottage to yours  ~  Trenda

scripture scarecrow.png

Thank you so much for spending some time with me today!  I’d love to hear from you and I am truly delighted, reading what you have to say.   Please leave any questions you may have or comments, below.  Don’t be dismayed if you don’t see your comment “appear” right away.  Word Press checks everything I receive for SPAM and all have to be approved, before posting.

A “Welcome Home” … for Thanksgiving

by Trenda at Cottage Green on the Lake

The slow progression of autumn here in East Texas has suddenly quickened and the sights and sounds of  the season have become tangible.  The crickets are softly droning (a decrescendo to their summer song!) as they sing their final chorus … there is a hush in the air that is marked by a distant caw of a crow or the occasional rustle of leaves as an acorn descends through the branches … a muffled “plop” heard, when it hits the ground … and the leaves of our Ash tree, that drape over the lake, are transforming into a beautiful shade of yellow.

ash2.png

The view beyond our windows reminds us that the “season” of Thanksgiving is upon us, though, like Thoreau … “I am grateful for what I am and have.  My thanksgiving is perpetual.”

thoreau-last

 As I “dress” our home and get it ready for the holidays, I am going to start with our front door … it is the first thing that welcomes and greets our family and friends when they visit.  The front door sets the stage of what people can “expect” to find inside your home and should be a reflection of the warmth and welcome you want to portray within your home.

front-door-collage
I began decorating our door by hanging this beautiful wreath that a dear friend of mine made.  Then I took a bundle of wrapped grapevine (I bought mine at Hobby Lobby in the section where grapevine wreaths are hanging) and cut the coil of grapevine in half with wire cutters – this gave me 2 sections of grapevine for each side of the door.  After cutting the 2 sections, I pulled the grapevine to loosen the taut coils.  My husband hammered nails into our door frame for me to impale the grapevine on.  At the base of the door, where the tension was greatest, I added a pipe cleaner and wrapped the grapevine around the nail, using the pipe cleaner to firmly hold the grapevine to the door frame.

front-door

Then I began inserting leaves that I cut from an autumn swag into the twigs of the grapevine.  I also wired some pumpkins, squash, and chrysanthemums to the grapevine to add interest and fullness  … but left enough of the grapevine bare, so it wouldn’t become too “visually heavy” or overbearing.

autumn-door-frame

I placed a pumpkin (leftover from Halloween!) next to this quaint basket that I found years ago.  I’ve always thought the wooden duck looked
“right at home” here at the lake and it is always handy, near our front door and holds walking sticks, any dripping umbrellas, and a fragrant “bouquet” of eucalyptus.  Tip: Eucalyptus makes the entry to your home smell wonderful, and it is also a natural deterrent for spiders!

duckie.png

Mr. and Mrs. Pilgrim greet all Thanksgiving visitors. (:  We ARE … grateful, thankful, blessed!

pilgrims.png

Our deck has several built into benches and on this one, next to the front door, I’ve “tipped my hat” to the season and added a little whimsy with these 2 Pilgrim door greeters!  I love this chalkboard a friend made for me, with it’s rustic look and cedar framework; I use it all the time … “4theseasons” to write holiday messages on, or for keeping track of horseshoe scores! (:

thanks final.png

I hope these ideas will help you and that you’ll have fun creating and making your entryway and door a “welcome home” for Thanksgiving!

“I am grateful for what I am and have.  My thanksgiving is perpetual.”

In everything give thanks.”

From my cottage to yours  ~  Trenda

Thank you so much for spending some time with me today!  I’d love to hear from you and I am truly delighted, reading what you have to say.  Please leave any questions you may have or comments, below.  Don’t be dismayed if you don’t see your comment “appear” right away.  Word Press checks everything I receive for SPAM and all have to be approved, before posting.


“Fall” … in love & Harvest Moon Pies by Trenda from Cottage Green on the Lake

“Fall” … in love with the autumn season, colored leaves, cooler days and all things cozy.  Here in Texas, September is just the prelude of the overture to come, but change is in the air; hayfields are filled with freshly baled hay, the little winter coots have returned and last night a gorgeous “harvest moon” rose slowly over the lake. <!–more–>

Now, I think you are going to “Fall” … in love with these darling treats … Harvest Moon Pies.   This idea is from a past addition of Southern Living Magazine and I was delighted to find that these desserts were easy to assemble and  almost too cute to eat!  I know we’re going to need more Moon Pies for Halloween  … to decorate with all things spooky!

piccollage

These decorated Moon Pies are a fun addition to any holiday and are a wonderful project for you and your children to enjoy doing together.  Have fun decorating each Moon Pie differently and you’ll finally have a use (if you’re like me!) for all those adorable holiday sprinkles, that seem to amass in your cabinets! (:piccollage1085342.png

I used a wire Maple leaf basket I had tucked away in my “4 the seasons” closet – my sweet hubby built for me!  I put a block of florist foam in the bottom of the basket to anchor and display my Harvest Moon Pies and covered the foam with some shredded black and orange paper I had.  Then, I wrapped each of my decorated Harvest Moon Pies in a cellophane favor bag. (I bought my cellophane bags from Hobby Lobby, they were located on the candy-making aisle along with the Wilton Candy Melts and “lollipop” sticks) and added autumn-colored ribbons around each handle.

I love the novelty of this charming and creative centerpiece, but I also love that they can be given as party favors, since I individually wrapped each of my Harvest Moon Pies!

piccollage

HARVEST MOON PIES/ LEVEL: EASY/  YIELD: 1 DOZEN

INGREDIENTS AND ITEMS NEEDED:

piccollage108309

INGREDIENTS & ITEMS NEEDED:

  • 12 lollipop sticks
  • 2 packages Chocolate Flavor Moon Pies (6 to each small package)
  • 1 package vanilla candy melts – orange colored (I used Wilton’s Candy Melts)
  • 1 zip-type plastic bag or cake decorator bag  
  • scissors
  • wax paper
  • assorted sugar cake decorations (I used Wilton’s leaf shaped decorations)
  • assorted seasonal sprinkles
  • ribbon in autumn colors
  • Decorator Icing

DIRECTIONS:

  1. Insert 1 lollipop stick, 2 to 3 inches into marshmallow center of Moon Pie
  2. Microwave candy melts in a glass bowl at Medium (50 percent power) 1 minute or until melted, stirring once. (read detailed instructions on the back of candy bag) Spoon into your plastic bag or cake decorator bag, push air out and seal.
  3.  Snip a small hole in 1 corner of the bag; pipe melted candy around where the lollipop stick meets the Moon Pie to hold it securely in place.  Lay flat on wax paper and let stand until firm.  *SEE NOTE BELOW
  4. Pipe a fun border of melted candy around the edges of the Moon Pie or pipe squiggles across the top; then add sprinkles, cake sugar or attach candy decorations (ie: candy corn, pumpkins, etc.) using melted candies or frosting

*Be sure and help your little ones insert the candy stick into their Harvest Moon Pie and pipe melted candy around lollipop stick for them. 

I hope you “Fall” … in love with these Harvest Moon Pies  and enjoy making and eating them, as much as we did! (:

There are so many thing to love about Fall!

img_6439118184

“Fall … in love with all things pumpkin!

piccollage116899

“Fall … in love with harvest moons and breezy nights

piccollage77783

“Fall” … in love with hay bales gleaming.

piccollage145315

 “Fall” … in love with yellow leaves, lying on the grass.

piccollage149117

“Fall” … in love with children playing … laughing, giggling.

piccollage79285

“Fall” … in love with FALL!

piccollage152939

From my cottage to yours ~ Trenda 

%d bloggers like this: