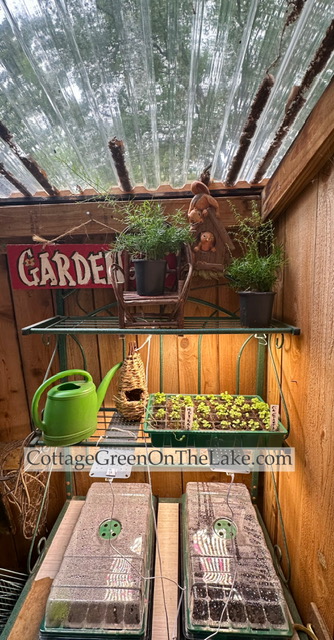
The seeds I planted in April are almost ready to be planted in their new homes outside! The little seeds have spent a cozy Spring on warm heat mats and cosseted under cozy moisture domes. Now the last step I need to do is to thin out the seedlings and harden off the plants before they’re transplanted outside.
Continue reading “Spring Gardening in the Cottage Greenhouse: How to Prepare Seedlings for Outdoors”Tag: spring

DIY Homemade Seed Packets: A Fun Gardening Project
“What a playhouse is to a child, a potting shed is to a gardener”
~ Unknown
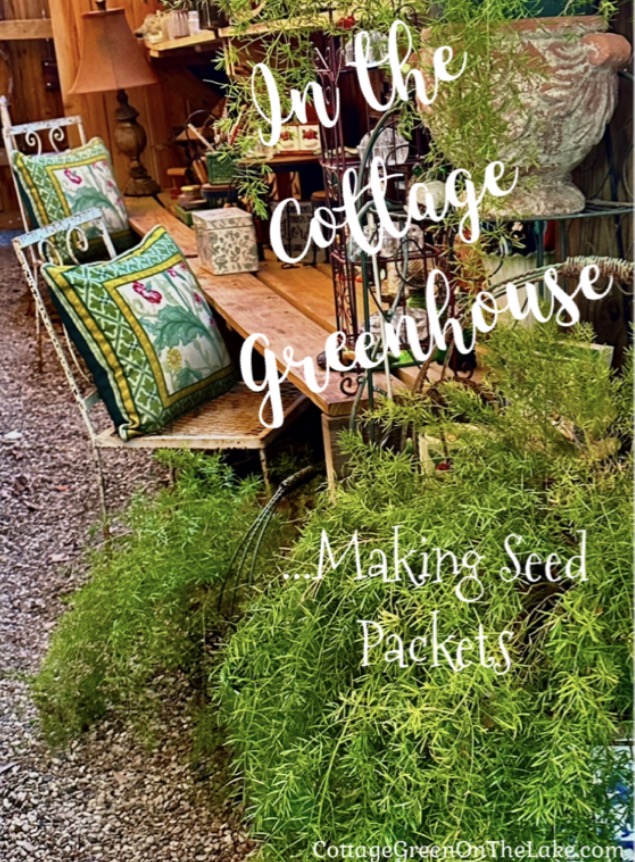
After days of colder-than-normal temperatures, the sunshine beckoned and it seemed like a good day to “go outside and play”…in the greenhouse. It was still chilly outside, but the temperature in the Cottage Greenhouse was 72 degrees…and a perfect day for dreaming of Spring flowers.
Continue reading “DIY Homemade Seed Packets: A Fun Gardening Project”One must maintain a little bit of summer, even in the middle of winter.” ~ Henry David Thoreau
Share this:

Easter Place Cards and Favors-DIY Mini Flower Pots
Ready for Easter and perched on a stack of plates in the cupboard, this little planter would look fitting in Old Mrs. Rabbit’s shop alongside her… “rabbit-wool mittens and muffatees…her herbs, and rosemary tea, and rabbit-tobacco (which is what we call lavender.)”

It’s hard to believe it’s time to celebrate another glorious Easter! Here’s a fun and easy DIY favor that is so whimsical and garden-esque, even Peter Rabbit would happily forgo marauding Mr. McGregor’s garden patch to come sit at your Easter table! These little flowerpots, covered in chippy white paint and decoupaged labels, have twiggy handles adorning their tops and look like rustic, little baskets! Guest’s names are written on the back and the flowerpots serve double-duty as charming “place cards” (showing every bunny where to sit) and can also be given as favors, and a sweet remembrance of the day.
Continue reading “Easter Place Cards and Favors-DIY Mini Flower Pots”Share this:

Part 2 Spring in the Cottage Greenhouse…DIY Whimsical Spring Arrangements
…the wild iris kept waving and beckoning me to come over. Finally, worn down by their flirting and persistence, I stopped working and went into the cottage greenhouse to fetch my trowel.
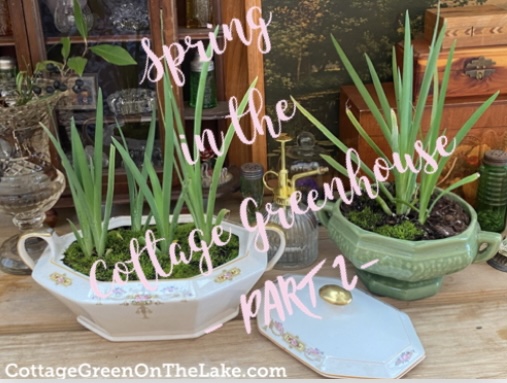
Dainty wood violets, wild irises, perky daffodils, fragrant hyacinth’s, azaleas in all shades of pink, creamy white Lady Banks roses, and woodland ferns are making their spring debut at Cottage Green!

Continue reading “Part 2 Spring in the Cottage Greenhouse…DIY Whimsical Spring Arrangements”
Share this:

Antique and Flea Market Finds
“I saw this darling, heart-shaped mirror glimmering and beckoning to me before I even got to the booth where it was hanging, and felt my heart quicken. The antique floral embellishment at the top of the mirror and the sweet, scalloped edges around the heart spoke to me, and told me, “You are taking me home.”

Recently Richard, my dear Huckleberry Friend, and I went on a trip and had a great time stopping at different antique shops and flea markets along the way. Frequently, I am asked (particularly about the wide assortment of items I use to decorate the Cottage Greenhouse) where I find the items I use in decorating. So, today I’m sharing some of the treasures we “two drifters, off to see the world” found on our trip, and what each item cost.
Moon river, wider than a mile
I'm crossing you in style some day
Oh, dream maker, you heart breaker
Wherever you're going, I'm going your way
Two drifters, off to see the world
There's such a lot of world to see
We're after the same rainbow's end
Waiting 'round the bend
My Huckleberry friend
Moon river and me


 Moon River ~ written by Johnny Mercer and Henry Mancini
Continue reading “Antique and Flea Market Finds”
Share this:

A Tablescape and Spring Buffet Plus, Decorating Tips for your Home
“See! The winter is past; the rains are over and gone. Flowers appear on the earth; the season of singing has come, the cooing of doves is heard in our land.” Song of Solomon 2:11-12
Brilliant blue skies, birds in construction mode flying back and forth with building materials in their beaks, Mourning Doves cooing, Barn Swallows swooping, Mockingbird’s singing, beautiful wisteria, azaleas, and roses blooming in all shades of pretty…it’s Spring!
Continue reading “A Tablescape and Spring Buffet Plus, Decorating Tips for your Home”“Adopt the pace of nature: her secret is patience.”
Ralph Waldo Emerson
Share this:

Springtime in the Cottage Greenhouse…planting flower seed trays and vegetables
It was a delightful day to be working outside in the Cottage Greenhouse. In my cozy shelter, I was protected from the cool, north wind…surrounded by smells of earth and growing things, soothed with a background of birdsong, and the greenhouse door was opened to the lake beyond.

It was one of those March days when the sun shines hot and the wind blows cold: when it is summer in the light, and winter in the shade.”
Charles Dickens
It was a delightful day to be working outside in the Cottage Greenhouse. In my cozy shelter, I was protected from the cool north wind…surrounded by smells of earth and growing things, soothed with a background of birdsong, and the greenhouse door was opened to the lake beyond.

Share this:

The Cottage Greenhouse, Garden Pathway & New Landscape Beds
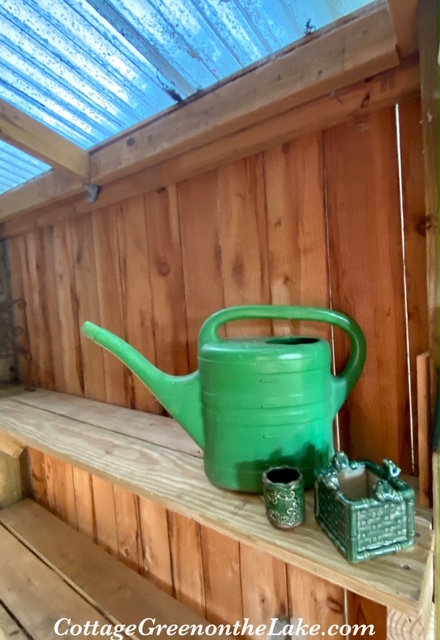
Inside the greenhouse is cozy and “crunchy” with a pea gravel floor and smells wonderfully of cedar, cut grass, and earthy things. There are rows of shelves for bedding plants, hangers for trowels and garden gloves, and a little garden desk that Richard built “just for me.” <3

After I took the picture of my Frog Prince standing in an enchanted forest of Wandering Jew in my blog “Charcuterie Charm” Richard and I both realized the plant had wandered way past it’s confine’s; it had overtaken the flower bed, tumbled over the brick wall, and begun a march across the patio. Richard cleared out all the “wandering nomads” then he reworked, leveled, and widened the old pathway that leads to our greenhouse. The greenhouse is tucked away on the side of our house, nestled under the boughs of a Cherry Laurel.

We’ve always used the greenhouse for storage and to house an occasional winter resident or two (an Areca Palm and some hanging plants) but since we’ve lived here, it has never been “user friendly” or very functional … until my sweet hubby remodeled the whole greenhouse and turned it into my “greenhouse dream come true.”


Now, the greenhouse has wide cedar doors that swing open on black hinges, cedar sides and a new clear greenhouse roof that rain merrily patters and plays on.

Inside the greenhouse is cozy and “crunchy” with a pea gravel floor and smells wonderfully of cedar, cut grass, and earthy things. There are rows of shelves for bedding plants, hangers for trowels and garden gloves, and a little garden desk that Richard built “just for me.” <3

The pathway Richard widened and re-lay from the greenhouse goes past new, curvy landscape beds …

… a bench my sister painted at the base of a large Oak tree

… and past the elevated landscape bed the Wandering Jew had taken over. Now, the only thing in this freshly mulched bed is a Cherry Laurel and a hedge of Richard Harland Boxwood’s that I planted 27 years ago. I bet you can guess why I picked that variety! (;

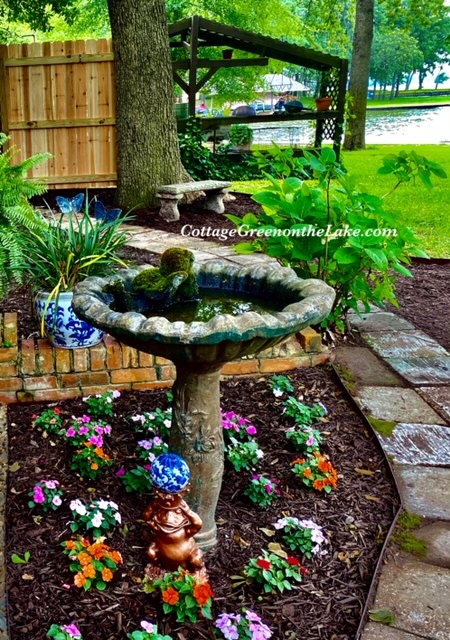
The pathway continues and meanders around the birdbath

… to the patio below.
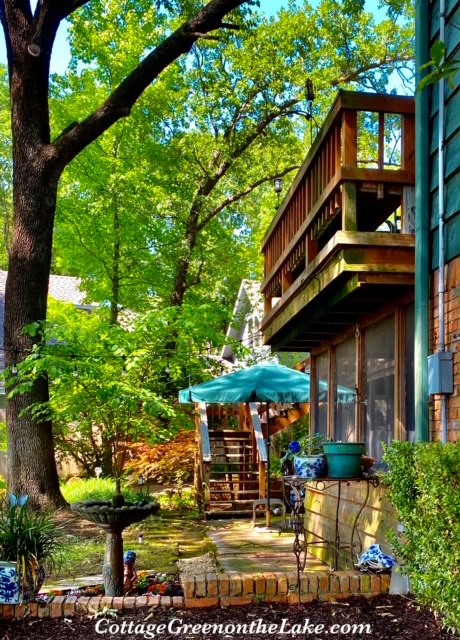
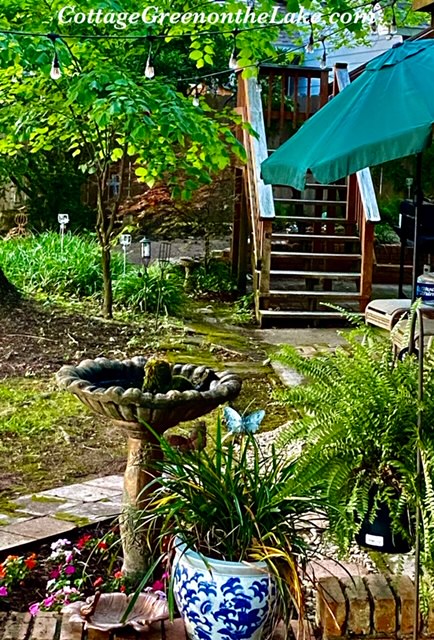

View from the lower patio … I filled the flower bed beneath the birdbath with these perky impatiens.(It’s the only thing my dear husband and private medic would “allow me” to do, afraid I’d overdue.) Soon, the flowers will spill over the edges of the bed and tumble out onto the pathway.
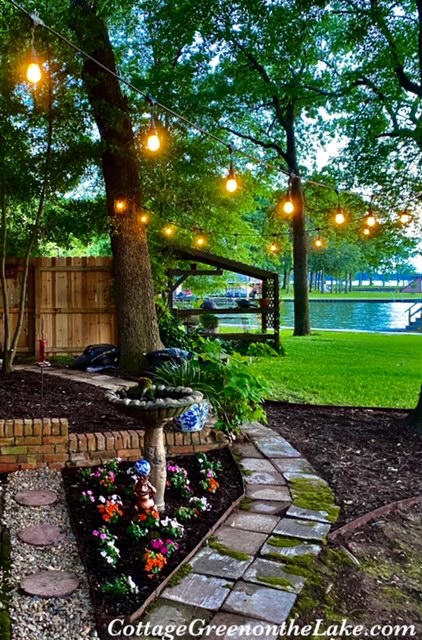
Up a slight incline past the new landscape beds and our “upper” seating area on the left … then on toward the greenhouse.

Patio lights glowing in the twilight
I love and cultivate the moss that grows around our cottage. When Richard was working on the path, he sweetly scraped off the moss that had grown on the old pathway, so I could replant it. I smooshed the moss down into the cracks and crevices, and along the sides of the pathway so it would look natural.

I am already having fun pondering what to do with the upper seating area and I am happily anticipating “decorating” my greenhouse and filling my new fluffed and waiting “beds.” I’ve ordered some Autumn Ember Encore Azaleas to plant around the Ash Tree and the earliest expected delivery date for their arrival is June 1st. I’m also envisioning some Red Rover Heucherella and would love to tuck in some Brilliance Autumn Fern Dryopteris, but haven’t found any on-line, yet! Look for more pictures, later!
Spring work is going on with joyful enthusiasm.
John Muir
~~~~~~~~~~~~~~~~~~~~~~~~~~~~~~~~~~~~~~~~~
From my cottage to yours ~ Trenda

Thank you for reading my blog. To have all my posts delivered directly to your email address, just click on FOLLOW in the post above … or click on my site: cottagegreenonthelake.com
Follow me on PINTEREST at Trenda@cottagegreenonthelake.com

Share this:

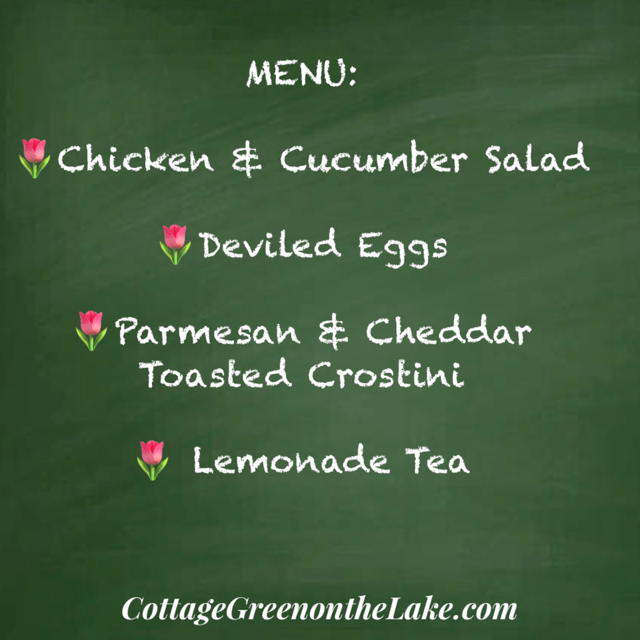
Lakeside Spring Picnic and Recipe for Chicken and Cucumber Salad
Yesterday it was such beautiful day here in Texas, I started day dreaming of picnic’s! Picnics with ruffly edged napkins, table linens, quaint dishes, and (usually my last consideration when “dreaming up” picnics) what picnic food to fix. With my daydream in mind, I went inside and opened our linen cabinet that’s filled with all kinds of vintage “lovely’s.”


My dear followers, I can never thank you enough for all your prayers, “get well” wishes, and notes you’ve written to me during these last 2 1/2 months. Knowing you cared meant so much to me. We have certainly felt the Lord’s Presence and seen His Intervention again and again since I first went into the hospital. Thank you so much for brightening my days.
<3 Trenda

I am slowly getting better though, frustratingly, it doesn’t take very much effort to exhaust me. I’m supposed to spend as much time as possible outside, and yesterday it was such beautiful day here in Texas, I started day dreaming of picnic’s! Picnics with ruffly edged napkins, table linens, quaint dishes, and (usually my last consideration when “dreaming up” picnics) what picnic food to fix. With my daydream in mind, I went inside to see what I could find in our linen cabinet that’s filled with all kinds of vintage “lovely’s.”

… and chose these White Battenberg napkins edged with scallops of lace and a bright green and white gingham runner trimmed with cheery orange stitches.

After picking out the napkins and table runner I wanted to use, I went to our corner hutch in the kitchen downstairs and started picking out dishes and deciding what picnic food to serve on each.
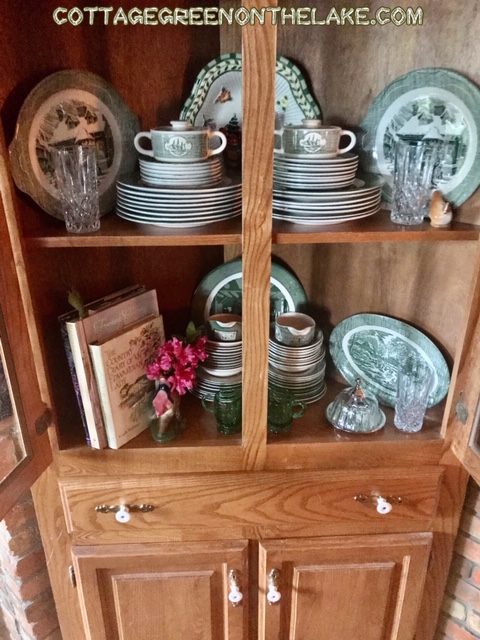
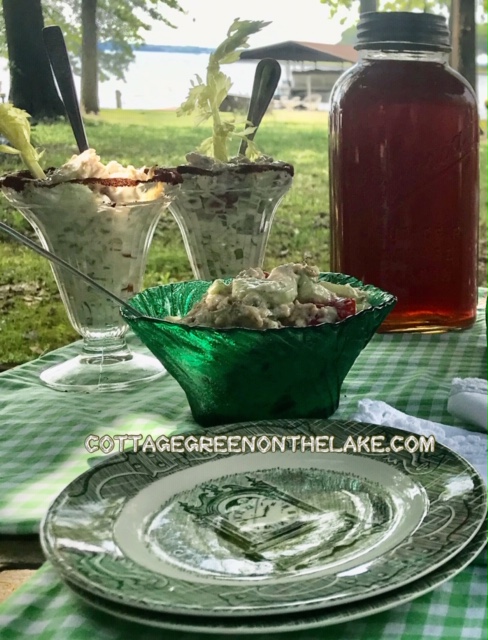
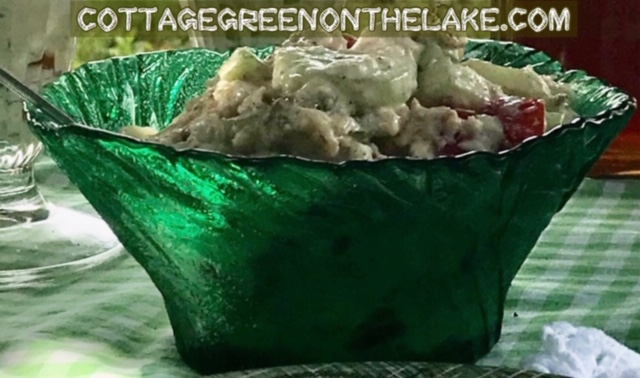
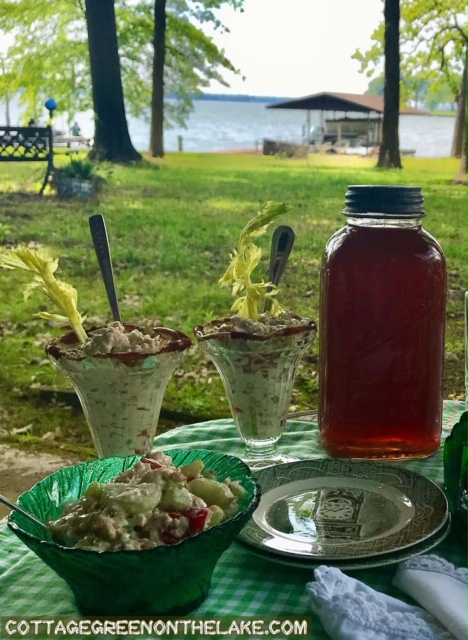
I pulled out 2 soda fountain glasses from the bottom cabinets and thought how cute they would look filled with something other than the usual ice cream! With my mind whirling with that bit of whimsy, the rest of the menu came easy and I selected my dishes … a darling egg plate, some green and white salad plates to match the table runner, a dark green bowl with lines etched into the glass to look like lettuce leaves, a banana split tray (helping to carry out the soda fountain theme!) and a quart-sized Mason jar my mother gave to me.
I quickly chopped cucumber, cherry tomatoes, and chicken and tossed in some other yummy ingredients for an easy “main course” salad (recipe below) then dipped the rims of the soda glasses in lemon juice and dusted the edges with paprika. I added “scoops” of chicken salad to the soda fountain glasses and topped it all off with a final touch … celery “straws.”(;

Since there were only 2 of us, I put the extra chicken salad into the green bowl with etched leaves.

Then I deviled some eggs to place in this sweet hen “egg tray.”

Crystal tumblers filled with ice … and Lemonade Tea, made in my mother’s Mason jar beckoned us to “come sit” and Toasted Parmesan and Cheddar Toasted Crostini (click on highlighted link to see how to make) are stacked appealingly in an antique, scalloped edged, banana split tray.

Green and White “Old Curiosity Shop” salad plates by Royal (USA)
Chicken & Cucumber Salad
~ recipe by Trenda at Cottage Green on the Lake
- 1 – 12.5 oz can Chicken Breast (drained)
- 1 English cucumber (English cucumbers are the extra long cucumbers; they are milder in taste and have fewer seeds than their American cousin’s! (:
- Cherry tomatoes (I used 14 tomatoes)
- 1/2 cup Ranch Dressing (I use Ken’s Steak House Ranch)
- 1/3 cup roasted and salted sunflower kernels
- black pepper – to taste
- 1/2 cup French’s Crispy Fried Onions (added, right before serving to remain crispy)

Instructions:
Wash, peel, and slice cucumber lengthwise to form “half round” slices. Place all sliced cucumber into a medium sized bowl. Halve cherry tomatoes (add tomatoes according to your own taste and preference; I prefer fewer tomatoes than cucumbers in my salad and I used 14 cherry tomatoes) Add drained chicken to the cucumber and tomato mixture and using a fork, separate the chicken into bite sized pieces. To the mixture, add 1/2 cup Ranch dressing, 1/3 cup sunflower kernels, and pepper to taste. Refrigerate until ready to serve. Before serving, add 1/2 cup of French’s Crispy Fried Onions, stir into salad and serve.
Lakeside picnic on a beautiful spring day at Cottage Green.
After Richard and I were “done” with our picnic I was “done in” (: and just sat outside the rest of the afternoon until the sun went down.

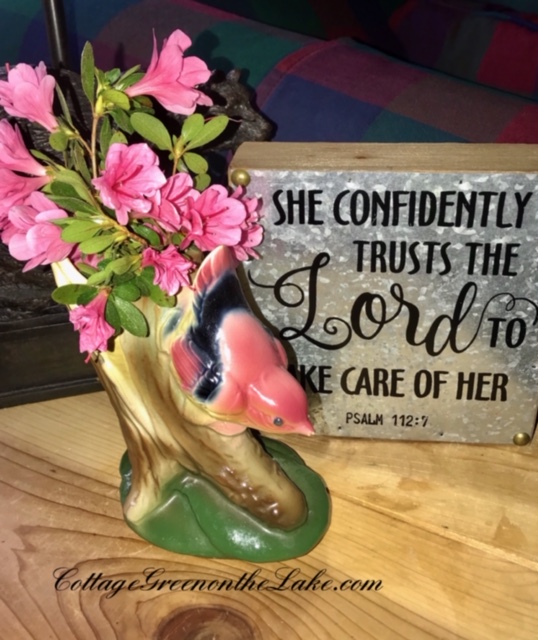
Now, I want to share one more thing with you that I hope and pray will help you during these troubling times. A dear friend sent me this little tin sign after I got out of the hospital and I kept it right where I could see it during those first scary weeks after I got home. I would look at the scripture inscribed on this sign and read over and over … “She confidently trusts the Lord to take care of her.” Psalms 112:7 Hmmm … “She confidently trusts!” So instead of worrying each day I decided I needed to confidently trust and be secure in the knowledge that the Lord WOULD take care of me. Daily I prayed, “Lord, help me to truly embody that verse and be confident that YOU will take care of me. Thank you for Your Word that promises that security and blessed assurance. Thank you Jesus, for loving me and thank you for being my Savior and my Friend.” The “New International Version” of the Bible and translation of that same verse is an anchor we can hold on to in “these days” we are living through and to remember in the coming weeks … “They will have no fear of bad news; their hearts are steadfast, trusting in the Lord.” Psalms 112:7 I am praying this verse for each of you during this time. “Have no fear of bad news … be steadfast … trust the Lord to take care of you. <3 If you long for that security and relationship with the Lord where you can trust that He will take care of you, no matter what the circumstances, please go to the top of my blog on the right side titled ABOUT ME … and click on My Faith in Jesus Christ. It’s as easy as saying A-B-C and it will change your life and your eternal life forever! The Bible says, “For God so loved the world that he gave his one and only Son, that whoever believes in him shall not perish, but have eternal life.” John 3:16 If you have any questions or you would like me to pray with you, please don’t hesitate to write me and ask. I’ve already prayed for everyone that reads this blog and the Lord already knows your name. <3
From my cottage to yours ~ Trenda
Thank you for reading my blog! To have all my posts delivered directly to your email address, just click on FOLLOW in the post above … or click on my site: Trenda @cottagegreenonthelake.com
Join me on Pinterest at Trenda@cottagegreenonthelake
Share this:

Charcuterie Charm … the tips and how to’s of charcuterie arrangements
I hoped to be inspired by the view and listening to the birds tweedle-dee-dee’ing … however, just the opposite happened; clever words are much harder to conjure up when surrounded by such bliss.

~ by Trenda
Today a sweet neighbor slipped into our garden gate and left a beautiful bouquet of roses and a get well card on our table outside. That was the only invitation and incentive I needed to fill a vase for my posy, grab my computer, and sit outside to write. The roses left by the sweet neighbor and their perfume kept me company while dear Richard worked on our garage door pulley that had broken … the nerve of the pulley breaking on such a day! I hoped to be inspired by the view and listening to the birds tweedle-dee-dee’ing … however, just the opposite happened; clever words are much harder to conjure up when surrounded by such bliss. So away from the dreamy pondering’s and on to “strings and sealing wax and other fancy stuff”

Earlier this spring, Richard and I were sitting outside and it was time to start thinking about dinner. I didn’t really feel like “fixing” anything and I was reluctant for our evening outside to end. I went inside and started rummaging around in our cabinets and refrigerator to see what I could put together that would be quick and easy, substantial enough for a meal, and convenient enough to carry outside to eat. Hmmm … I pulled crackers and pretzels from the cabinets … pickled okra and cheeses out of the refrigerator … one apple, some deli roast chicken … a little of this and that. Then, I got out a platter and started arranging “my collection of foods” so they looked appealing and appetizing. I was pleased how quickly and easily it all came together … a platter of finger foods, a thermos for hot tea, and voila … dinner was ready! A charming charcuterie platter, just the perfect thing for a beautiful spring evening outdoors!

Charcuterie (pronounced shar-cute-uh-ree) is a French word and in Miriam Webster’s time was … “a delicatessen specializing in dressed meats and meat dishes.” Today, the trendy word charcuterie is a reference to any foods (appetizer’s, finger foods, or dessert’s) that are arranged on a cutting board or actual charcuterie board. The charcuterie boards available in the stores are vast and the selections range from elegant to rustic … marble slabs to knotty boards … and come in all shapes and sizes.

However, I love being enterprising and using items I already have. Platters, different sized chopping boards, and casserole dishes all work well for arranging and displaying charcuterie. Look in your kitchen and re-purpose items you already have for your own charcuterie display … any flat and “food safe” surface can be used. A 13 x 9 casserole dish makes an excellent base and helps keep accouterments in place. I use pretty, ruffly, “Loose Leaf Lettuce” to camouflage the sides of my casserole dish and the lettuce adds dimension to my charcuterie display. click here
Our Simple Charcuterie Platter
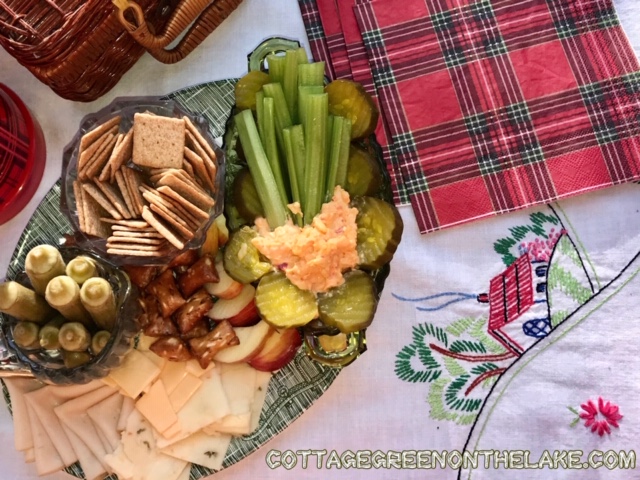
- Roasted chicken
- Pepperjack cheese
- American cheese
- Pickled okra
- Honeycrisp apple
- Stuffed peanut butter pretzels
- Wheat Thins crackers
- Zesty bread & butter pickles
- Pimiento cheese
- Celery
Charcuterie arrangement tips:
- Roll or fold deli meats
- Cube or cut cheeses into smaller squares
- Cut fruits and vegetables into bite sized pieces
- Arrange foods with contrasting colors and textures to compliment each other and make your charcuterie look more appetizing
- Incorporate smaller dishes on your board or platter to create different heights and to add interest. Pictured Below … Crackers that tend to “spread out” and look messy on a platter I have contained in a miniature pedestal bowl. Now they stand upright, and look “fetching.” (: Another low oblong dish holds a mound of pimiento cheese. Celery sticks are on one side, ready for dipping while Zesty Bread & Butter pickles encircle the golden cheese. Small dishes are also a clever way to contain “wayward” foods … like my pickled okra! The okra, grouped together and standing upright in a glass creamer makes them look more appealing and urges in an “Alice in Wonderland” kind of way … “EAT ME!”

With my charcuterie platter ready, I gathered up a few more pieces of charm … an antique table runner trimmed in red, sprinkled with red daisy’s, and dear little cottages … a red plaid thermos to hold our tea … and tartan red napkins fit perfectly in our grand daughter’s miniature wicker picnic basket.

Variety is the very spice of life, that gives it all it’s flavor
William Cowper
Richard loved our impromptu dinner! The informality of the charcuterie platter added a subtle charm and carefree feeling to our al fresco dining that evening … and we stayed outside until the sun slipped away and tinged the sky and lake a beautiful pink.

More April “rambling’s” around our cottage … <3
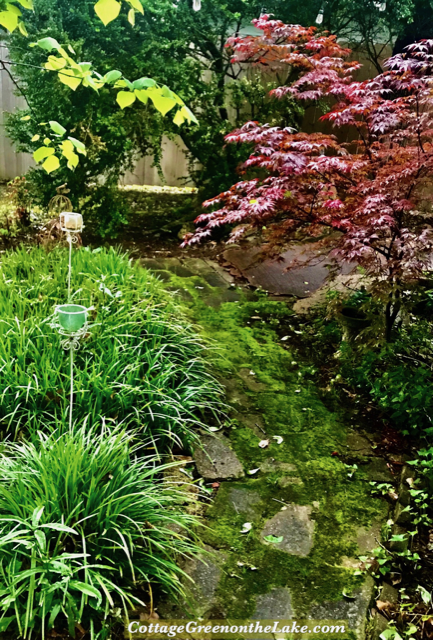
Encore Azaleas, Purple Iris, and Woodland Ferns in the rain … I went out while it was still dripping to take these pictures. The canopy of the trees shielded me for the most part, except when an occasional drop of rain would land on my shoulders … which only added to the loveliness.

Our Japanese Maple with a tiny birdbath I love tucked beneath it. Inscribed around the rim are the words, “His eye is on the sparrow.”

Our carefully cultivated moss-lined path and Japanese Maple almost glow in the light rain.
Easter was different this year since we couldn’t be with our kids and grand kids or have our traditional Family Hunt because of COVID – 19, but it was still a glorious day. “It was not about the bunny, it was about the LAMB.” After our Sunday Service on-line and Easter lunch, I made these decoupaged Easter Eggs using 2 different sets of napkins. “Let’s Go on an Easter Egg Hunt” by Meri Meri and Beatrix Potter’s dear little ducks, butterflies, pots, and pails alongside Peter Rabbit, and Jemima Puddle Duck look darling on these hard boiled eggs. It was a fun and sweet project on a reflective Easter afternoon.

This was just a forlorn and plain metal table that I covered with broken pieces of blue and white pottery. I love the look of the mossy enchantment and eclectic blend of the treasures I keep on this table. Shells gathered from the beaches of Texas, Florida, and Virginia … a collection of glass frogs that peep out of crevices … terra cotta planters with scrolls, frilly lines, and rusty iron rings … a bunny weather vane … and a little trough for thirsty birds inscribed with these words … “Life’s greatest treasures are life’s simplest pleasures.” A dear friend of our’s had a canvas of this picture made for me to hang in our greenhouse. <3
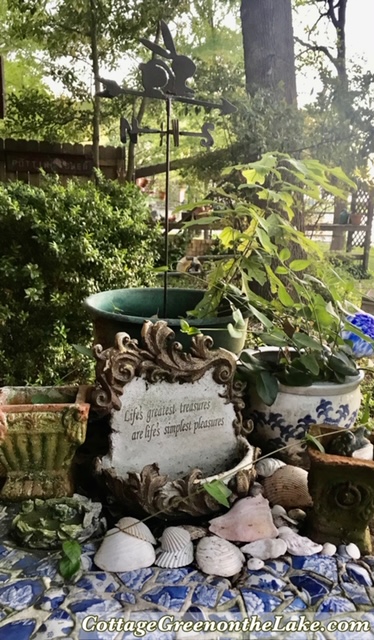
Setting below the table a little Frog Prince can barely peep above the spring flush of Wandering Jew (Tradescantia Fluminensis). He clings to his crown trying carefully to balance the blue and white pottery ball that perches there.

Hope you enjoyed seeing spring around our cottage and you are ready to have fun, assembling your own charcuterie board!
From my cottage to yours ~ Trenda

Thank you for reading my blog. To have all my posts delivered directly to your email address, just click on FOLLOW in the post above … or click on my site: cottagegreenonthelake.com
Follow me on PINTEREST at Trenda@cottagegreenonthelake.com

