
It’s almost Halloween, and this week I’m getting ready for our family’s traditional chili fest…always a fun, pumpkin filled evening with lots to eat, and festive treats. Our dinner menu for this special evening is always the same…steamy bowls filled with Chili con Carne served alongside a topping bar, a large salad, and a crockpot filled with delicious Pumpkin Spice Latte. No tricks are allowed, but it’s, “all about the treats” for the grandchildren. There will be Candy Corn Sugar Cookies and Harvest Moon Pies. For the adults, there’s cheesecake covered in a caramel and toffee drizzle, and for toasting, later, there’s Ghost Peep S’mores…all treats worthy of a night reserved for goosebumps and thrills.
Continue reading “Getting Ready for Halloween…DIY “Not So Spooky” Halloween Wreath”Tag: wreath

Thanksgiving Ideas, Tablescapes, Decorating Tips, DIY Projects and Recipes plus … Autumn in the Ozarks

I’ve gathered an assortment of Thanksgiving ideas, decorating tips, recipes, tablescapes, centerpieces, and DIY projects from “Thanksgiving’s Past” at Cottage Green. For the full instructions and details about each, click on the highlighted links. I am so sorry, some of these older pictures are really “grainy” and are not very clear.
A Welcome Home for Thanksgiving has some ideas on how to “dress up” your front porch and a simple DIY project using grapevine around your front door frame.

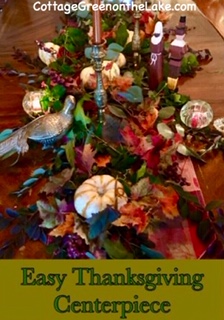
Click on Easy Thanksgiving Centerpiece for one of my favorite ways to create a centerpiece. It assembles in minutes!
Here’s an easy appetizer to enjoy while awaiting the feast Easy Caramel Toffee Cream Cheese Dessert Dip served with apples. It’s harder to say than it is to put together! (;

Decadent ruby red Apple Cranberry Salad is the perfect mixture of cranberry tartness mixed with the sweet fillings of jello, pineapple, crispy apples and pecan pieces.

Click on autumn-napkin-rings for these charming, grapevine napkin rings. The silk autumn leaves and sprig of bittersweet brighten each table setting and they are so easy to make!

An Autumn Tablescape gives tips and how to’s for creating your own beautiful table for Thanksgiving.

Click on Easy Thanksgiving Favors to learn how to make these sweet little favors. Miniature Kraft bags are tied with colored twine and topped with a whimsical acorn and assemble in minutes.

Plus, on the same blog … learn how to make this decorative bow and this beautiful autumn wreath filled with glittered stalks of wheat, purple clusters of grapes and autumn leaves. Both the favors bags and the autumn wreath instructions are on Easy Thanksgiving Favors & DIY Autumn Wreath.

Now for a re-cap and some pictures of “all things autumn” from our recent trip to Missouri. Autumn is our favorite season to travel and we love seeing the beautiful colors of the Ozark deepen each day we’re there. Look at this blazing Maple Tree!

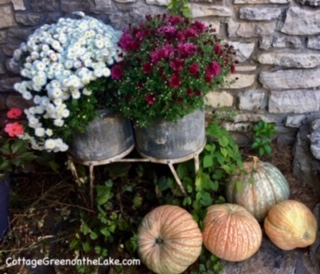
Chrysanthemums in rustic pails perched above squat-y pumpkins.
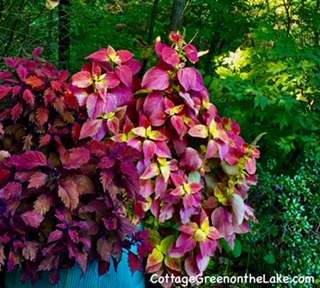
Fuchsia colored Coleus that almost glowed.
Short pumpkins, tall pumpkins, Cinderella’s and Baby Boo’s gathered beside more gorgeous Coleus.

Dark green, light green, orange, and white pumpkins contrast beautifully with a huge decorative pot of flowering Kale and burgundy Coleus.

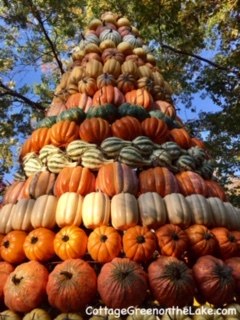
Look at these amazing pumpkin displays we saw at Silver Dollar City.

Pumpkins stacked to the treetops …
And my favorite … a darling little pumpkin cottage with a fern lined roof!

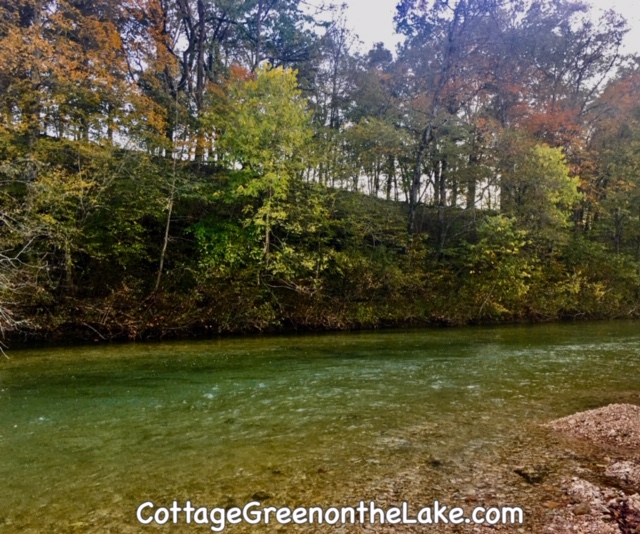
This spot was so enchanting, Richard and I walked along the creek bed and the only sounds were the burbling creek and the evening crickets.
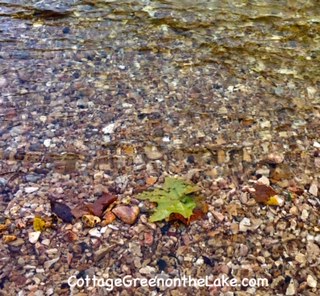
A lone Sycamore leaf drifting along in the crystal clear waters.
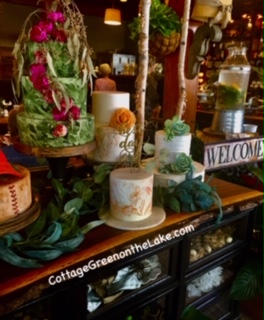
Look at this perfectly charming cafe … Sugar Leaf Cafe & Bakery where we had lunch one day.

… and came back for dessert on another day! (:
We loved the beauty and mystique of “Pumpkin Nights” at Silver Dollar City in Branson … with owls dangling from the treetops.

One King Owl ruling over his parliament of owls.

A camp site with glowing pumpkin flames.

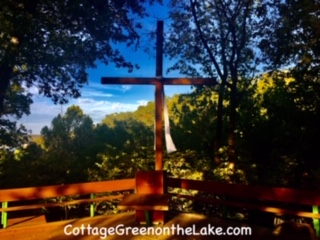
And the last picture … this “Chapel in the Woods” we were thrilled to find.
Hope you enjoyed the pictures of our vacation and the Thanksgiving ideas will inspire and motivate you as you begin planning your own Thanksgiving.
From my cottage to yours ~ Trenda

Thank you for reading my blog! Click on the Follow button above to have all my posts delivered directly to your email address AND follow me on Pinterest … Trenda@CottageGreenontheLake.com

Thanksgiving Ideas, Tablescapes, Decorating Tips, DIY Projects and Recipes plus … Autumn in the Ozarks
I’ve gathered an assortment of Thanksgiving ideas, decorating tips, recipes, tablescapes, centerpieces, and DIY projects from “Thanksgiving’s Past” at Cottage Green. For the full instructions and details about each, click on the highlighted links. I am so sorry, some of these older pictures are really “grainy” and are not very clear.
A Welcome Home for Thanksgiving has some ideas on how to “dress up” your front porch and a simple DIY project using grapevine around your front door frame.
Click on Easy Thanksgiving Centerpiece for one of my favorite ways to create a centerpiece. It assembles in minutes!
Here’s an easy appetizer to enjoy while awaiting the feast Easy Caramel Toffee Cream Cheese Dessert Dip served with apples. It’s harder to say than it is to put together! (;
Decadent ruby red Apple Cranberry Salad is the perfect mixture of cranberry tartness mixed with the sweet fillings of jello, pineapple, crispy apples and pecan pieces.
Click on autumn-napkin-rings for these charming, grapevine napkin rings. The silk autumn leaves and sprig of bittersweet brighten each table setting and they are so easy to make!
An Autumn Tablescape gives tips and how to’s for creating your own beautiful table for Thanksgiving.
Click on Easy Thanksgiving Favors to learn how to make these sweet little favors. Miniature Kraft bags are tied with colored twine and topped with a whimsical acorn and assemble in minutes.
Plus, on the same blog … learn how to make this decorative bow and this beautiful autumn wreath filled with glittered stalks of wheat, purple clusters of grapes and autumn leaves. Both the favors bags and the autumn wreath instructions are on Easy Thanksgiving Favors & DIY Autumn Wreath.
Now for a re-cap and some pictures of “all things autumn” from our recent trip to Missouri. Autumn is our favorite season to travel and we love seeing the beautiful colors of the Ozark deepen each day we’re there. Look at this blazing Maple Tree!
Chrysanthemums in rustic pails perched above squat-y pumpkins.
Fuchsia colored Coleus that almost glowed.
Short pumpkins, tall pumpkins, Cinderella’s and Baby Boo’s gathered beside more gorgeous Coleus.
Dark green, light green, orange, and white pumpkins contrast beautifully with a huge decorative pot of flowering Kale and burgundy Coleus.
Look at these amazing pumpkin displays we saw at Silver Dollar City.
Pumpkins stacked to the treetops …
And my favorite … a darling little pumpkin cottage with a fern lined roof!
This spot was so enchanting, Richard and I walked along the creek bed and the only sounds were the burbling creek and the evening crickets.
A lone Sycamore leaf drifting along in the crystal clear waters.
Look at this perfectly charming cafe … Sugar Leaf Cafe & Bakery where we had lunch one day.
… and came back for dessert on another day! (:
We loved the beauty and mystique of “Pumpkin Nights” at Silver Dollar City in Branson … with owls dangling from the treetops.
One King Owl ruling over his parliament of owls.
A camp site with glowing pumpkin flames.
And the last picture … this “Chapel in the Woods” we were thrilled to find.
Hope you enjoyed the pictures of our vacation and the Thanksgiving ideas will inspire and motivate you as you begin planning your own Thanksgiving.
From my cottage to yours ~ Trenda
Thank you for reading my blog! Click on the Follow button above to have all my posts delivered directly to your email address AND follow me on Pinterest … Trenda@CottageGreenontheLake.com
Share this:

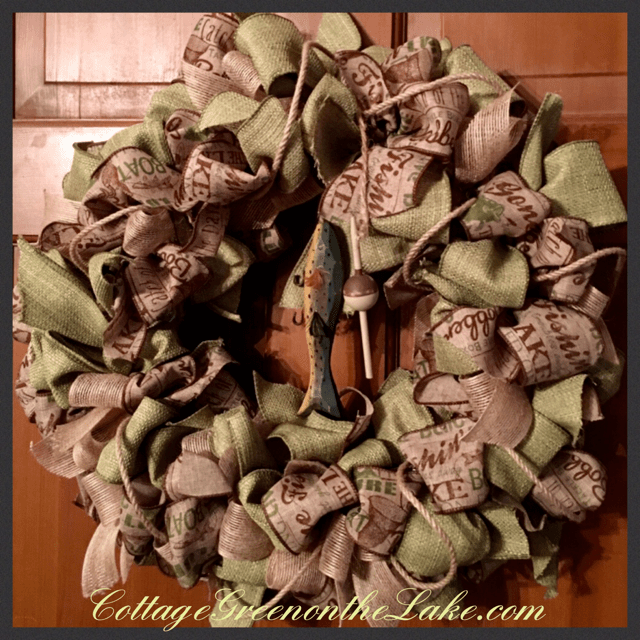
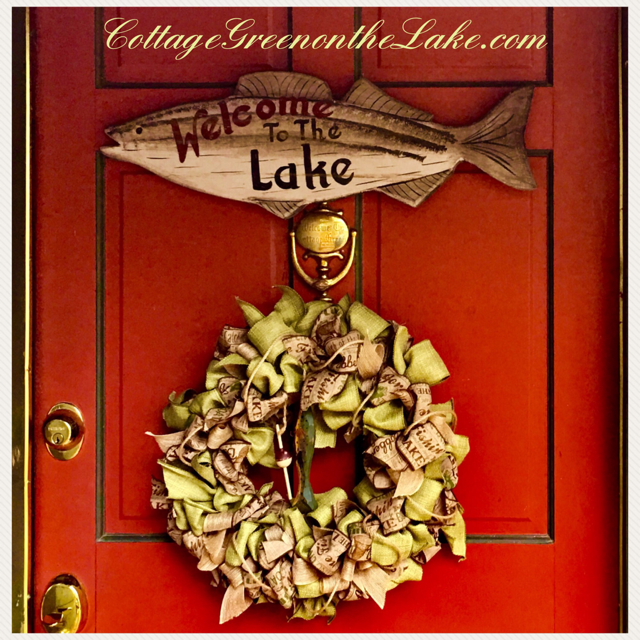
Welcome to the Lake … DIY Wreath for the Summer!
~ Trenda
I was delighted when I saw this rustic looking ribbon covered with fishing terms in bold fonts! I had been wanting to make a wreath for our front door and the “discovery” of that ribbon set “the theme” for my whole wreath. After finding the fishing ribbon, the rest of the coordinating ribbons were easily found. A coarse textured, sage green ribbon, a loose weaved burlap colored ribbon, a rope-like ribbon, and a wooden fish and bobber finished my purchases and I was ready to begin making my wreath. A wreath that would “say” … “Welcome to the long days of summer at the lake!”

Here are supplies I used making my lake wreath:
- straw wreath form
- floral pins
- scissors
- ruler
- ribbons – at least 3 different colors or widths
- wooden fish and bobber
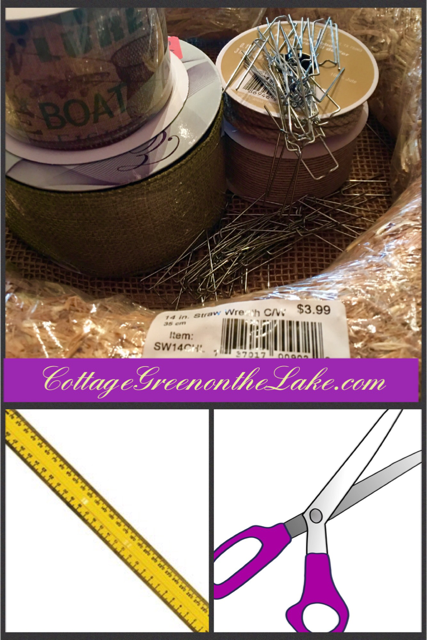
Only materials needed … scissors, a ruler, a straw wreath, floral pins, ribbon, and a wooden fish and bobber! (Note: Be sure to leave the clear plastic covering on your straw wreath to keep your wreath intact, and your straw from shedding all over your floor!)
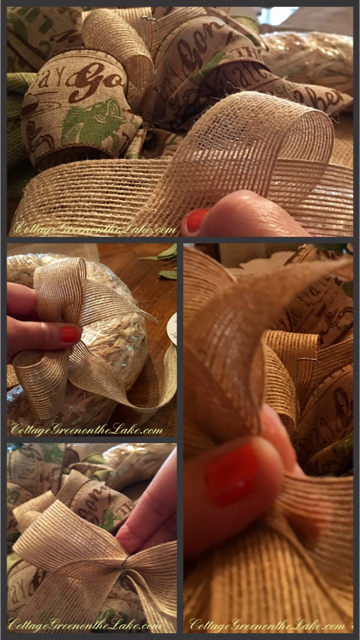
Instructions: (see pictures above)
- Measure a length of ribbon approximately 17″ long and cut. (Note: When you cut your ribbon, make a “pretty” diagonal cut since this will be the “tail” of your bow!)
- Grasp the cut length of ribbon in the middle and put your thumb on the center of the ribbon.
- Make a loop on each side of the center point (where you are holding the ribbon) These loops are the 2 loops your bow. Grasp where the 2 loops cross over each other, in the center.
- Bunch the center of the ribbon together and place a floral pin over the “bunched” ribbon and push the “bow” into the straw form, pushing the floral pin all the way down. (Note: the “tails” of your bow add fullness to your wreath!)
- Make your next bow, repeating the same steps but alternating the colors of the ribbon you are using.
- To make your wreath fuller, place your next bow so one side of the loop goes between the “tails” of the previous bow, then pin. Switch the direction of your bow each time before pinning.
- When your wreath is covered with bows, go back and fill in the sides and center where you see any gaps.
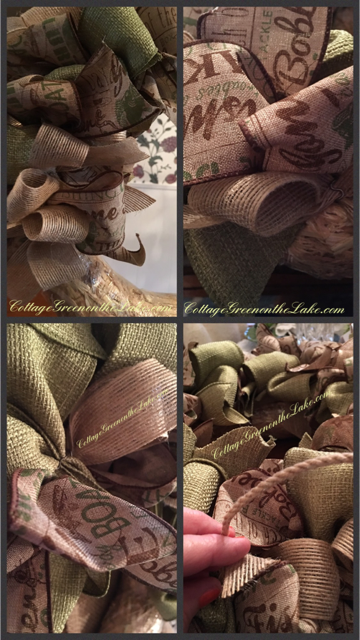
I added my “rope cord” filler by going back after my wreath was complete and floral pinning just a loose cord around the entire wreath. Last touch … I floral pinned my little wooden fish and bobber dangling on a piece of twine, near the top of the wreath so it would hang down in the center of my wreath.

“Welcome to the Lake!”
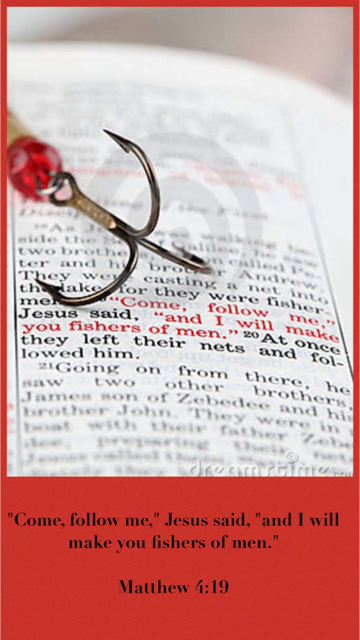
“Come, follow me,” Jesus said, “and I will make you fishers of men.” Matthew 4:19
Wishing you the best of summer’s!
From my cottage to yours ~ Trenda

I’m delighted you read my blog today! Please click on FOLLOW in the post above or on my site cottagegreenonthelake.com to have all my posts delivered directly to your email address. Also, I’m joining Kelly from The Essence of Home in a Share Your Style Link Party (click here to see other great sites)
Share this:

Part 2 – A “Welcome Home” for Thanksgiving
by Trenda

Anticipating and looking forward to our family coming home next week, I love decorating and creating a “welcome home” for each dear person that will be here for Thanksgiving. Last week our “welcome home” to Thanksgiving began with decorating the front door. Today, we’re going to take a peek behind the front door.

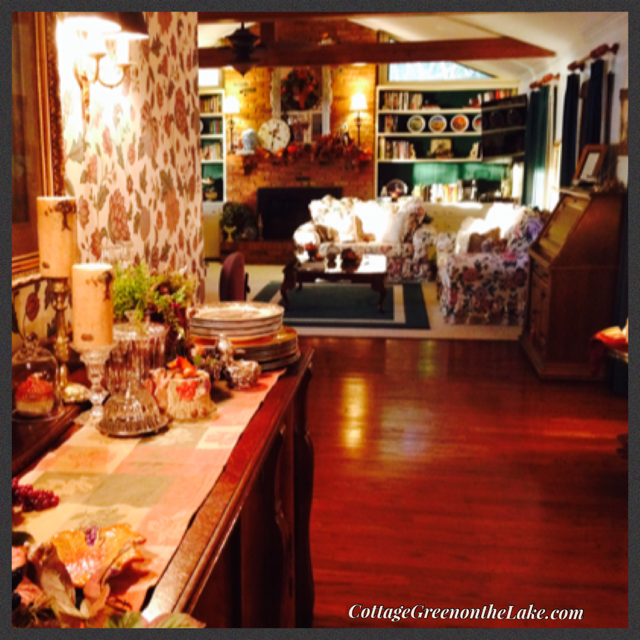
As you walk in our front door the first thing you see is our antique buffet. It’s a beautiful piece of furniture; I was giddy when I found it hidden away in a dark corner in an antique store in Tyler. (: The interior cabinets and drawers are as beautiful as the outside and sometimes I imagine the buffet’s “past life” … and different hands than mine putting away carefully stitched napkins and tablecloths, or special Christmas dishes, into it’s confines.
Come on in! I’m so glad you’re here! (: On Thanksgiving, all desserts and pies are displayed out on the buffet; it’s a tantalizing spread for everyone who enters!

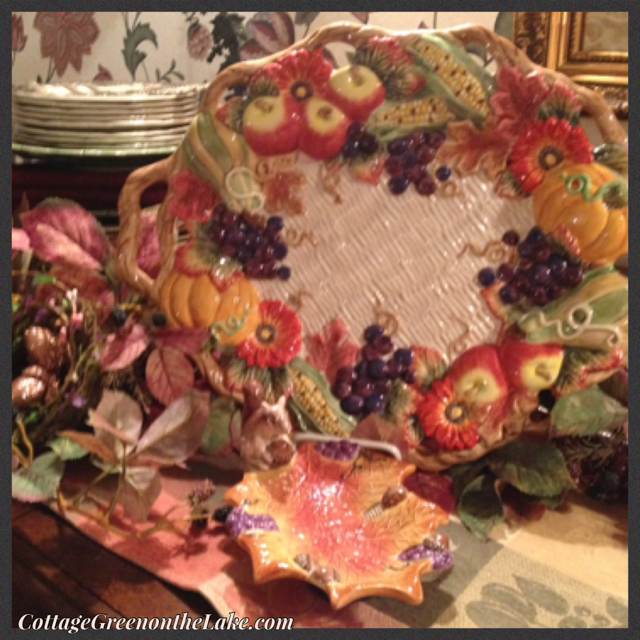
The buffet is filled with autumn’s bounty and has a woodland feel with birch pillar candles, squirrels posing on oak leaves or peering into logs, little nests filled with acorns, and perching birds near their feeders! A beautiful Fitz and Floyd harvest platter and charming squirrel dish.
The Friendly Village dishes by Johnson Brothers are ready on chargers for the Thanksgiving tablescape and another stack of dessert plates are stacked on a plate server ready to be loaded with everything delicious!

Woodland friends …

A favorite “souvenir” from a vacation spent in Italy … an inlaid wooden tea cart is stacked and ready to stand-in as a portable side table. The tea cart is filled with necessary items for the feast … plus a few additional items for a little “glitz and glow!”(:

Below … more Johnson Brothers Friendly Village dishes, a turkey platter, a stack of antique silver “nut” trays, a crystal biscuit barrel and a silver coffee service.

Our fireplace is questionably (since it has to compete with the view outside!) the focal point of our living room … and is all “decked out” for Thanksgiving.
Harvest has “spilled out” onto the mantle with pumpkins, clusters of grapes, bittersweet, and walnuts all accenting an autumn swag.

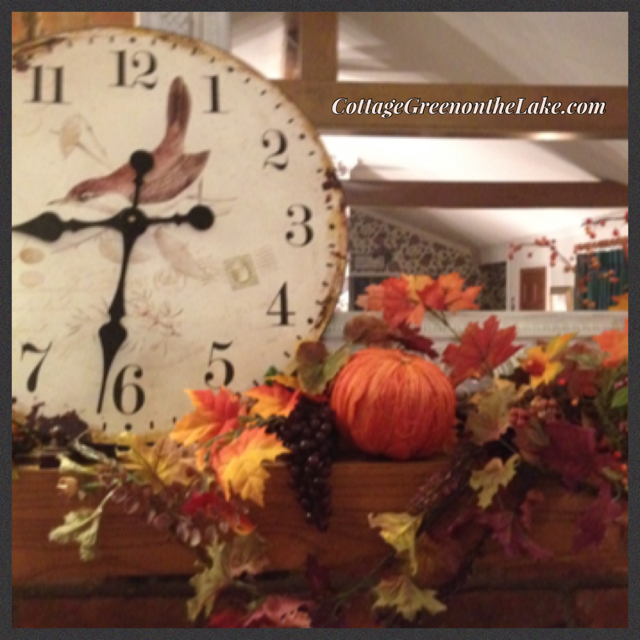 Our “Beau” Pilgrim (I told you we like to name things around here!) made by Fitz and Floyd resides over the Mantle Harvest and has his own thanksgiving offerings … some maize and a pumpkin, in his hands.

A Thanksgiving wreath (DIY instructions in a subsequent post!) trimmed with a bow and ribbon that says … Count Your Blessings, Fall Harvest, Thanksgiving Tradition, and Give Thanks.


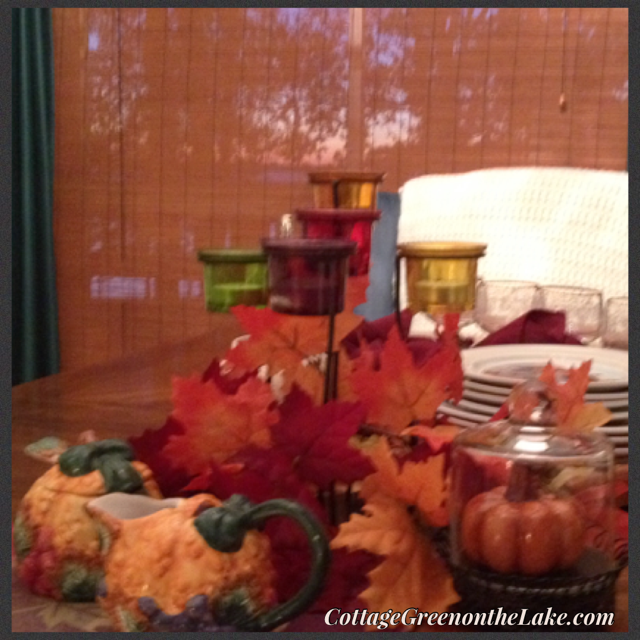
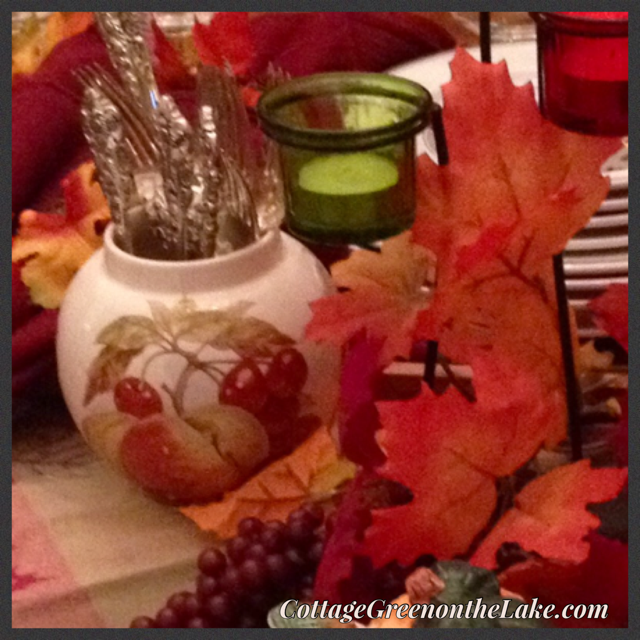
Before I have the fun of setting our table for Thanksgiving, I keep a simple setting on the table with all the essentials needed for an cozy autumn meal enjoyed with any friends and family that arrive before “the day.” A part of the tablescape and ready to disperse are … a stack of Villeroy & Boch (design Naif) dinnerware, napkins encircled with mini grapevine wreaths (click here for instructions for DIY Autumn napkin rings) silverware in a ginger jar, etched glasses, and a creamer and sugar bowl for after-dinner coffee.

Gorgeous view beyond the window … twilight on the lake.
An autumn ginger jar holds silverware …
I love these etched glasses from Germany and they are particularly enchanting when filled with ambrosia or holding a miniature compote …

Little pumpkin showcased under a cloche …

Looking around, I love how our “Cottage Green” looks festive and says “welcome home” to all for Thanksgiving. Now, I have to get to the shopping, cleaning, and cooking done!!! But, like the ribbon on the wreath says … during this “Thanksgiving Tradition” and the blessing of our “Fall Harvest” … “Count Your Blessings” and “Give Thanks.”
From my cottage to yours ~ Trenda

Thank you so much for spending some time with me today! I’d love to hear from you and I am truly delighted reading what you have to say. Please leave any questions you may have or comments, below. Don’t be dismayed if you don’t see your comment “appear” right away. Word Press checks everything I receive for SPAM and all have to be approved, before posting.
Share this:

A “Welcome Home” … for Thanksgiving

by Trenda at Cottage Green on the Lake
The slow progression of autumn here in East Texas has suddenly quickened and the sights and sounds of the season have become tangible. The crickets are softly droning (a decrescendo to their summer song!) as they sing their final chorus … there is a hush in the air that is marked by a distant caw of a crow or the occasional rustle of leaves as an acorn descends through the branches … a muffled “plop” heard, when it hits the ground … and the leaves of our Ash tree, that drape over the lake, are transforming into a beautiful shade of yellow.

The view beyond our windows reminds us that the “season” of Thanksgiving is upon us, though, like Thoreau … “I am grateful for what I am and have. My thanksgiving is perpetual.”

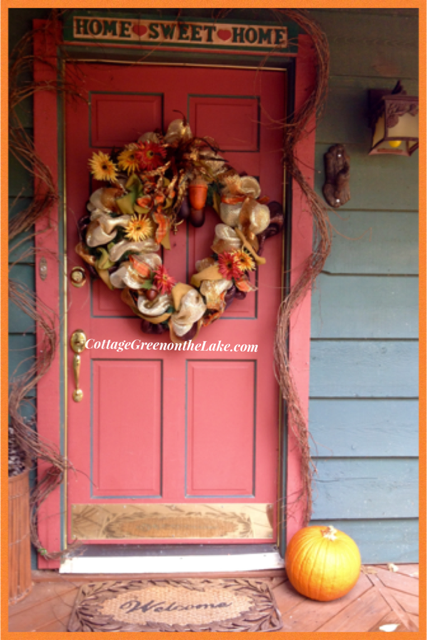
As I “dress” our home and get it ready for the holidays, I am going to start with our front door … it is the first thing that welcomes and greets our family and friends when they visit. The front door sets the stage of what people can “expect” to find inside your home and should be a reflection of the warmth and welcome you want to portray within your home.
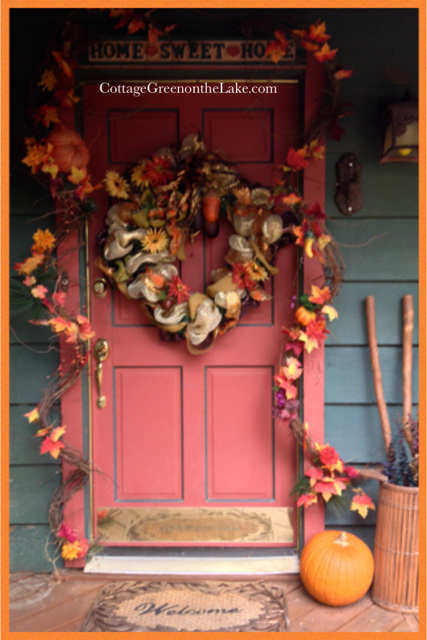
I began decorating our door by hanging this beautiful wreath that a dear friend of mine made. Then I took a bundle of wrapped grapevine (I bought mine at Hobby Lobby in the section where grapevine wreaths are hanging) and cut the coil of grapevine in half with wire cutters – this gave me 2 sections of grapevine for each side of the door. After cutting the 2 sections, I pulled the grapevine to loosen the taut coils. My husband hammered nails into our door frame for me to impale the grapevine on. At the base of the door, where the tension was greatest, I added a pipe cleaner and wrapped the grapevine around the nail, using the pipe cleaner to firmly hold the grapevine to the door frame.
Then I began inserting leaves that I cut from an autumn swag into the twigs of the grapevine. I also wired some pumpkins, squash, and chrysanthemums to the grapevine to add interest and fullness … but left enough of the grapevine bare, so it wouldn’t become too “visually heavy” or overbearing.
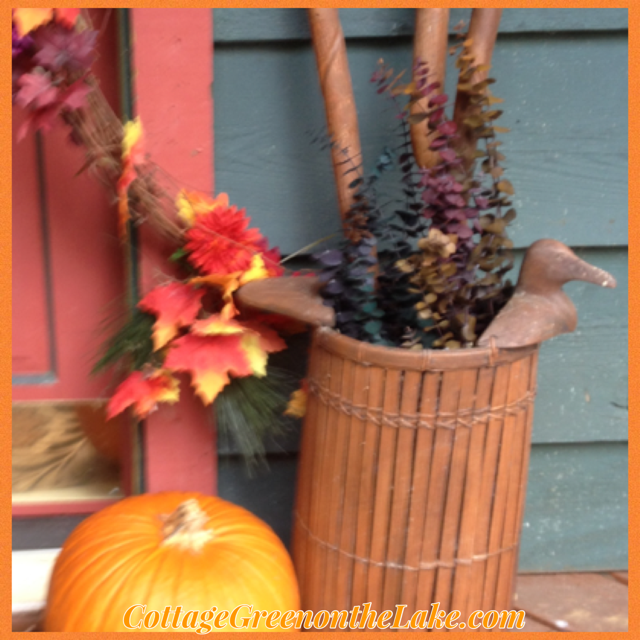
I placed a pumpkin (leftover from Halloween!) next to this quaint basket that I found years ago. I’ve always thought the wooden duck looked
“right at home” here at the lake and it is always handy, near our front door and holds walking sticks, any dripping umbrellas, and a fragrant “bouquet” of eucalyptus. Tip: Eucalyptus makes the entry to your home smell wonderful, and it is also a natural deterrent for spiders!
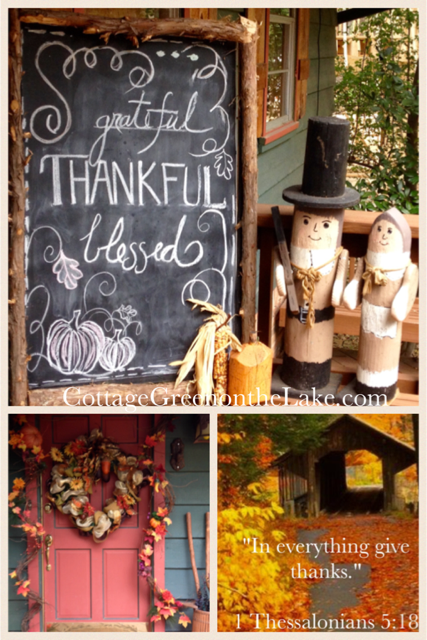
Mr. and Mrs. Pilgrim greet all Thanksgiving visitors. (: We ARE … grateful, thankful, blessed!

Our deck has several built into benches and on this one, next to the front door, I’ve “tipped my hat” to the season and added a little whimsy with these 2 Pilgrim door greeters! I love this chalkboard a friend made for me, with it’s rustic look and cedar framework; I use it all the time … “4theseasons” to write holiday messages on, or for keeping track of horseshoe scores! (:
I hope these ideas will help you and that you’ll have fun creating and making your entryway and door a “welcome home” for Thanksgiving!
“I am grateful for what I am and have. My thanksgiving is perpetual.”
“In everything give thanks.”
From my cottage to yours ~ Trenda
Thank you so much for spending some time with me today! I’d love to hear from you and I am truly delighted, reading what you have to say. Please leave any questions you may have or comments, below. Don’t be dismayed if you don’t see your comment “appear” right away. Word Press checks everything I receive for SPAM and all have to be approved, before posting.
Share this:

DIY “Jolly Jack-o-Lantern” Halloween Wreath … by Trenda
“A Halloween of Memory Past” by Trenda In just a little over a “fortnight” we will have a host of little ghosts and goblins coming to our doorstep. Once, not really so very long ago, I was one of those happy “trick or treater’s” … traipsing down the streets, I peered to see out of my plastic mask that was always askew, had eye slots that were cut too small to properly see and was held in place by a thin rubber band that pulled my hair and I was always afraid would snap and pop me in the face! I made sure I stayed close to my strong, broad shouldered father and seeing his comforting silhouette outlined in the shadows was particularly assuring on a night called All Hallows’ Eve! My father carried a railroad lantern to lead his little band and family of mix-matched character’s … a hobo, a skeleton, 2 gypsies, and a clown … and I remember the red glow cast by his lantern, added to the mystique of the evening. (to be continued)
Remembering that feeling, I love to make our home as welcoming as possible on Halloween and enjoy creating an expectant atmosphere, befitting the night, that the children can sense as they climb up each step to our door.
Now with all that in mind … today I am writing the DIY instructions for this Jolly Jack-o-Lantern Halloween wreath that you can make and hang on your front door to welcome each of your little visitors! The “jewel and sparkle” a wreath adds to your door, is like adding a necklace to your outfit! (:

Below, is a list of supplies you will need to make your wreath.
Materials needed:
- metal wreath form
- up to 3 rolls of mesh in your choice of Halloween colors
- pipe cleaners
- glue gun and glue sticks
- assorted Halloween decorations
- scissors & wire cutters
Instructions:
First, make a simple loop hanger using a pipe cleaner and wrap it around the back of the wire wreath form. This is the hanger you will use to display your wreath on your door, but it is also convenient to use while constructing your wreath. Tip: I always use pipe cleaners that match the colors I am using in my wreath. Then, when I am finished they aren’t easily seen and “blend” right into the decorations and colors of the wreath. Take your first color of mesh and go around the form of your wreath, bunching the mesh loosely. To form a “poof” or segment, wrap a pipe cleaner around the mesh and wire wreath form to secure the mesh to the form. I trim my pipe cleaners off at this point to keep things neat and so they won’t get “in the way” and snag my material. Continue bunching and securing mesh around the perimeter of your wreath form. Don’t be timid! There’s no wrong way to do this! (:
![PicCollage[412].png](https://cottagegreenonthelake.com/wp-content/uploads/2016/10/piccollage412.png)
Then, do the same thing again with the next color you have chosen for your wreath. Gather and bunch your mesh and secure it with pipe cleaners to your wreath form. Be sure and “stagger” where you bunch and secure your mesh, not conforming with the same pattern you used with the first color. This will make your wreath fuller. See picture below.
![PicCollage[414].png](https://cottagegreenonthelake.com/wp-content/uploads/2016/10/piccollage414.png)
Repeat the same procedure again, using your last color of mesh and making sure to weave and bunch your mesh in areas you see that need more fullness. Note: It is up to you how many colors of mesh you use. Sometimes, I use only 2 fabrics or even one color of mesh or burlap. Just make sure when you are using fewer colors that you bunch your fabric tighter, so you have a full wreath.
![PicCollage[417].png](https://cottagegreenonthelake.com/wp-content/uploads/2016/10/piccollage417.png)
Now, the fun part begins! Take your decorations and just hot glue them to your wreath. I add my biggest items first … next, any smaller items I have.
![PicCollage[424].png](https://cottagegreenonthelake.com/wp-content/uploads/2016/10/piccollage424.png)
![PicCollage[429].png](https://cottagegreenonthelake.com/wp-content/uploads/2016/10/piccollage429.png)
Then … I add my “filler” last. Filler is added to your entire wreath and “pulls” the look of your wreath together, unifying and blending all your colors and decorations on the wreath. Filler can be any material – it adds texture and conformity. In the photo below … see how I’ve used my neon green curly twigs as filler.

Then, I added a few “bursts” of accent with a ribbon that incorporated all the colors of my 3 different mesh … a purple, orange and black plaid. Wherever I wanted a little more color, I cut some random lengths of my plaid ribbon and “wove it” into the mesh ribbon, and hot glued the ends to hold. The final step was gluing some sparkly wrapped paper candies … table confetti, that I found at Hobby Lobby for only $1.50 … in just my colors of purple, orange, and neon green!
Now when …
“Silent phantoms
of the night
In their robes
of ghostly white.
They are always to be seen
On the night of Halloween.”
come to your door, they will be delighted to see the wreath you made welcoming them to your haunt!
![PicCollage[434].png](https://cottagegreenonthelake.com/wp-content/uploads/2016/10/piccollage434.png)
![PicCollage[432].png](https://cottagegreenonthelake.com/wp-content/uploads/2016/10/piccollage432.png)
Thank you so much for spending some time with me today! I’d love to hear from you and I am truly delighted, reading what you have to say. Please leave a comment, below. Don’t be alarmed when your comment doesn’t post, immediately. Word Press makes sure each post I send or that I receive hasn’t any SPAM attached … “it’s a good thing!” (:
From my cottage to yours ~ Trenda

