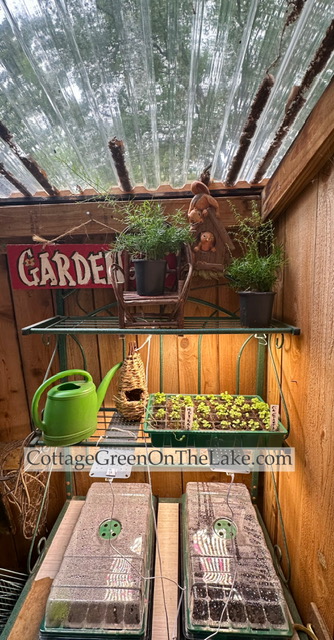
The seeds I planted in April are almost ready to be planted in their new homes outside! The little seeds have spent a cozy Spring on warm heat mats and cosseted under cozy moisture domes. Now the last step I need to do is to thin out the seedlings and harden off the plants before they’re transplanted outside.
Continue reading “Spring Gardening in the Cottage Greenhouse: How to Prepare Seedlings for Outdoors”Tag: greenhouse

DIY Homemade Seed Packets: A Fun Gardening Project
“What a playhouse is to a child, a potting shed is to a gardener”
~ Unknown
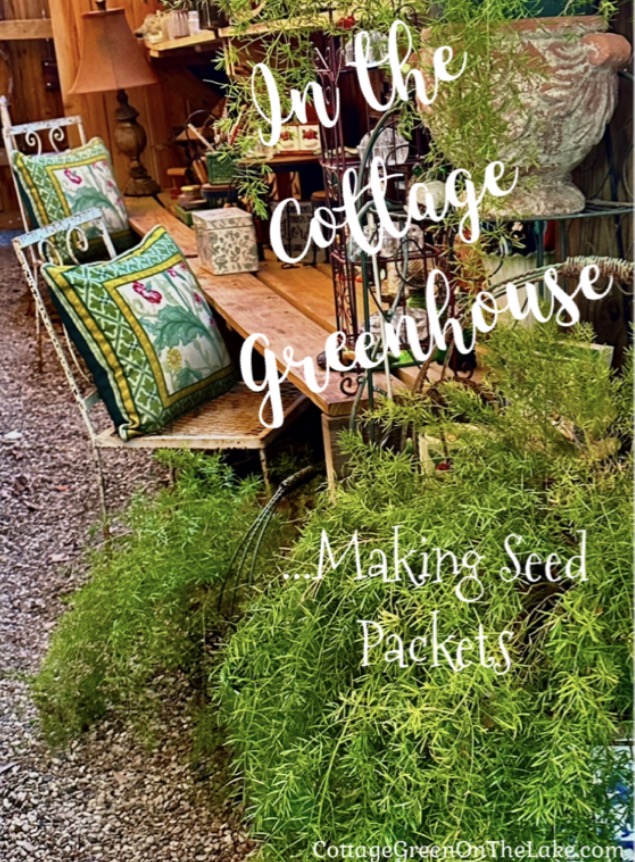
After days of colder-than-normal temperatures, the sunshine beckoned and it seemed like a good day to “go outside and play”…in the greenhouse. It was still chilly outside, but the temperature in the Cottage Greenhouse was 72 degrees…and a perfect day for dreaming of Spring flowers.
Continue reading “DIY Homemade Seed Packets: A Fun Gardening Project”One must maintain a little bit of summer, even in the middle of winter.” ~ Henry David Thoreau
Share this:

How to Make Succulent Arrangements…Summer Project in the Greenhouse

During these hot, summer months this garden project allows you to “get your hands in the dirt” without much exertion…and even if you don’t feel like you “have a green thumb” you’ll find making these succulent arrangements, easy and rewarding.
Continue reading “How to Make Succulent Arrangements…Summer Project in the Greenhouse”There’s something satisfying about getting your hands in the soil.”
~ E. A. Bucchianeri
Share this:

Making Homemade Potpourri & Afternoon Tea…in the Cottage Greenhouse
…my warm, little hovel filled with plants, garden tools, baskets, old paintings, antique glassware, forgotten bird nests, flower frogs, and lichen covered bark, would be a delightful place for mixing potpourri.


In my last post I wrote about the charming nook, a “flower apothecary” of sorts that I created in our cottage greenhouse. (click here to read)
Since then, I’ve been stirring up all kinds of mixtures and potpourris made from dried rosebuds, daisy petals, lavender, vanilla, jasmine, and other fragrant flowers and scents.
Share this:

In the Cottage Greenhouse…Setting Up a Flower Apothecary
As I looked around the greenhouse, my idea began to grow; my warm, little hovel filled with plants, paintings, antique glassware, forgotten bird nests, flower frogs, and lichen covered bark, would be a delightful place for mixing potpourri…an apothecary of sorts.
During this time of the year, “all is calm, all is quiet” on the lake and it’s a lovely time of year for playing in the cottage greenhouse. Not only did my plants need watering, but I had come out to the greenhouse to check on the roses and statice I’d left hanging upside down from the greenhouse rafters to dry.
Continue reading “In the Cottage Greenhouse…Setting Up a Flower Apothecary”Share this:

Antique & Flea Market Finds
Last year after I wrote about our antique and flea market trips, many of you wrote in the comment section and in letters, that you enjoyed reading about our shopping trips and seeing the treasures we found. We’ve been on several shopping adventures since then and I’ve been saving some of my favorite finds to share with you!
Continue reading “Antique & Flea Market Finds”I like adventures, and I’m going to find some.
Louisa May Alcott
Share this:

Part 2 Spring in the Cottage Greenhouse…DIY Whimsical Spring Arrangements
…the wild iris kept waving and beckoning me to come over. Finally, worn down by their flirting and persistence, I stopped working and went into the cottage greenhouse to fetch my trowel.
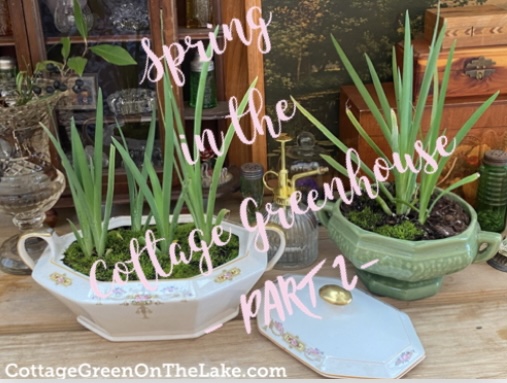
Dainty wood violets, wild irises, perky daffodils, fragrant hyacinth’s, azaleas in all shades of pink, creamy white Lady Banks roses, and woodland ferns are making their spring debut at Cottage Green!

Continue reading “Part 2 Spring in the Cottage Greenhouse…DIY Whimsical Spring Arrangements”
Share this:

Antique and Flea Market Finds
“I saw this darling, heart-shaped mirror glimmering and beckoning to me before I even got to the booth where it was hanging, and felt my heart quicken. The antique floral embellishment at the top of the mirror and the sweet, scalloped edges around the heart spoke to me, and told me, “You are taking me home.”

Recently Richard, my dear Huckleberry Friend, and I went on a trip and had a great time stopping at different antique shops and flea markets along the way. Frequently, I am asked (particularly about the wide assortment of items I use to decorate the Cottage Greenhouse) where I find the items I use in decorating. So, today I’m sharing some of the treasures we “two drifters, off to see the world” found on our trip, and what each item cost.
Moon river, wider than a mile
I'm crossing you in style some day
Oh, dream maker, you heart breaker
Wherever you're going, I'm going your way
Two drifters, off to see the world
There's such a lot of world to see
We're after the same rainbow's end
Waiting 'round the bend
My Huckleberry friend
Moon river and me


 Moon River ~ written by Johnny Mercer and Henry Mancini
Continue reading “Antique and Flea Market Finds”
Share this:

Springtime in the Cottage Greenhouse…planting flower seed trays and vegetables
It was a delightful day to be working outside in the Cottage Greenhouse. In my cozy shelter, I was protected from the cool, north wind…surrounded by smells of earth and growing things, soothed with a background of birdsong, and the greenhouse door was opened to the lake beyond.

It was one of those March days when the sun shines hot and the wind blows cold: when it is summer in the light, and winter in the shade.”
Charles Dickens
It was a delightful day to be working outside in the Cottage Greenhouse. In my cozy shelter, I was protected from the cool north wind…surrounded by smells of earth and growing things, soothed with a background of birdsong, and the greenhouse door was opened to the lake beyond.

Share this:

Christmas in the Greenhouse
A white lace table runner against the rugged-y table was striking on the potting table that usually held potting soil, terra cotta planters, and trowels…and Buttered Almond Cookies tucked inside an antique sugar bowl and Gingerbread Thins looked especially festive in a cut glass, pedestaled bowl for our Christmas Tea.

I hope you had a wonderful season of Christmas! Some years ago, Richard and I decided we were going to celebrate the whole month of December and truly relish each part of the season: the beautiful decorations, the holiday music, the tastes and seasonal treats, the divine Christmas-y smells of evergreens, cinnamon, sugar cookies, orange pomanders, and gingerbread…and most important, amidst and amongst it all, we would reflect and ponder each day on God’s gift to us…Jesus.
Continue reading “Christmas in the Greenhouse”
