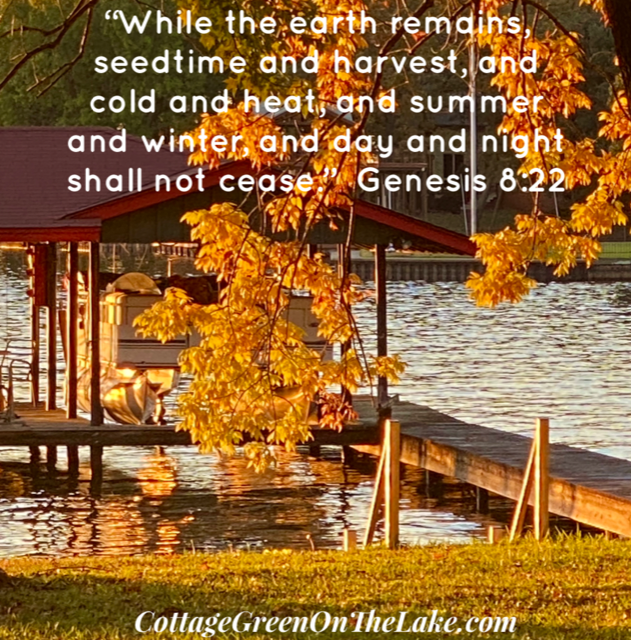
The lake looked so cool and inviting; the waters kept “waving” at us, beckoning us to come out and enjoy… “Sittin’ on the dock of the bay.”
If you are like me, as soon as you read the title of this post, you began whistling Otis Redding’s famous song, “(Sittin’ On) The Dock of the Bay.” Friday was a beautiful, hot summer day and our daughter and granddaughter were over visiting. The lake looked so cool and inviting; the waters kept “waving” at us, beckoning us to come out and enjoy…”Sittin’ on the dock of the bay.”
Twilight was closing in which was a signal to the Loons to begin their enchanting love calls over the lake.
Auld Lang Syne and best wishes for the brightest and merriest of new years! You know I haven’t written you since last year (; so I need to write about the last bit of our 2020 before I begin writing about the new year. Get comfy and pour yourself something warm to drink, and as a dear friend and I say to one another, “Let’s drink some tea and talk of happy things.”
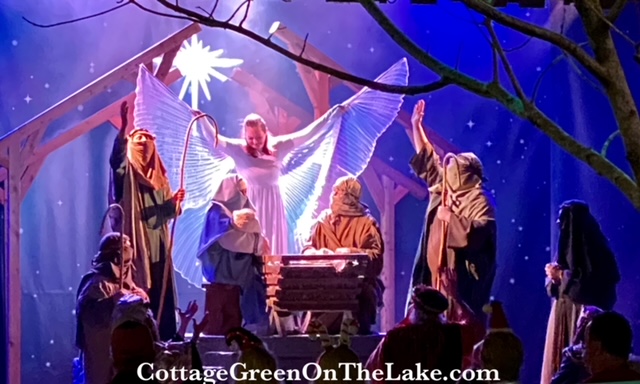
It was a wonderful Christmas season filled with bustling and busy-ness, yuletide cheer, and enough merry making “to make the season bright.” Then on the night of Winter Solstice we all had the added excitement and wonder of the celestial 2,000 year phenomenon of Jupiter and Saturn coming so closely aligned in their orbits they appeared as “a double planet” and were nicknamed the Christmas Star. All-the-while, our days were intermingled with the holiness and awe of the season as we reflected on what Christmas truly means and marveled anew that Jesus chose to come down to earth as a little baby to be our Savior.
A thousand times in history a baby has become a king, but only once in history did a King become a baby.
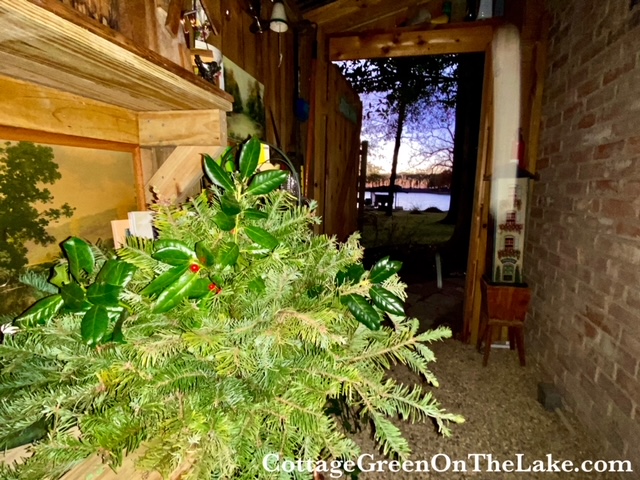
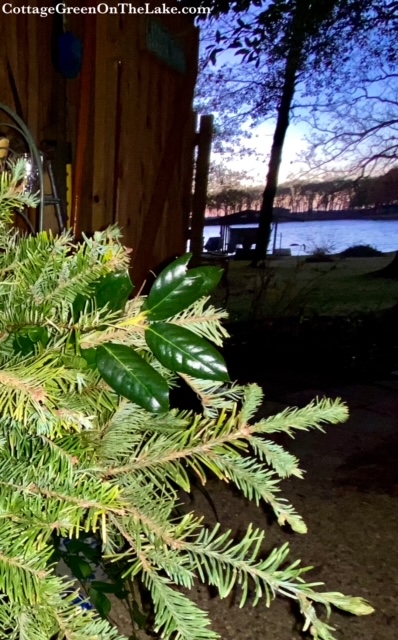
As usual I ran out of time to do all I wanted to do. However, one fun project I did have time to do was to make a beautiful evergreen centerpiece. I wish I could share with you the wonderful, heady, fir fragrance that enveloped my greenhouse while I was making it! The beautiful winter day was fading into twilight, but it was still warm enough outside to leave my greenhouse door open to see the lake and hear the birds twittering as they enjoyed their evening meal together at the bird feeders, while I worked.
The fir boughs I was using I had saved and kept fresh in 2 big buckets of water in the greenhouse ever since Richard had trimmed them from our Christmas tree. I had plenty of branches to work with, but I still needed a little texture and color to mix in with my fir branches. Out into the backyard I went to forage with pruners in hand. I experienced a little thrill of resourcefulness when I found the perfect filler I needed…pointed, deep green, holly leaves with bright red berries from our very own holly bushes! I couldn’t help myself and began humming “The Holly and the Ivy” while I was clipping.
The holly and the ivy,
When they are both full grown
Of all the trees that are in the wood
The holly bears the crown.
I was back in the Cottage Greenhouse, ready to make my arrangement, still humming, now on the refrain…
O, the rising of the sun
And the running of the deer
The playin of the merry organ
Sweet singing in the choir
All done, just in time with the last light fading away.
The holly bears a blossom
As white as  lily flow'r
And Mary bore sweet Jesus Christ
To be our dear Saviour
My simple arrangement looked elegant on our woodland table and red tapers and red votive cups enhanced the red of the holly berries.
Then the Christmas season blended into New Year’s Eve and our son and daughter in law asked us to spend the festive evening with them and our 2 grand babies. ❤ Our DDIL had prepared a Mexican feast for us and we had corn and flour taquitos served with her homemade sausage queso and pico de gallo, Chicken Enchilada Dip (click here for recipe) served with chips and veggies, and a delicious Key Lime Pie. We spent the evening just enjoying each other’s company, watching the antics of our grand children, and toasting in the NewYear with some sparkling White Grape Juice.
Write it on your heart that every day is the best day in the year…This new day is too dear, with its hopes and invitations, to waste a moment on the yesterdays.
Ralph Waldo Emerson
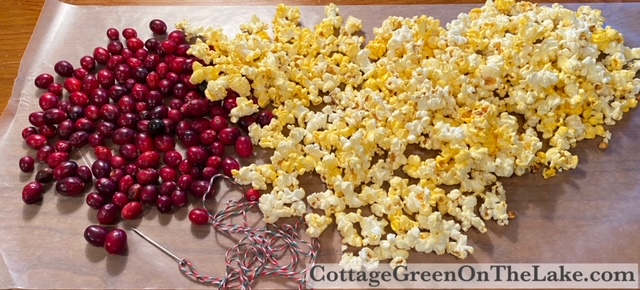
Then, this weekend SNOW was forecasted for us! It was the perfect time for another fun winter project I always enjoy doing, especially on a cold winter afternoon during NFL Wild Card Weekend; I made treats to decorate a tree for the birds! Click on the highlighted link to see another one of my posts about DIY bird treats… “A Picnic for the Birds” Since reading all the Laura Ingalls Wilder books when I was in elementary school, I’ve always wanted to string popcorn. Finally, after all these years, I decided to do it. Unlike Laura, who had to pop her corn over the kitchen fireplace, I conveniently got a bag of popcorn out of our cabinet and placed it in the microwave. While the kernels were popping, I set out some fresh cranberries I wanted to add to my popcorn string, found some cute red, green, and white cording to use for stringing, and a tapestry needle.
Helpful hints to make popcorn stringing easier:
Stale popcorn is easier to string than fresh, crispy popcorn. Pop your popcorn the night before and spread it out on wax paper so your popcorn will be easier to thread the next day.
Use a smaller needle and thread. A tapestry needle is blunt and much larger then a regular needle. It is a great choice if you have young children that are helping you that you don’t want to get hurt when working with a needle, however, it is harder for the large tapestry needle to go through the popcorn without breaking the popped kernel. After a few trials, I switched to a finer needle and just “doubled” sewing thread instead of using the thicker cording I had been using. I was amazed how much quicker and easier the stringing became!
After I got through stringing my popcorn and cranberries, I cut a grapefruit, an orange, and a lemon into thin slices to dry in the oven and hang as ornaments and treats on my bird tree.
Directions:
Slice your choice of fruits (I used 1 grapefruit, 1 orange, and 1 lemon) into thin rounds.
Pat both sides of fruit with a paper towel to dry and place the slices on a cookie sheet covered with parchment paper.
Preheat the oven to 200 degrees and bake fruit slices for 1 hour.
Turn slices over after the first hour and continue baking for another 1-2 hours, checking periodically to make sure the slices don’t burn
Total baking time, 2-3 hours, or until fruits are dried and transparent
Remove from oven
When cool, make a small slit in each fruit round near the rind to insert jute or yarn for hanging.
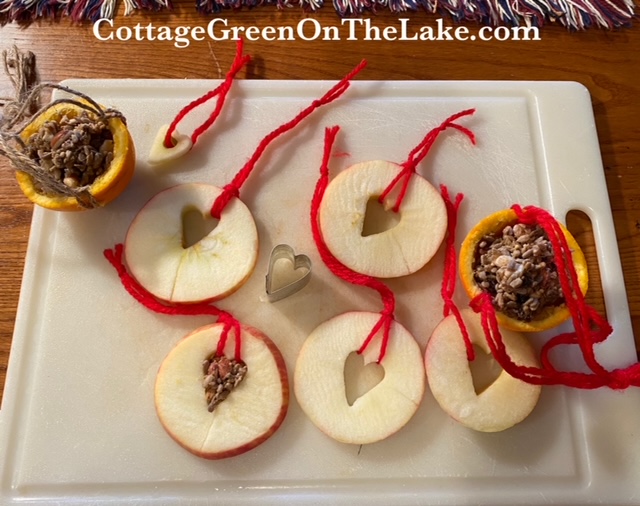
Next, I cut apple slices and used a mini cookie cutter to punch out heart in each apple slice. After the apple slices, I made sweet little orange cups and filled them with a mixture of peanut butter, corn meal, and bird seed.
Directions for Apple Slices w/heart cutout:
Cut apple in thin slices
Brush slices with lemon juice to keep apples from discoloring
Use a mini cookie cutter to punch out a heart in each apple slice
Insert yarn through heart and tie for hanging…or fill heart cut out with peanut butter seed mixture
Directions for Orange Seed Cups :
Cut orange in half and scoop out orange segments and pulp
Dry inside of both orange halves with a paper towel
Using a knife, make 3 holes near the cut edge of each orange half, making sure the holes are evenly spaced around the circumference of your orange
Insert jute or yarn into each hole and tie a knot to secure each strand to the orange, allowing extra length of yarn/jute for hanging (see picture below)
Knot the 3 strands of jute/yarn together at the top for hanging
Fill cups with birdseed or…I made a blend of peanut butter, cornmeal (adding cornmeal to peanut butter makes it easier for the birds to swallow) and birdseed to fill each orange cup
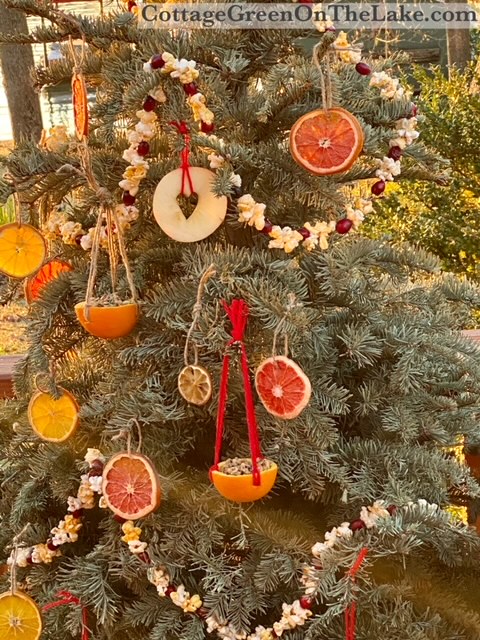
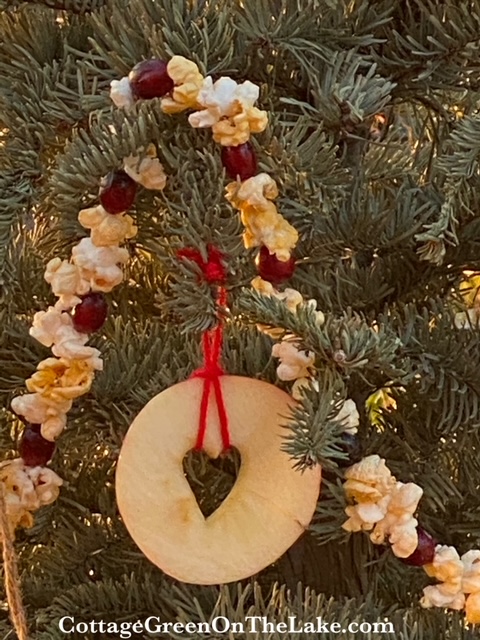
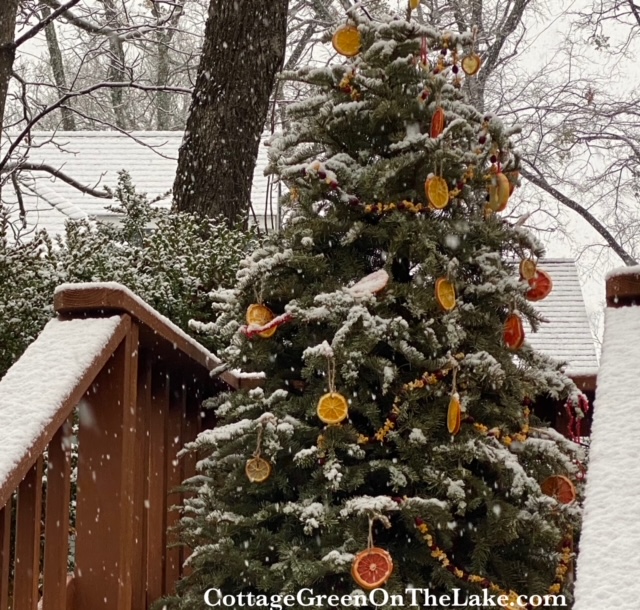
All the special treats for the bird feast were done and I hung them on what-had-been our Christmas tree. Strings of popcorn and cranberries, stained glass grapefruit, orange, and lemon slices, apple slices with little punched out hearts, and charming orange cups soon filled the tree. When I had finished, dear Richard, who always goes along with my whims, carried the whole tree up to the landing on our stairs where I could watch the birds from my chair. Just look how cute the tree looks perched up there!
“Bon Appetit!”
Sweet apple rounds underneath an appetizer of popcorn and cranberries.
Everything for the next day was done; the fruit ornaments and festoons of popcorn strands were hung. A winter feast awaited my feathered friends and the only thing needed was the predicted and unaccustomed snow for our area in East Texas.
After taking some pictures, I was sitting on the upper stairs hoping to see some late visitors, though I knew it was unlikely at that hour. [Side note: Did you know that by 4:30 (here in East Texas) most birds have quit feeding and are already tucked away, safe in their nests? The cardinals are usually the latest birds to arrive at the feeders. My guess is they use the evening shadows to help diminish the visibility of their bright red feathers which makes them more vulnerable and highly visible to predators.] Twilight was closing in which was a signal to the Loons to begin their enchanting love calls over the lake. While I was enthralled and still listening to the Loons, 2 bald headed eagles flew by right above me, only 25 feet from where I was sitting! My winter evening came with gifts. ❤
And the next day, even earlier than predicted, our snow came!
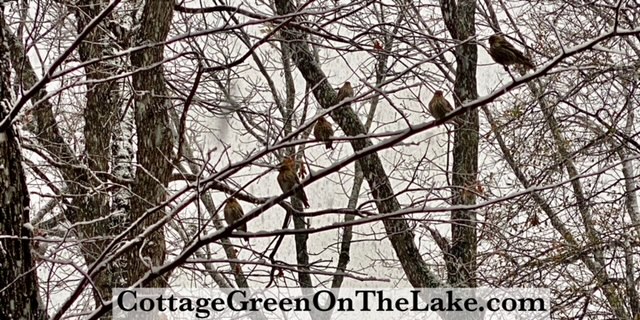
The birds lined up in pecking order [which is a very important social order and strictly observed at our feeders!] Woodpeckers, with their strong, swift beaks are given the highest respect, with the Blue Jays next in line since they are bigger than most of the birds we typically see at our feeders. Regal Cardinals seem indifferent to all, but their own mate and cautiously watched from the snow covered branches eyeing and picking out which treats they wanted before they approached. The Junco’s, or Snow Birds as they’re commonly called and the Carolina Wrens happily ate the treats that fell to the deck, thus avoiding the wait and the line. The rest of the crew, the sweet, smaller birds, the Carolina and Black-capped Chickadees, all the Finches (the American Goldfinch, House Finch, and Red Finch) Warblers, and Titmouse stayed close by, flitting in and out, and rested on the branches between courses.
Beautiful, beautiful snow! I couldn’t get over it’s loveliness and how it felt falling “on my nose and eyelashes.”
or… thinking how clever God is to imagine and be so creative that He made what usually comes down as rain in other seasons, into something soft, fluffy, and fun to play in, just to soften the landscape and mood of winter.
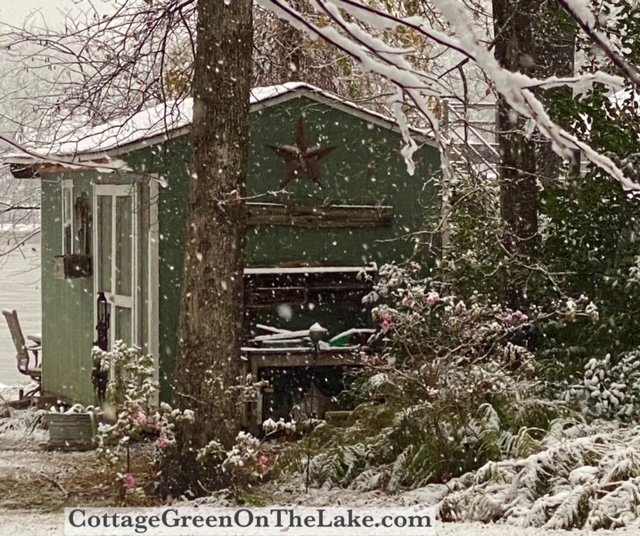
Look how enchanting my Potting Cottage looks in the snow!
Well, I think that catches us all up. Our snow was a delight for the day, and the next day the sun was shining brightly and only the bravest and most stalwart of snowmen remained. Bemusedly, when Richard brought in the mail yesterday there on top of the stack of mail was my Burpee Seed Catalog, filled with the promise of Spring, zesty-mix zinnia’s, and Gloriosa Daisy’s!
From my cottage to yours ~ Trenda
I’m delighted you read my blog today! I’d love to hear from you! Please leave any questions or comments you have in the comment section below. Don’t be dismayed if you don’t see your comment immediately after you write. All comments go through Word Press before posting. If you would like to read each new post I write and have it delivered directly to your email address, just click FOLLOW in my post above and follow the prompts.
Summer's loss
Seems little, dear! on days like these.

~ Ernest Christopher Dowson
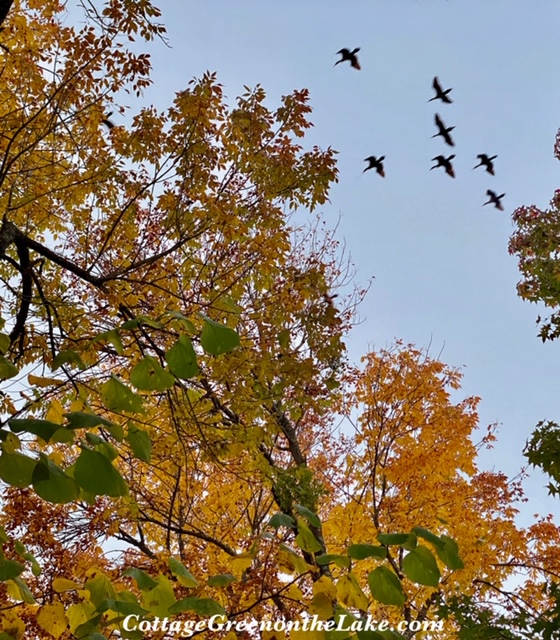
“On days like these” the leaves on our Redbud and Ash Trees glowed golden yellow in the sunlight and to our delight the double breasted cormorants that winter here glided into our cove by the hundred’s.
“On days like these” geese flew by in waves with the swoosh of their wings heard, before they were seen silhouetted against autumn blue skies.
“On days like these” leaves drifted by on wayward breezes and looked fetching against the green backdrop of grass.
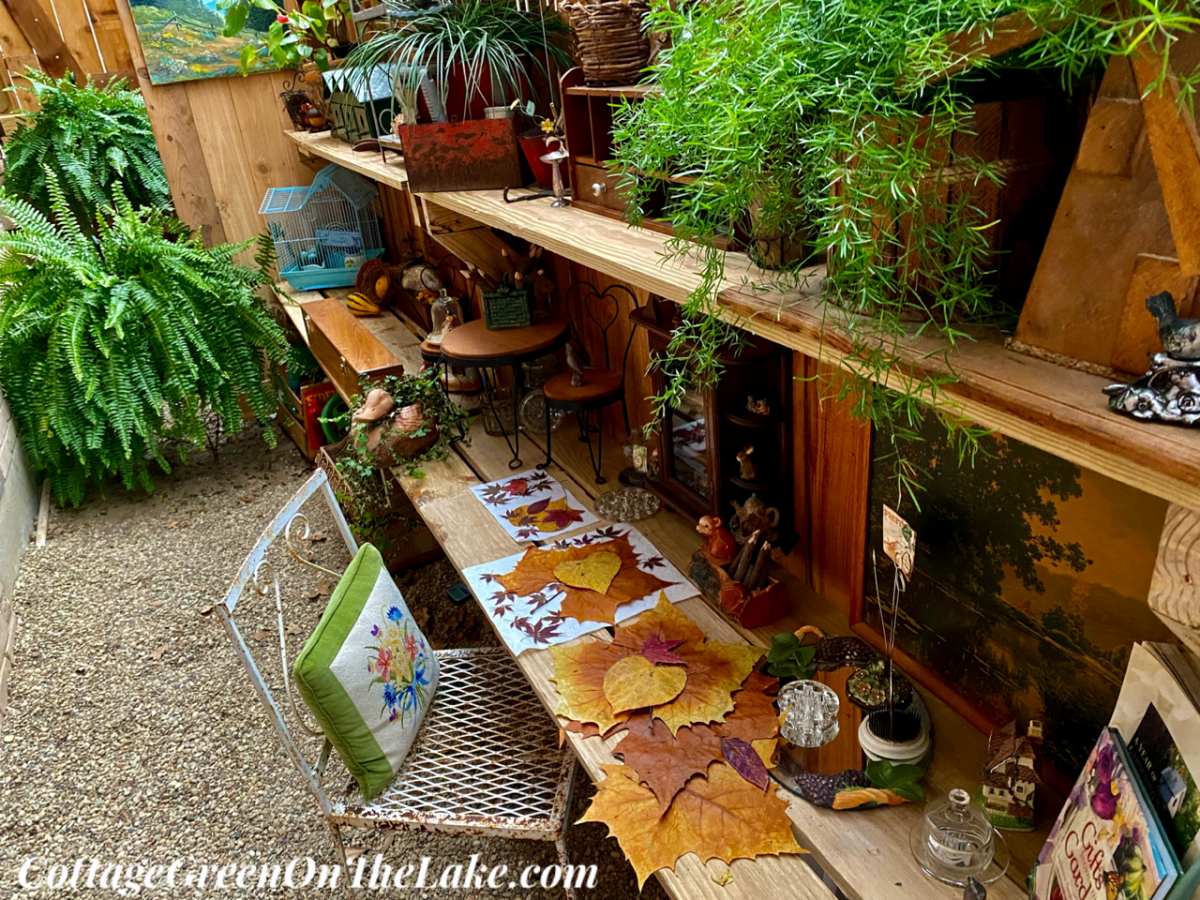
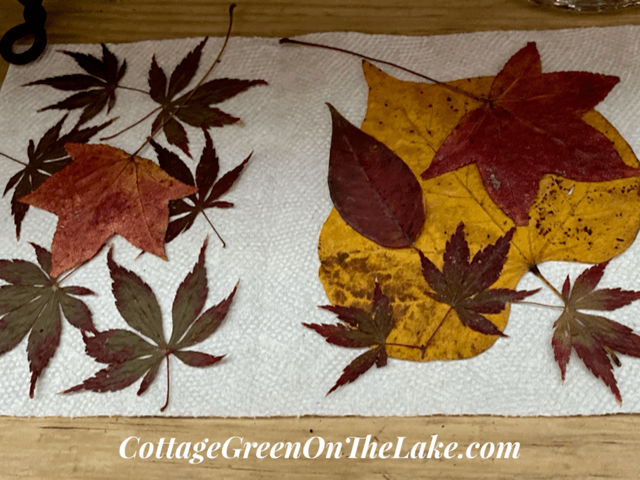
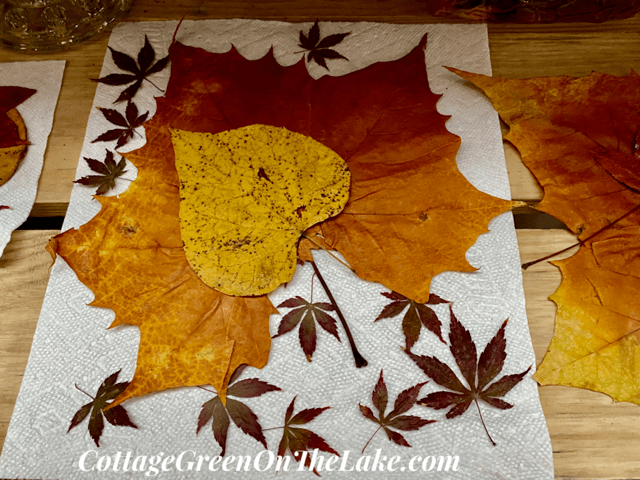
Just look at all these glorious, autumn leaves I collected and preserved!
Scarlet Sweet Gum leaves, Burgundy Japanese Maple leaves, Burning Bush leaves, and yellow Redbud leaves
Burnt orange Sycamore leaves, yellow Redbud leaf, and burgundy Japanese Maple leaves
Our winter’s come delightfully late here in East Texas and our first freeze of the year wasn’t predicted until Monday night, the last night in November. That afternoon I carried my outdoor plants into the greenhouse where Richard was busy getting our heating system and thermometer all set up. After I got all the plants tucked away in their winter home, I went around the yard and clipped as many flowers as I could. Knockout Roses, impatiens, chrysanthemums, and Encore Azaleas were still blooming beautifully and the bouquet in my hands kept getting bigger and bigger, since I hated to leave any blossoms. I had lots to work with and made some sweet little arrangements to place around the house.
A cluster of azaleas drape over the edge of this pink and green sorbet dish. Richard bought this miniature violin for me. The strings actually pluck and are wound into the pegs!
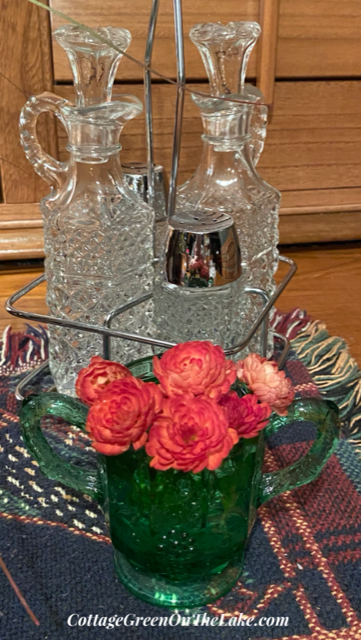
Deep red-orange chrysanthemums look striking against the green of a Depression Glass sugar bowl. Look at this sweet little antique vinegar & oil caddy with salt and pepper shakers I recently found on a trip we took to Branson.
Take a detour with me for a moment and look at 3 more treasures I found on our trip…these green Depression Glass shakers! I’m keeping them in the Cottage Greenhouse; they’ll be perfect for storing seeds I gather from my flowers.
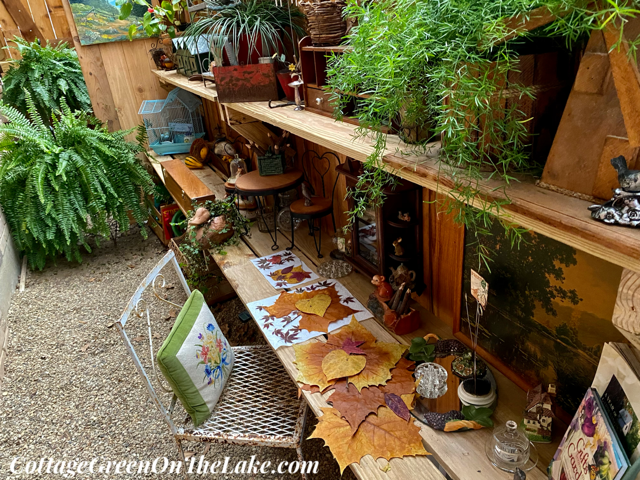
Back to leaf and flower pressing! (: The rest of my gathering’s I laid out on paper towels to press and dry beneath a pile of heavy books. It is so satisfying drying flowers, ferns, or leaves – and being able to use them later to decorate a tablescape, make a centerpiece, or use them in some other project adds another dimension of enjoyment.
How to Press Leaves & Flowers
Choose leaves that are fresh and supple…and flowers that are NOT densely petaled
Place items you want to press on a paper towel or newspaper, making sure the leaves/flowers do not overlap
Place another paper towel or newspaper on top of the items you are pressing
Place the sandwiched leaves/flowers inside a heavy book, or stack heavy books or objects on top of the paper towel “sandwich” and keep in a dry location
In approximately 2 weeks the pressed leaves/flowers will be completely dry and ready to use
Next post I plan to show you a fun and easy project using some of my pressed leaves. Hope you enjoy these last days of autumn and have fun gathering leaves and pressing them.
From my cottage to yours ~ Trenda
To have all my posts delivered directly to your email address, just click on FOLLOW in the post above … or click on my site: cottagegreenonthelake.com
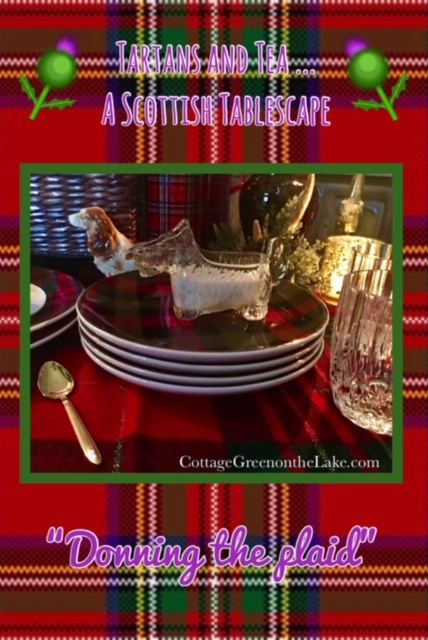
The Scotch in me loves using tartans in our home year round, but the warmth and cheerful “feel” of these plaids is especially pleasing on dreary days. Last week we had several cold, gray, “drizzly” days just the sort of day that was perfect for “a spot of tea.” Suddenly, I was inspired and the low table in our family room beckoned and glowed and seemed the perfect spot for a cozy, afternoon tea. A bright red tartan tablecloth was my backdrop and the transformation and fun began.
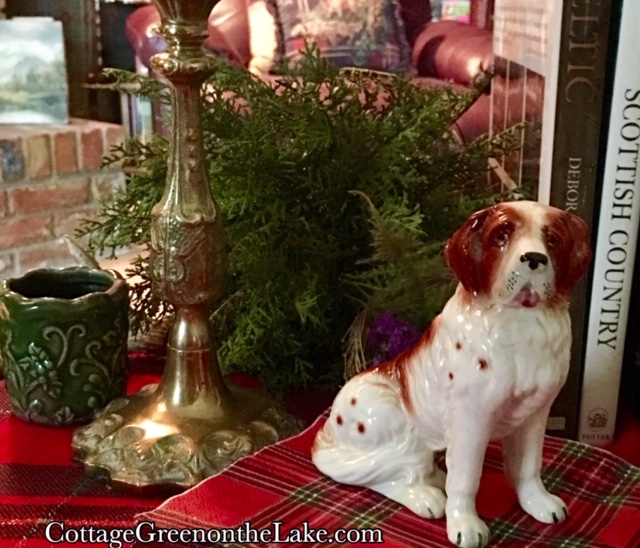
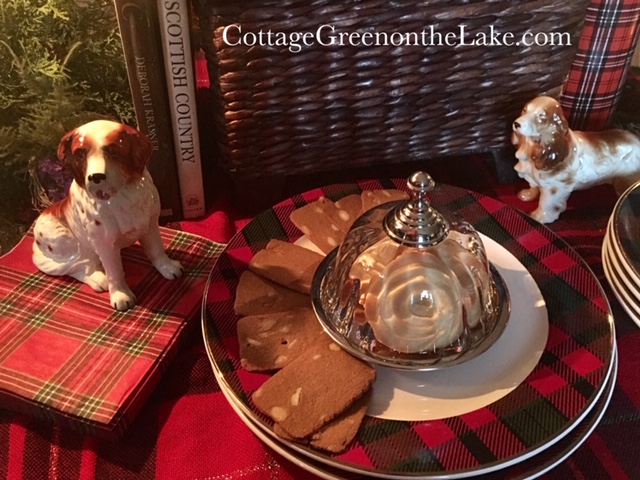
I gathered a basket full of “accouterments” for my tablescape that reminded me of Scotland … a beautiful antique Saint Bernard to sit atop tartan napkins looked stately in front of a pair of Scottish books.
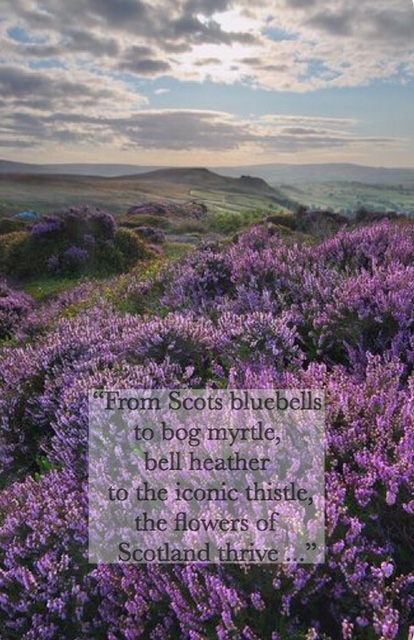
Purple Statice, placed in a little nest mimicked the purple heather and thistle that thrives in the Highlands and a clump of prickly cedar tucked beneath the candlestick represented the spiny gorse that covers the Scottish crags and glens.
“From Scots bluebells to bog myrtle, bell heather to the iconic thistle, the flowers of Scotland thrive …”
Flowers of Scotland
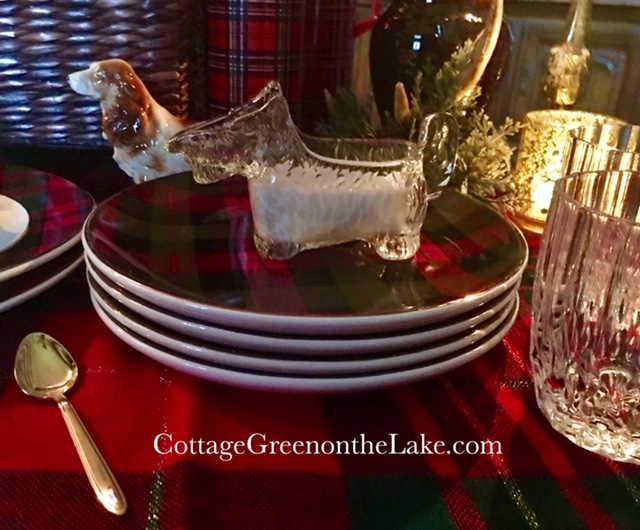
Since Scots are renowned for their love of dogs … another pair of sweet antique doggies for my tablescape; a ceramic Cocker Spaniel stands beside a glass Scottish Terrier that’s perched on a pedestal of tartan plates.
I love this whimsical “Scotty” dog cream pitcher! His perky tail is the handle of the creamer and the cream “spout” is his snout! (:
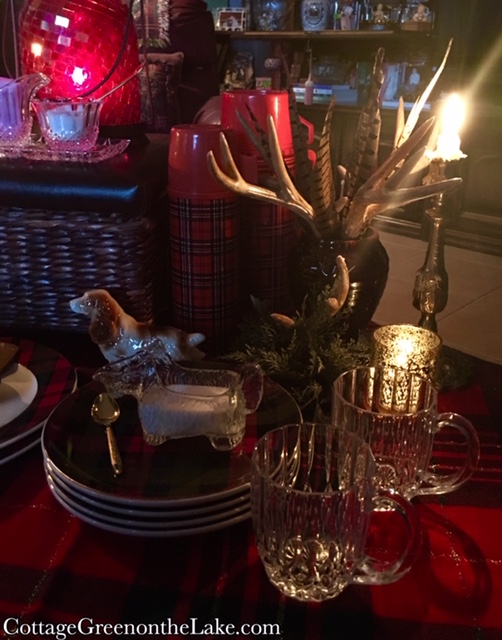
A pair of ornate candlesticks with scarlet tapers match the tartan cloth and a glazed pottery vase filled with pheasant feathers and faux antlers conjures up more Scottish flavor. Then, my favorite red thermoses add height, a perk of interest, and another layer of plaid, plus they’re perfect for keeping the tea hot … with two crystal mugs for “supping” close by!
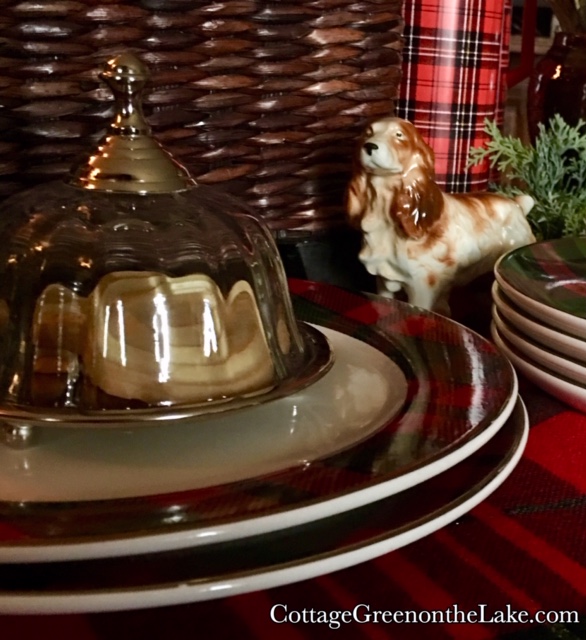
I keep Scottish Shortbread cookies in the pantry, so I placed “just enough for two” under a domed dessert tray.
And another teatime treat, Almond Thins, circle a cheery plate rimmed in plaid.
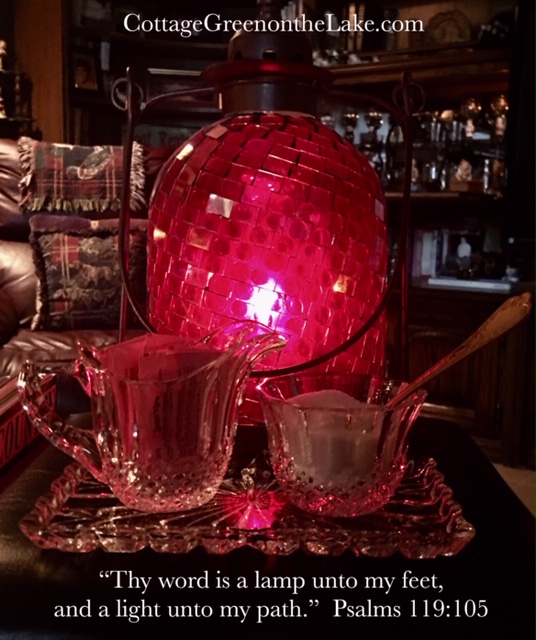
Then the last adornment’s to my tablescape … a leaded glass lantern (a loved gift from our daughter) and an antique crystal cream and sugar service glisten like jewelry atop a little wooden chest.
The welcome glow and ambiance from the lantern, candlesticks and votives add sparkle to our cloudy afternoon.
All set and ready!
The calendar proclaims that it’s almost Spring and just the other day I saw a flock of Robins in our backyard … but today it feels like “winter” so we’ll stay inside where it’s warm, indulging in our Highlander Tea! Embrace the last of the “cozy season” put on something comfy and have some tea! (:
From my cottage to yours ~ Trenda
Thank you for reading my blog! To have all my posts delivered to your mailbox, click on the FOLLOW box above and type in your email address.
Author: cottagegreenonthelake
I hope you will be charmed and delighted when you read and look at the pictures of tablescapes, home decor, seasonal decorations, floral arrangements, landscaping ideas, “potting about the shed” and the unexpected ways I use everyday items to decorate my home; I hope all will be an inspiration for you as you make your own little haven and nest … 4 the seasons!From my cottage to yours ~ TrendaView all posts by cottagegreenonthelake
With beautiful, tangible evidence of autumn in the air and a birthday to celebrate with “la famille” last weekend, I polished the brass candlesticks and started decorating the table. I always have a general idea of how I want to set my table … if I’ll be using a table runner, a tablecloth, or place mats … which plates, napkins, and cutlery I want to use … and what I’ll be using as a centerpiece, but setting a table and creating a tablescape are two different things. Sprinkles and touches of “this and that” are what magically transform a set table into a tablescape.
The definition of tablescape according to the English Oxford dictionary is … “A decorative arrangement of ornaments or other objects on a tabletop.” Embellishing Oxford’s definition of tablescape a little further … a tablescape for me is created by arranging a tabletop in an artful way by using decorative objects … decor … centerpieces … lighting … and color in combination with the items needed in the table setting to create a certain mood or theme.
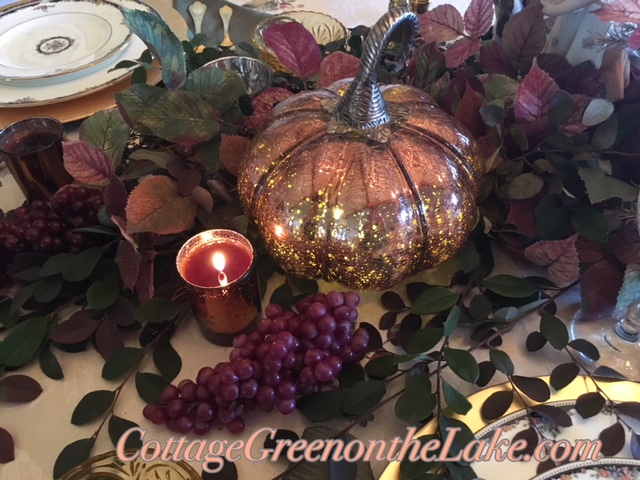
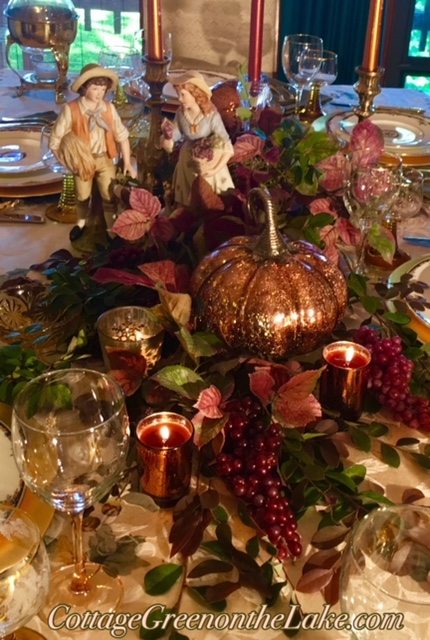
To begin “building” my tablescape, I chose what colors I wanted. I envisioned the autumn shades of squatty, Cinderella pumpkins, golden wheat fields, and the colors of the leaves that were beginning to turn different shades outside. With those colors in mind, I chose a beautiful soft yellow tablecloth with borders edged with harvest bounty, autumn leaves and acorns. My choice of dinnerware was an elegant, ivory colored Wedgwood china that was rimmed with rich, harvest colors and had a deep cornflower blue border. A cluster of silk autumn leaves in dusty orange, burgundy, and golden yellow became my centerpiece mixed with faux clusters of deep purple grapes, and fresh sprigs of burgundy Loropetalum (Chinese Fringe Flower) that I tucked in among the leaves from bushes Richard had just trimmed outside.(click here to see pictures and instructions)
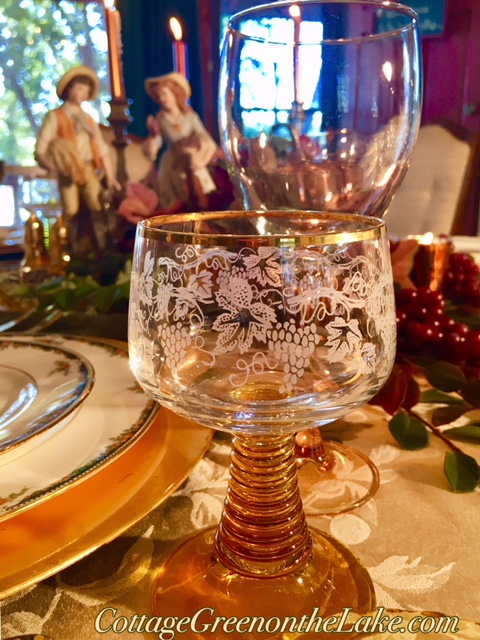
When creating a tablescape, it’s important to imagine what idea, mood, or theme you are trying to convey. In my mind I pictured a French villa on a warm autumn afternoon that overlooked a valley of the French countryside. As I visualized what I wanted my table to look like, I knew the French provincial figurines in my kitchen hutch. (click here to see) would look perfect on the table and voilá! … with the placement of Pierre and Belle, my table was suddenly transformed into the beginnings of a tablescape!
Then, the fun really began as I begin to sprinkle in a little “magic” … “this and that” … “the jewelry” to make our table gleam: brass and crystal candlesticks were placed, tall against my autumn foliage and copper and gold votive cups were tucked among the foliage and grape clusters for sparkle.
Goldware glistens atop sage green napkins and next to gold chargers …
Antique berry bowls and grape clustered German stemware with golden rims and pedestals,
Blush and gold colored stemware …
A copper colored votive and a twinkling Cinderella pumpkin are placed among burgundy leaves and purple clusters of grapes …
“Salagadoola mechicka boola
Bibbidi-bobbidi-boo
Put them together and what have you got
Bibbidi-bobbidi-boo …”
~ Walt Disney’s “Cinderella”
The autumn afternoon is ready and waiting for the family …
Chandelier draped in autumn finery … rose hips, colored leaves, grape clusters and strings of gilded acorns.
“Salagadoola mechicka boola
Bibbidi-bobbidi-boo
It’ll do magic, believe it or not
Bibbidi-bobbidi-boo …”
~ Walt Disney’s “Cinderella”
“It’ll do magic, believe it or not” creating your own tablescapes, when you use these tips … bibbidi-bobbidi-boo! (:
From my cottage to yours ~ Trenda
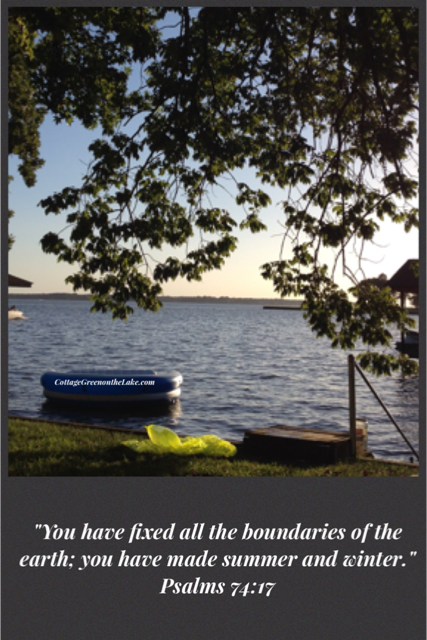
I was reminded of this scripture when we were out on our boat last Saturday and saw this spectacular view of the eastern sky at sunset … “For as lightning that comes from the east is visible even in the west, so will be the coming of the Son of Man.” Matthew 24:27
Thank you for reading my blog! To have all my posts delivered to your email address, just click FOLLOW in my post above … or click on my site: cottagegreenonthelake.com
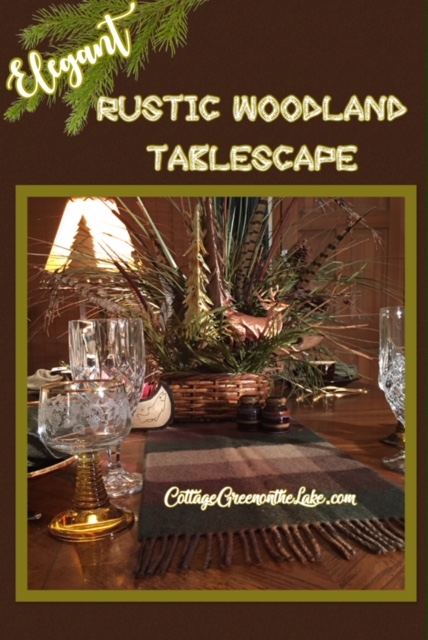
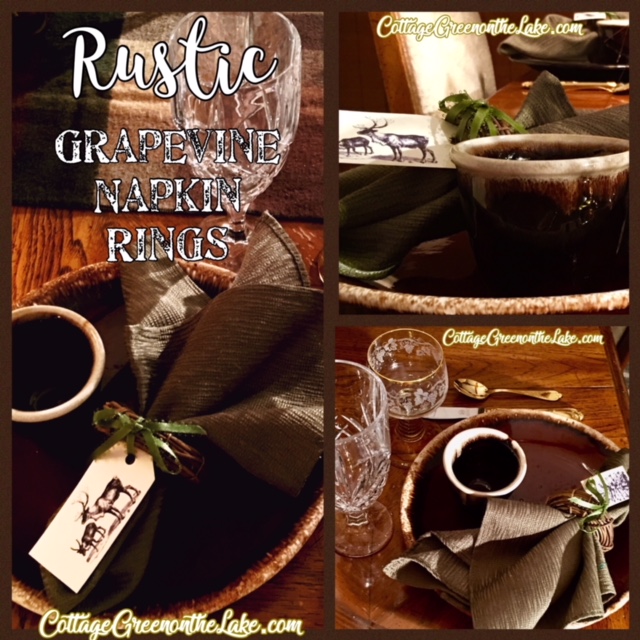
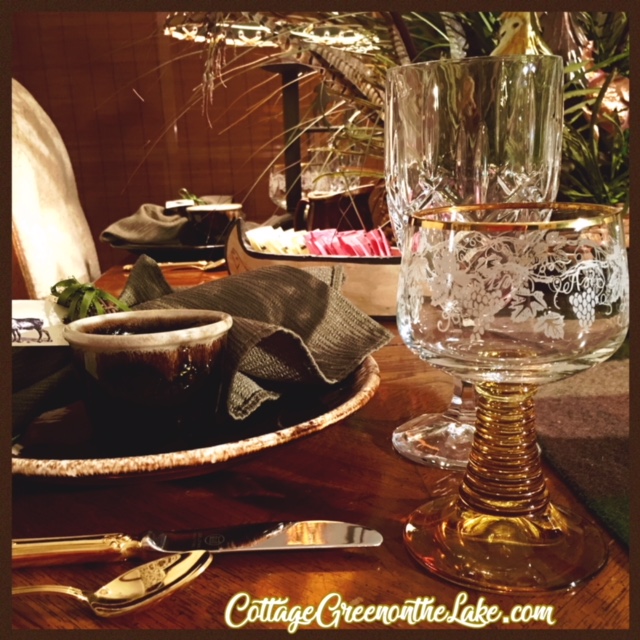
I enjoyed doing some tabletop decorating last week and I combined two different decorating styles in my table setting. I love the look of fragile crystal and goldware mixed with chunky pottery, natural grapevine napkin rings and woven baskets. “Elegance meets Rustic” and “opposites, do indeed attract” (; … as this duo is lovely together and the contrast of styles makes a cozy woodland tablescape.To make the woodland centerpiece I took the plastic covering off of 2 blocks of floral foam and hot glued them into the bottom of a woven basket I had. Then I began filling the basket with a collection of grasses, cattails, pine cone floral stems, pheasant feathers and birch twigs I had “amassed” over the years. The tallest part of any arrangement should be in the center, so after anchoring my tallest pieces I began “fanning down” both sides from the center of the arrangement, inserting my filler into the florist foam. The last addition and focal point I added to the arrangement was a metal art piece … a copper stag among metal fir trees. For my place settings I used pieces of vintage Hull and Pfaltzgraff pottery, a treasure that Richard found and bought for me at an auction he went to with his brother, Bob. The dishes are a sweet remembrance for both of us since Bob passed away this past October. ❤ The pattern on this stoneware is known as “Brown Drip” pattern, a favorite of both the Hull and Pfaltzgraff Stoneware Companies during the 1930’s.These simple, rustic napkin rings are made using mini-grapevine wreaths. I downloaded my free woodland tags from Decorator’s Notebook by Bethan John. After printing and cutting out my tags, I punched a hole in each tag using a standard hole punch. Then I inserted a moss-green satin ribbon into the hole of each tag and tied the ribbon into a bow to the grapevine, making sure the tag was facing out as I pulled my knot of the bow, tight.I love these darling little bean pots and keep collecting them whenever I see them at antique stores. They look charming holding BBQ beans for autumn wiener roasts … filled with Chili con Carne on cold winter evenings … brimming with Stuffed Pepper Soup on breezy Spring picnics … or in the summer, filled with colorful Cajun Beans (recipe coming at a later date!) alongside grilled steaks! Crystal glasses and little goblets from Germany are etched with grapevines and are rimmed in gold and have golden bases. I love the look of the fragile crystal contrasting with the heavy pottery and the comparison makes the crystal seem even more delicate. And this hand painted canoe makes a darling caddy for sweeteners!A mixture of metals … the copper stag and the goldware add gleam to all the forest browns, moss greens and the deep brown dishes. For a final touch of coziness, I added this little lamp that looks like it was made for my woodland tablescape! The golden lampshade matches the carved canoe and also highlights the goldware and golden goblets while the dark silhouettes of the spruce trees and moose on the lamp shade adds more “depth” to my rustic theme.You know how I love using every day objects in unusual ways?! I pulled Richard’s cashmere muffler from the closet and thought it made the perfect table runner for my woodland tablescape! The softness of the muffler contrasted with the rough basket centerpiece and it’s color … the same browns and moss-green colors found in the forest!Juxtaposition/definition by Merriam-Webster: the act or an instance of placing two or more things side by side often to compare or contrast or to create an interesting effect. Hmmm … crystal next to pottery, textured, woven centerpiece sitting atop soft, luxurious cashmere, and rustic grapevines mixed with elegant goldware??? I love juxtaposition decorating! (:P.S. We saw 2 Bald Eagles, yesterday!!! Neither Richard or I had ever seen one except in books or film! Then, we saw 2 in one day! The first eagle we saw around noon just nonchalantly sitting in a tree and the second one we saw in a totally different area, near sunset, also perched in the top of a huge Sycamore Tree. After our second Bald Eagle flew off, our “Blue, Super Moon” was just begin to rise and it was gorgeous! I couldn’t help but think of the scripture I had just read that morning …“Praise the Lord, O my soul. O Lord my God, you are very great; you are clothed with splendor and majesty. He wraps himself in light as with a garment; he stretches out the heavens like a tent and lays the beams of his upper chambers on their waters. He makes the clouds his chariot and rides on the wings of the wind.” Psalms 104:1-3
From my cottage to yours ~ TrendaThank you for reading my blog! To have all my posts delivered to your email address, just click FOLLOW in my post above .. or click on my site: cottagegreenonthelake.com
"Deck the halls again now...For we need a little Christmas
Right this very minute
Candles in the window
Carols at the spinetAnd we need a little Christmas
Right, this very minute
We need a little Christmas now."~ written by Jerry Herman for the Broadway musical Mame
The countdown to Christmas has begun and these miniature envelopes you make yourself (use free link below) are a charming way to mark off the days until Christmas.
“Deep summer is when laziness finds respectability.” – Sam Keen
“4 the seasons” … Summer Season at Cottage Green on the Lake
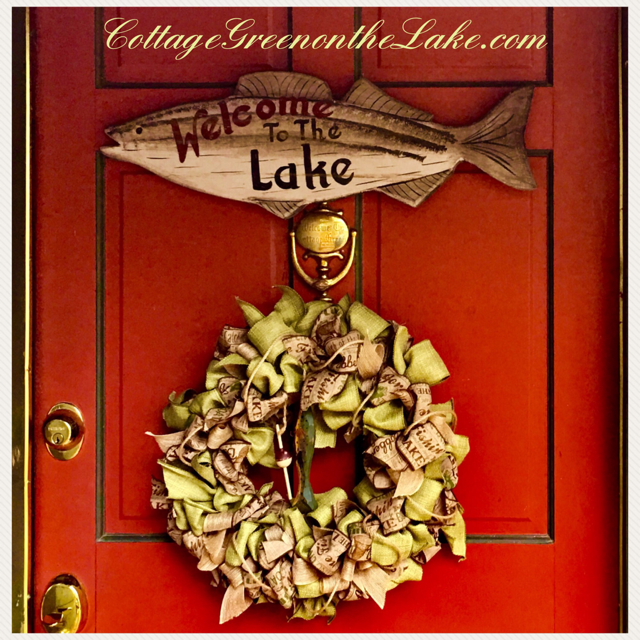
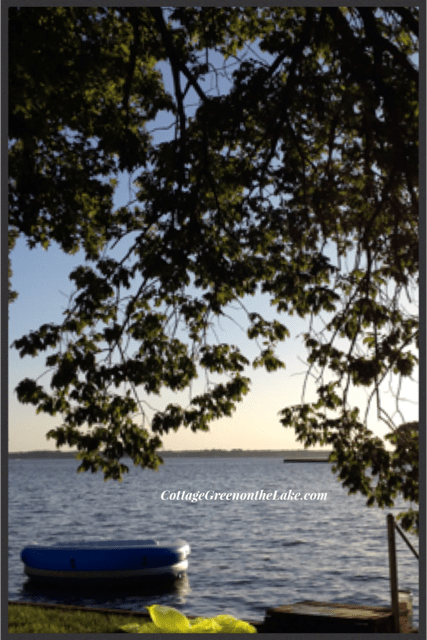
On the dock … ‘WELCOME TO THE LAKE’
From the back deck …
“Whiskers” (a Great Blue Heron) a long time resident at Cottage Green strolls each morning and evening along our retaining wall and dock. A few evenings ago Richard and I were sitting outside watching Whiskers as he stood poised, watching intently the water below. Suddenly, we saw his neck straighten as he nimbly struck at a passing fish. When he straightened back up, he had a 5-6 inch perch, “shis-ka-bobbed” on his beak … “bon appétit! (:
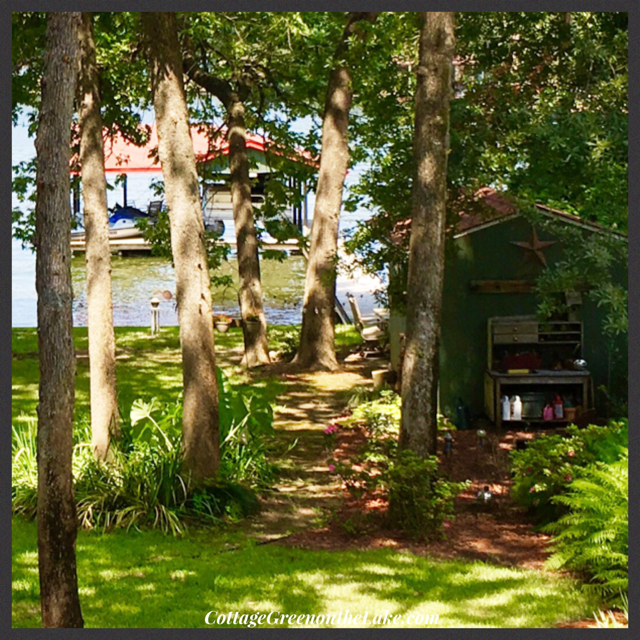
My very own “play house” and potting shed under the canopy of trees and near the water …
Backyard … Encore Azaleas are performing their second act, re-blooming and brilliant against a backdrop of ferns.
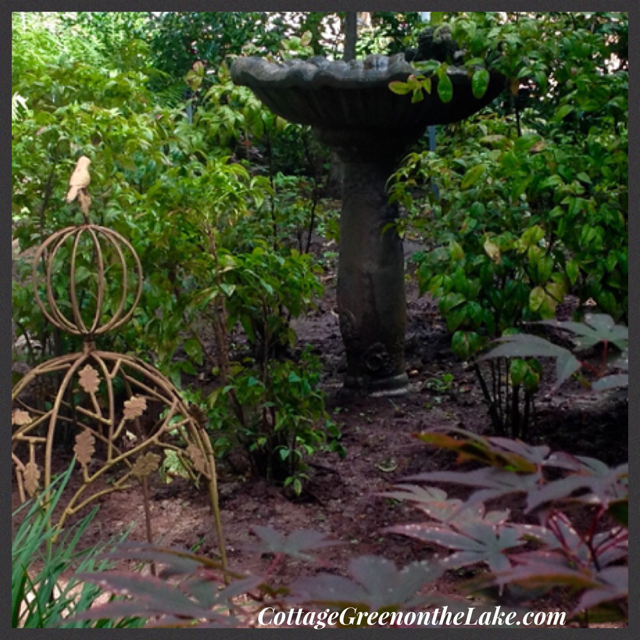
A delightful spot to bathe! A birdbath surrounded by Holly, Dwarf Nandina and a Japanese Maple …
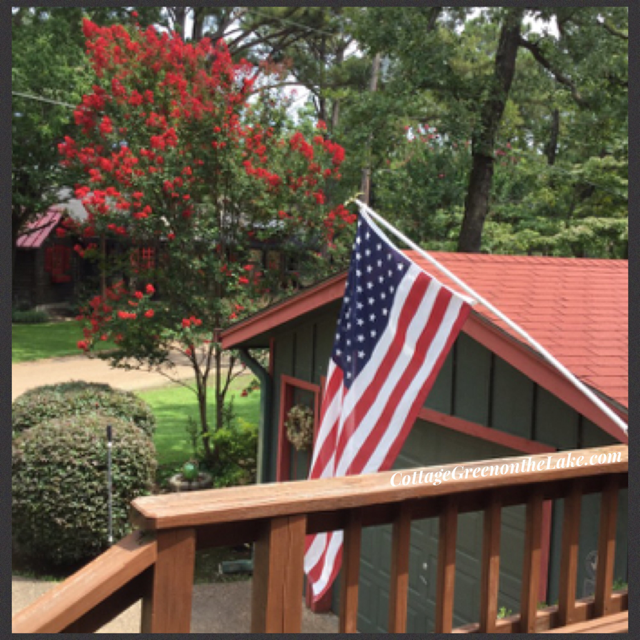
In the front yard … perfectly named for it’s blooming time and “firecracker red” blooms our ‘Firecracker’ Crepe Myrtle (Lagerstromia) blooms each year in our front yard around the 4th of July.
Strutting across our driveway is a new resident at Cottage Green … a white crane I named “Sassy Pants!” (: He visited our front yard one day and decided he likes perching on our front deck and dining on worms he finds between our brick pavers!
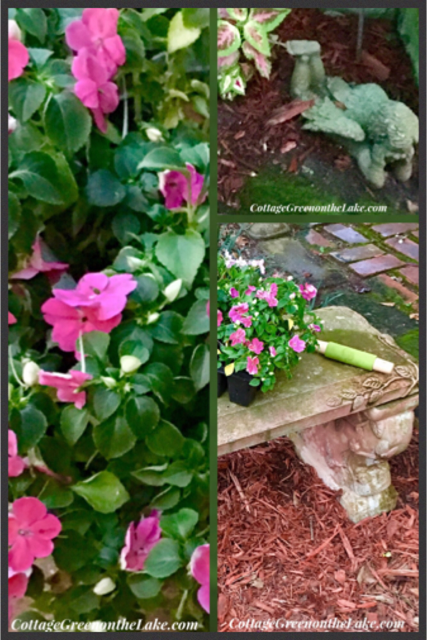
The sideyard … Impatiens on a cherished cement bench my sister stained and painted.
Remembering Mr. Keen’s words … I hope you have many “respectable” days during these last days of summer! (:
From my cottage to yours ~ Trenda
Thank you for reading my blog today. To have all my posts delivered directly to your email address, just click on FOLLOW in the post above … or click on my site: Trenda @cottagegreenonthelake.com and follow me on Pinterest.
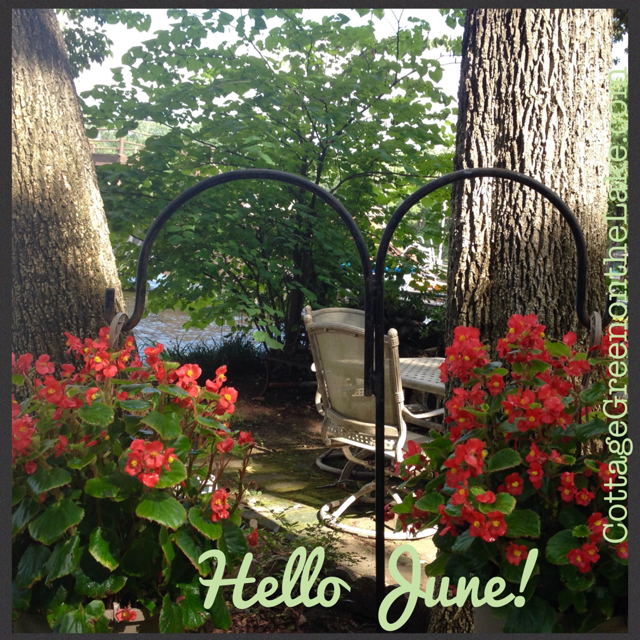
Hello June! We’ve been looking forward to seeing you! (:
“Roll out those lazy, hazy, crazy days of summer …” It’s time to slow down, kick back, and relax!
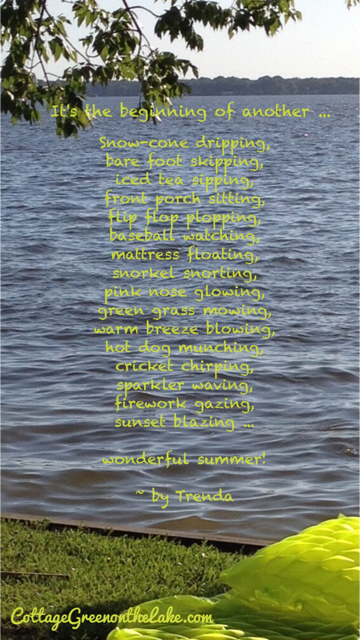
WONDERFUL SUMMER! ~ by Trenda
“It’s the beginning of another …
Snow-cone dripping,
bare foot skipping,
iced tea sipping,
front porch sitting,
flip flop plopping,
baseball watching,
mattress floating,
snorkel snorting,
pink nose glowing,
green grass mowing,
warm breeze blowing,
hot dog munching,
cricket chirping,
sparkler waving,
firework gazing,
sunset blazing …
wonderful summer!”
The days of June are marked off the calendar with the “procession” of different celebrations and “happenings.” Flag Day – June 14th … Father’s Day – June 18th … and the longest day of the year, Summer Solstice – June 21st. Keep the “red, white, and blue” decorations handy and get out those summer recipes and “Father’s Favorites!” Two of our favorite’s here at Cottage Green are … my recipe for Delicious BBQ Beans and Sand Pail Ice Cream
We love the smoky flavor of these “Delicious BBQ Beans” and the enhanced layer of flavor that the bell pepper adds! I also love that the beans are cooking in the crock pot while I’m away or I’m busy preparing other dishes.
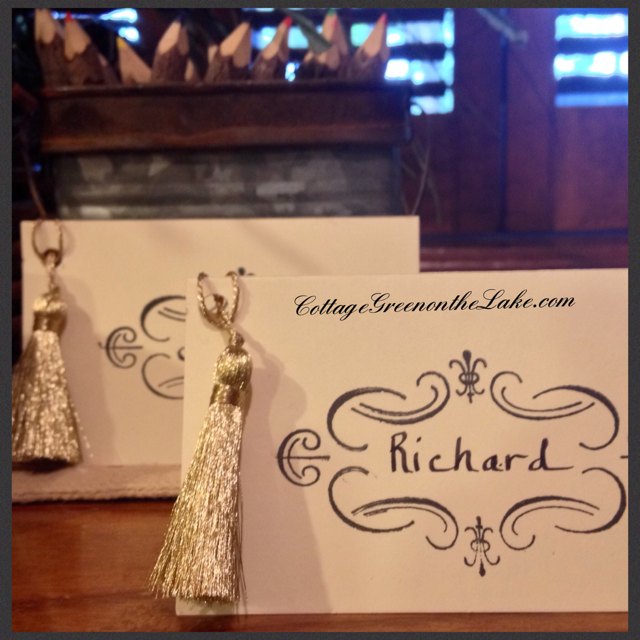
Now, for some elegant DIY place cards that are easy to make that will add an “air” of sophistication to your “Father’s Day” table. If you’ve been following my blog for any length of time, you know I love “dressing” the table! One of the easiest ways to make your table festive and make every guest feel important is by adding place cards to your tablescape. I made these simple, but elegant place cards for a graduation party and they are perfect and serving “double-duty” … for our Father’s Day celebration!
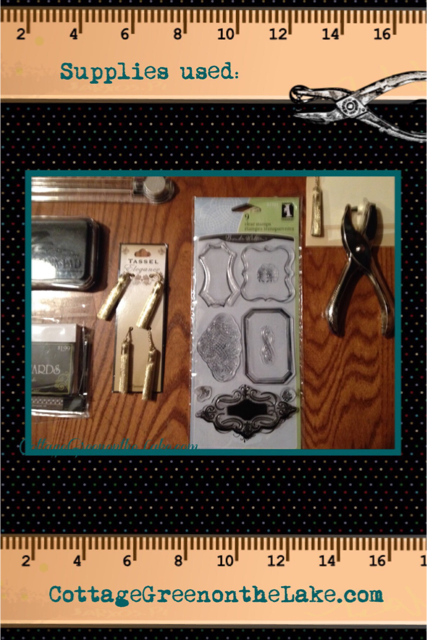
Here are supplies needed to make these place cards:
I bought my miniature decorative tassels in the “Notions” section at Hobby Lobby (where the fabrics/buttons/ribbons are located). I also bought my place cards and my clear stamp pads at Hobby Lobby, in the stationery section.
Instructions:
Punch a hole in upper left-hand corner of each place card, making sure you punch the hole through the front and back of the place card.
Insert the opposite end of the tassel through the punched hole in the front of the card (insert, front to back) so that the tassel is in the front of the place card.
Bring the looped end of cord over the top of the place card and insert (thread) the tassel through the corded opening and pull gently to secure the “tassel in place. Make sure the knot is not taut, so the tassel drapes loosely down the front of the place card. * (see photo below)
Stamp the front of each place card with a filigree frame of your choice from your selection of clear stamp pads. Make sure you allow enough time for the ink to dry before handling.
After ink has thoroughly dried, write each person’s name centered in the stamped frame.
*Close-up photo of #3 instructions:
I love the elegant and “man-ly” look of these place cards and can’t wait to show you how they look “gracing” our Father’s Day tablescape!
Now hang up your hammock, get out the ice cream maker, and drape your patio in party lights and “Roll out those lazy, hazy, crazy days of summer … you’ll wish that summer could always be here.” ~ Nat King Cole
From my cottage to yours ~ Trenda
I’m delighted that you read my blog today! Please click on FOLLOW in the post above or on my site cottagegreenonthelake.com to have all posts delivered directly to your email address.
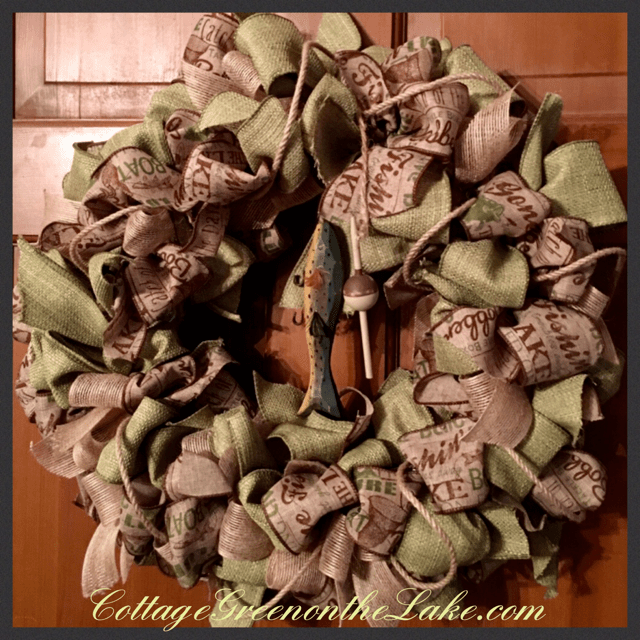
I was delighted when I saw this rustic looking ribbon covered with fishing terms in bold fonts! I had been wanting to make a wreath for our front door and the “discovery” of that ribbon set “the theme” for my whole wreath. After finding the fishing ribbon, the rest of the coordinating ribbons were easily found. A coarse textured, sage green ribbon, a loose weaved burlap colored ribbon, a rope-like ribbon, and a wooden fish and bobber finished my purchases and I was ready to begin making my wreath. A wreath that would “say” … “Welcome to the long days of summer at the lake!”
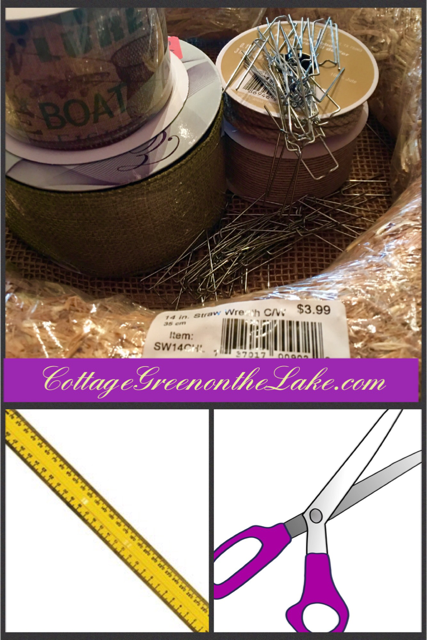
Here are supplies I used making my lake wreath:
straw wreath form
floral pins
scissors
ruler
ribbons – at least 3 different colors or widths
wooden fish and bobber
Only materials needed … scissors, a ruler, a straw wreath, floral pins, ribbon, and a wooden fish and bobber! (Note: Be sure to leave the clear plastic covering on your straw wreath to keep your wreath intact, and your straw from shedding all over your floor!)
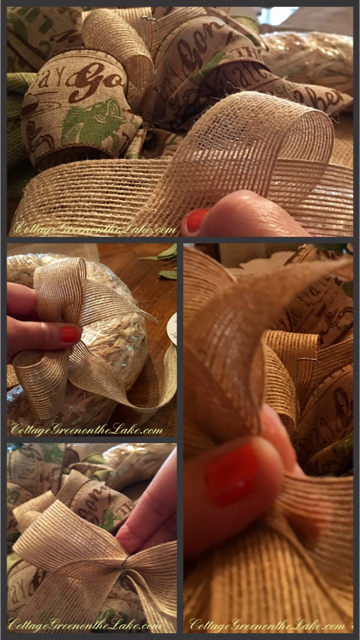
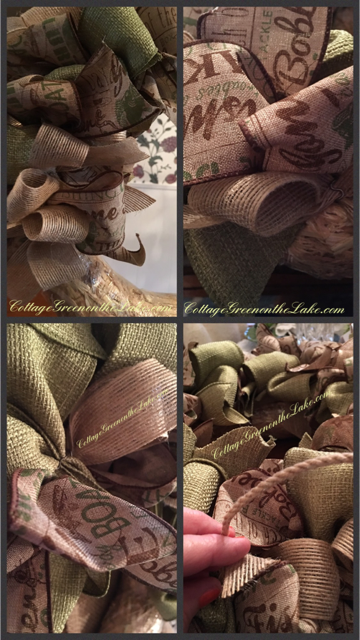
Instructions: (see pictures above)
Measure a length of ribbon approximately 17″ long and cut. (Note: When you cut your ribbon, make a “pretty” diagonal cut since this will be the “tail” of your bow!)
Grasp the cut length of ribbon in the middle and put your thumb on the center of the ribbon.
Make a loop on each side of the center point (where you are holding the ribbon) These loops are the 2 loops your bow. Grasp where the 2 loops cross over each other, in the center.
Bunch the center of the ribbon together and place a floral pin over the “bunched” ribbon and push the “bow” into the straw form, pushing the floral pin all the way down. (Note: the “tails” of your bow add fullness to your wreath!)
Make your next bow, repeating the same steps but alternating the colors of the ribbon you are using.
To make your wreath fuller, place your next bow so one side of the loop goes between the “tails” of the previous bow, then pin. Switch the direction of your bow each time before pinning.
When your wreath is covered with bows, go back and fill in the sides and center where you see any gaps.
I added my “rope cord” filler by going back after my wreath was complete and floral pinning just a loose cord around the entire wreath. Last touch … I floral pinned my little wooden fish and bobber dangling on a piece of twine, near the top of the wreath so it would hang down in the center of my wreath.
“Welcome to the Lake!”
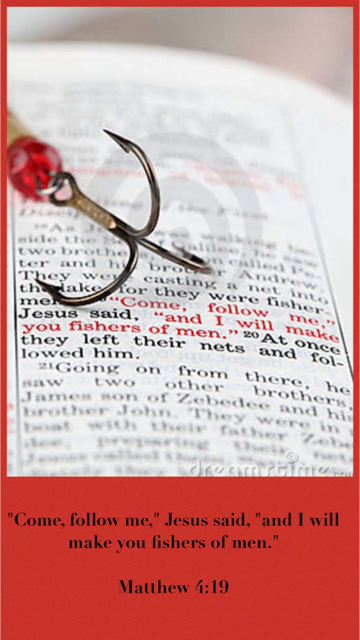
“Come, follow me,” Jesus said, “and I will make you fishers of men.” Matthew 4:19
Wishing you the best of summer’s!
From my cottage to yours ~ Trenda
I’m delighted you read my blog today! Please click on FOLLOW in the post above or on my site cottagegreenonthelake.com to have all my posts delivered directly to your email address. Also, I’m joining Kelly from The Essence of Home in a Share Your Style Link Party (click here to see other great sites)


 The definition of tablescape according to the English Oxford dictionary is … “A decorative arrangement of ornaments or other objects on a tabletop.” Embellishing Oxford’s definition of tablescape a little further … a tablescape for me is created by arranging a tabletop in an artful way by using decorative objects … decor … centerpieces … lighting … and color in combination with the items needed in the table setting to create a certain mood or theme.


 “Whiskers” (a Great Blue Heron) a long time resident at Cottage Green strolls each morning and evening along our retaining wall and dock. A few evenings ago Richard and I were sitting outside watching Whiskers as he stood poised, watching intently the water below. Suddenly, we saw his neck straighten as he nimbly struck at a passing fish. When he straightened back up, he had a 5-6 inch perch, “shis-ka-bobbed” on his beak … “bon appétit! (:


 Instructions: