~ Trenda
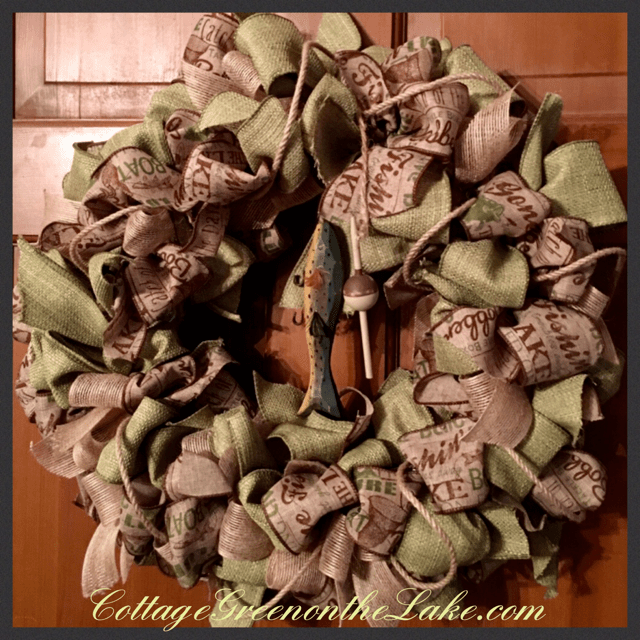
I was delighted when I saw this rustic looking ribbon covered with fishing terms in bold fonts! I had been wanting to make a wreath for our front door and the “discovery” of that ribbon set “the theme” for my whole wreath. After finding the fishing ribbon, the rest of the coordinating ribbons were easily found. A coarse textured, sage green ribbon, a loose weaved burlap colored ribbon, a rope-like ribbon, and a wooden fish and bobber finished my purchases and I was ready to begin making my wreath. A wreath that would “say” … “Welcome to the long days of summer at the lake!”

Here are supplies I used making my lake wreath:
- straw wreath form
- floral pins
- scissors
- ruler
- ribbons – at least 3 different colors or widths
- wooden fish and bobber

Only materials needed … scissors, a ruler, a straw wreath, floral pins, ribbon, and a wooden fish and bobber! (Note: Be sure to leave the clear plastic covering on your straw wreath to keep your wreath intact, and your straw from shedding all over your floor!)

Instructions: (see pictures above)
- Measure a length of ribbon approximately 17″ long and cut. (Note: When you cut your ribbon, make a “pretty” diagonal cut since this will be the “tail” of your bow!)
- Grasp the cut length of ribbon in the middle and put your thumb on the center of the ribbon.
- Make a loop on each side of the center point (where you are holding the ribbon) These loops are the 2 loops your bow. Grasp where the 2 loops cross over each other, in the center.
- Bunch the center of the ribbon together and place a floral pin over the “bunched” ribbon and push the “bow” into the straw form, pushing the floral pin all the way down. (Note: the “tails” of your bow add fullness to your wreath!)
- Make your next bow, repeating the same steps but alternating the colors of the ribbon you are using.
- To make your wreath fuller, place your next bow so one side of the loop goes between the “tails” of the previous bow, then pin. Switch the direction of your bow each time before pinning.
- When your wreath is covered with bows, go back and fill in the sides and center where you see any gaps.

I added my “rope cord” filler by going back after my wreath was complete and floral pinning just a loose cord around the entire wreath. Last touch … I floral pinned my little wooden fish and bobber dangling on a piece of twine, near the top of the wreath so it would hang down in the center of my wreath.

“Welcome to the Lake!”

“Come, follow me,” Jesus said, “and I will make you fishers of men.” Matthew 4:19

Wishing you the best of summer’s!
From my cottage to yours ~ Trenda

I’m delighted you read my blog today! Please click on FOLLOW in the post above or on my site cottagegreenonthelake.com to have all my posts delivered directly to your email address. Also, I’m joining Kelly from The Essence of Home in a Share Your Style Link Party (click here to see other great sites)
Discover more from Cottage Green on the Lake
Subscribe to get the latest posts sent to your email.


2 thoughts on “Welcome to the Lake … DIY Wreath for the Summer!”