Look at the latest sparkle I’ve added in the Cottage Greenhouse! I found this quaint and quirky vanity tray mirror covered in a layer of dust at a local Thrift Store for only $1.00! When I found it, I had no idea where I was going to put it, but I couldn’t bear to leave it there forgotten and forlorn.
Now, look how perfectly charming it looks in The Cottage Greenhouse!
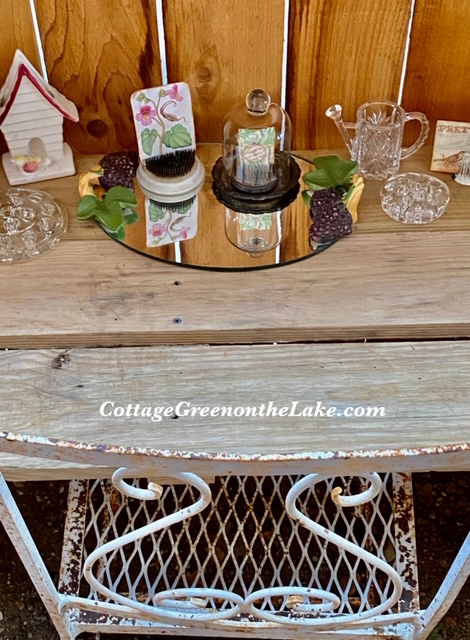
Instead of the usual cosmetics and perfumes that sit on a vanity tray, I loaded my Greenhouse vanity tray with a few of my antique metal floral frogs and a tiny silver platter with ruffled edges I topped with a chunky cloche. A crystal watering can fits in perfectly with this garden vignette.
Pretty DIY place cards are propped up on the prongs of antique floral frogs. They look fetching in this greenhouse setting, but they’re especially sweet when I use them in a Nature themed tablescape!
To make this flower place card I cut an image from an old garden book that I was lucky to find at a library sale for only $1.00! I cut the flower image into a smaller rectangle and rounded the corners of the card to soften the edges, then inked the edges. Complete instructions for all Nature place cards below.
To make this little card under the cloche, I photo-copied a favorite vintage green and white crocheted table runner onto cream card stock, then cut the paper copy into small cards. I punched out a round tab from an old book page and distressed it by inking along the edges. Then I stamped the tab with a letter “T” and stapled it onto a bit of lace.
I love the look of this unique and layered place card and made it by first laying a lace handkerchief on the copy machine. Then I placed a cloth napkin on top of the lace handkerchief, closed the lid on my copy machine, and copied the layered cloths onto cream colored card stock. Look at the beautiful texture on the card below and how the photo copied lace looks like actual lace overlapping the card.
Instructions for DIY Nature Place Cards
Instead of using decorative papers or colored card stock for this project, I used an assortment of materials … a page from a garden book, a vintage green and white table runner, a lace handkerchief, and a floral napkin. I love the look and visual texture of materials photo-copied onto cream colored card stock. So use your imagination when making your place cards and have fun looking for the textiles or other images you want to photo copy for your place card backgrounds.
After making your photo copies, cut the paper copy into the shapes you desire for your project. I cut my photo-copied paper into petite rectangles to fit in my antique floral frogs.
For variety, I left some of the corners of my cards square, other’s I rounded using a corner punch I have. If you don’t have a corner punch, you can round the edges of your place cards with scissors.
No inking is necessary, but if you want to add an antique or aged look to your place cards, ink the edges of your cards using a blending tool and stamp pad. I used Tim Holtz’s mini ink blending tool and Tim Holtz’s Distress Ink Pad, Color: Vintage Photo
To add stamped images to your cards, you will need cling or acrylic stamps or wood block stamps. I used an acrylic bird image stamp, an acrylic bumble bee stamp, and a set of wood block miniature alphabet letters I bought at CVS for only $1.00. (Seems I’ve found a lot of good deals for only a $1.00!) I used the alphabet set to stamp the letters at the top of my card to spell PRETTY.
Punch or cut out round tabs using old book pages and staple them to the card on top of a bit of lace … or use buttons and glue the lace to the button and attach both to the card.
A little embellishment for a lot of charm!
Adopt the pace of nature: her secret is patience.
Ralph Waldo Emerson
In other news … my dear Richard cleaned out and organized his sprinkler pipes, fertilizers, and tools that were in the Cottage Greenhouse and he built two more sets of shelves for my bedding plants and greenhouse accouterments. ❤ Now I have twice as much room for planting and playing in the Cottage Greenhouse! Coming soon … pictures of my new addition, plus a Greenhouse tablescape using my Nature place cards!
WELCOME SEPTEMBER!
From my cottage to yours ~ Trenda
Thank you for reading my blog. To have all my posts delivered directly to your email address, just click on FOLLOW in the post above … or click on my site: cottagegreenonthelake.com
Follow me on PINTEREST at Trenda@cottagegreenonthelake.com
It was a delightful day for working in the cottage greenhouse.
Breezes from the north swept past the greenhouse door and I could see the lake winking at me while I worked at my garden desk.
I love hydrangeas and each spring I look forward to the gorgeous purple-blue blooms that fill our bushes. However, between the weather and furry folks, my hydrangea hedge has dwindled down to one lone bush. When I looked on-line to order more hydrangea’s, the nursery selections were limited and costly. With both those incentives, it seemed like the perfect opportunity to propagate some hydrangea cuttings from my Mophead Hydrangea … something I’ve wanted and meant to do every summer. It was a delightful day for working in the cottage greenhouse. Breezes from the north swept past the greenhouse door and I could see the lake winking at me while I worked at my garden desk.
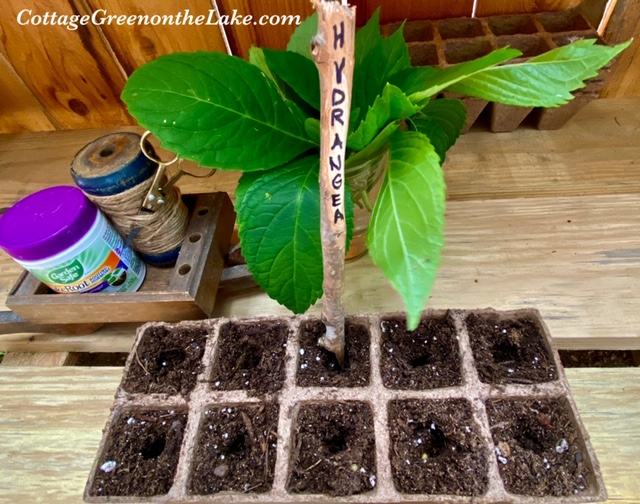
Before beginning my propagation project I ordered a set of peat pot trays, though I could have used a pot or any other container for my cuttings, provided they had good drainage. My seedling trays came with a set of bedding plant markers. I was disappointed when I opened my package and saw the plant markers were made of plastic and were stark white. I had envisioned something a little more “earthy” and rustic for my first greenhouse project. Undaunted, I went out in the yard, gathered up some twigs, and whittled my own set of charming plant markers!
These plant markers made from twigs are just what I had envisioned, they are so rustic and winsome … AND so simple and fun to make! The only thing you’ll need for this project is twigs, a pocket knife for whittling, and a permanent marker. Are you ready? (: …. Go outside and pick up some twigs that are all about the same length and diameter, and that are reasonably straight (though some crooks and knot holes in your twigs add character!) Then sit down and begin whittling away the bark at the wider end of your stick. Carve enough bark away on your twig to expose the smooth wood underneath. You’ll only want to whittle away enough of the rough bark so you can easily write the names of the plants or seeds on your twig marker for identification. In the little red pail below, are ALL of the twig plant markers I made. I wrote Hydrangea and Morning Glory on 2 of them and I left the other markers with empty “nameplates” for future projects. Before I made these plant markers, I had never whittled anything in my life. I found the task mesmerizing and had to stop myself from carving away too much of the twig! P.S. – See the white plastic marker that came with the seedling trays that I placed next to my twig plant markers! (:
PROPAGATING HYDRANGEAS … SUPPLIES NEEDED:
seedling trays or other container w/good drainage
Potting Mix (I used Miracle Gro)
pruners
container of water
rooting hormone (I used Garden Safe Rooting Hormone)
Sharp stick or pencil
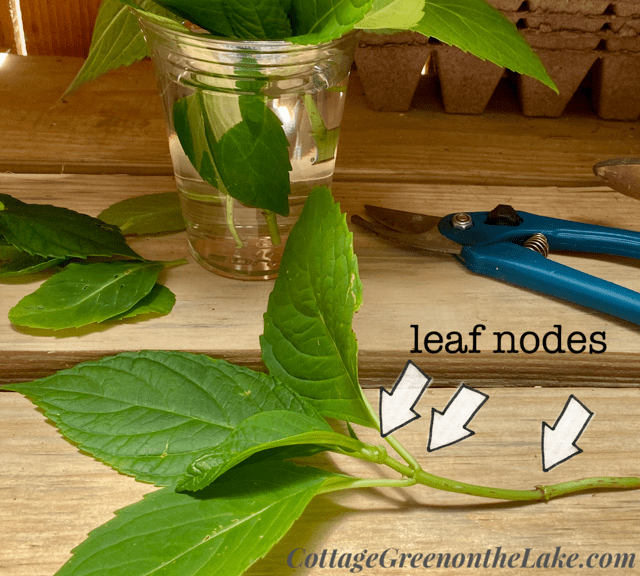
The best time to take “cuttings” from a hydrangea is around the first day of summer. The first day of summer is the longest day of the year in the northern hemisphere and is also known as Summer Solstice … and this year Summer Solstice is today, June 20th! Around this time is when the leaves of the hydrangea are lush and green and it’s also the fastest time for the hydrangea to begin generating roots. Starting your hydrangea cutting’s at this time allows enough time for the cuttings (also known as strikes) to develop root systems before the hydrangea’s go dormant in the fall. Look for new, tender green limbs, known as “soft wood” on your hydrangea, as opposed to the brown, rigid woody sticks known as “old growth.” Cut 3″- 5″ stems, making the cut right below a leaf node (leaf nodes are horizontal segments on the stem where the leaves grow out) and include 3 leaf nodes in the stem you cut.
Carry a cup or container of water with you as you make your cuttings and place your hydrangea cuttings in the water so they won’t become taxed or wilted.
After you have as many cuttings as you want, trim your cuttings, taking off all the leaves except for the top 2. If your leaves are very small, you can leave them whole. However, if you are propagating large leaf hydrangea varieties, cut these leaves to about 1/4 of their original size so the cutting won’t be strained trying to supply water to the large leaf. Return your cuttings to the water after cutting the leaves. Fill your seedling trays or other container with potting mix and use a pencil (I used the the sharp end of my new whittled twig plant markers!) to poke a hole into the potting mix … 1 hole for each of your cutting’s, then dampen your potting mix before inserting your hydrangea cuttings.
Dip each wet hydrangea stem into the rooting hormone and insert cutting, coated with rooting hormone into your prepared potting mix. At least one set of leaf nodes, preferably 2, need to be covered in the potting mix since the nodes and stem are where the new roots will begin growing.
Gently push the potting mix around the cutting to hold it firmly in place, and continue until all cuttings are planted, then water thoroughly until the water flows freely from the drainage hole. If you use peat pots or trays like I did, I watered my cuttings until the sides of the tray were sodden. Keep your cuttings in a bright, warm place, but out of direct sunlight, and make sure your potting mix is moist at all times.
Don’t disturb your hydrangea strikes and continue to let them grow in your container or trays, making sure they are kept moist; I watered mine once each day. In 4 weeks your hydrangea cuttings, or strikes, should have produced new roots. At this time you can transfer your hydrangea’s to a bigger container. When you feel like your new hydrangea plants have become strong enough, or they have outgrown their container, they can be planted in your yard. This method of propagation works for all varieties of hydrangeas. I planted 10 hydrangea cuttings which hopefully will grow into 10 more Mophead Hydrangea bushes for our yard. Did you know a 1 gallon plant of Endless Summer Mophead Hydrangeas cost $29.99 on Amazon?!!! Go get on your garden gloves! (:
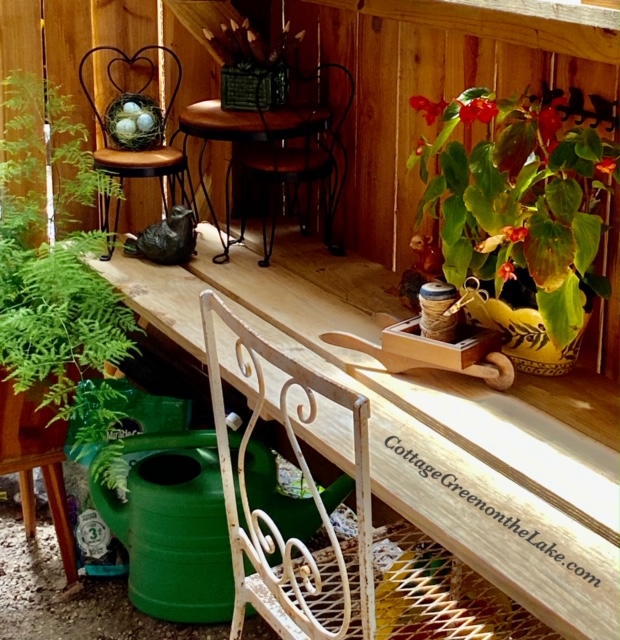
I love puttering around in my cottage greenhouse and below I have included some pictures of some of the knick-knacks I’ve added for some greenhouse charm. This wrought iron chair under my garden desk ~ is 1 of 4 that belongs with a beautiful glass topped garden table that my grandmother always had on her covered front porch. My mother gave the cherished table set to me and Richard sweetly sanded it and gave it a new coat of white paint. Now, I keep the table inside and use it in my music/craft room. I have dear memories of my grandmother and me sitting on her porch as she worked with her plants, sitting in this very chair! ❤
An Angel Wing Begonia looks beautiful tucked in a planter until I have the time to transplant it to an antique washtub outside my Potting Shed. See the sweet antique planter with the little bear sitting on top of the log? I love to find and collect these whimsical planters when we go antiqu’ing, and I have them in all kinds of unexpected places, not only in the greenhouse!
A grapevine wrapped pencil cup holds carved colored pencils and a chunky votive burns citronella and vanilla candles when I’m in the greenhouse. Here’s another one of my antique planters … a sweet little birdhouse with a red roof and a little birdie perched by the front door.
An old handmade wheelbarrow holds a spool of jute and scissors ready for tying up plants and other garden projects.
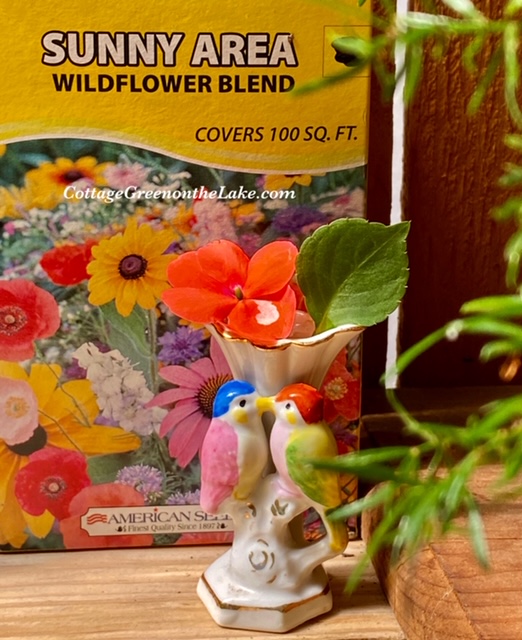
I love this tiny little flower vase with the kissing birds and I love to tuck tiny flowers inside. The colors of the birds and the coral-orange of the impatien’s bloom match perfectly with the box of wildflower seeds.
This is the canvas I told you about in my post “Charcuterie Charm” (click here to see) that my dear friend, Patricia made from the picture I sent her of the metal table I covered with broken pieces of blue and white pottery. Patricia told me she had this canvas made for me to hang in my greenhouse. I love it (and the giver) ❤ Doesn’t it make a great backdrop for my folksy handmade windmill with adjoining planter that holds an Asparagus Fern?
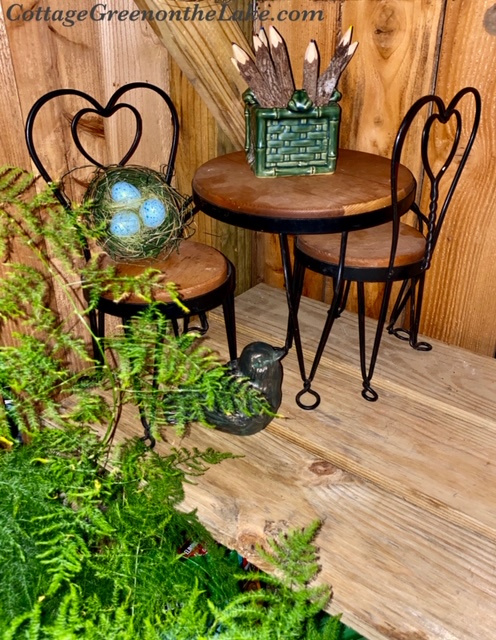
This miniature bistro table belonged to our daughter when she was little. ❤ The tabletop was always set with her Beatrix Potter tea set, ready for impromptu Teddy Bear Tea Party’s. I couldn’t think of parting with it, or the memories of sweet days gone by. Now, I love seeing it on my garden desk with a nest propped on one of the bistro chairs, a little bird keeping watch from the feathery fronds of a Plumosa Asparagus Fern, and another planter topped with little frogs, and filled with carved colored pencils.
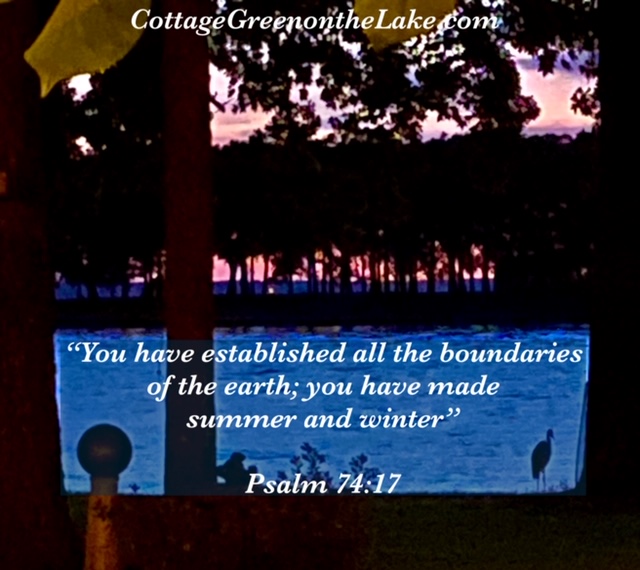
Hope you enjoyed your day … your Summer Solstice, and the beginning of summer! Look who obligingly walked right into the picture below as I was taking our beautiful sunset. A Great Blue Heron we’ve fondly named Whiskers. He comes to our backyard buffet every evening, looking for dinner!
From my cottage to yours ~ Trenda
Thank you for reading my blog. To have all my posts delivered directly to your email address, just click on FOLLOW in the post above … or click on my site: cottagegreenonthelake.com
Follow me on PINTEREST at Trenda@cottagegreenonthelake.com
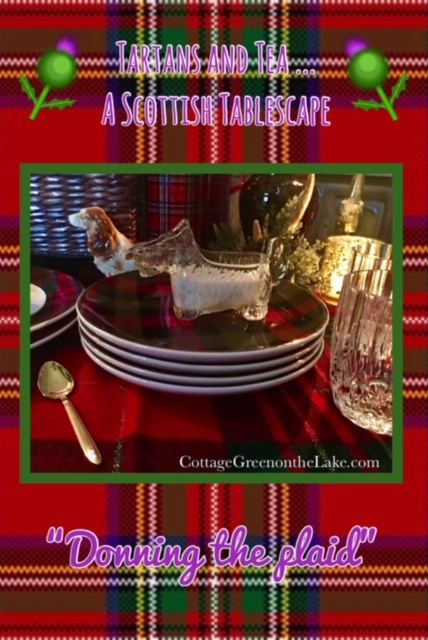
The Scotch in me loves using tartans in our home year round, but the warmth and cheerful “feel” of these plaids is especially pleasing on dreary days. Last week we had several cold, gray, “drizzly” days just the sort of day that was perfect for “a spot of tea.” Suddenly, I was inspired and the low table in our family room beckoned and glowed and seemed the perfect spot for a cozy, afternoon tea. A bright red tartan tablecloth was my backdrop and the transformation and fun began.
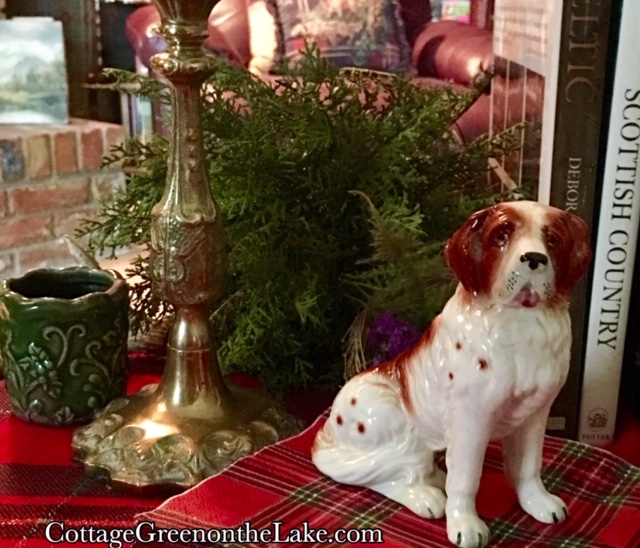
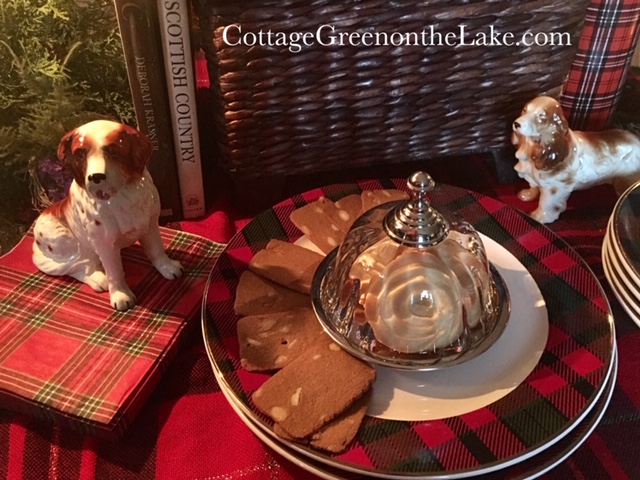
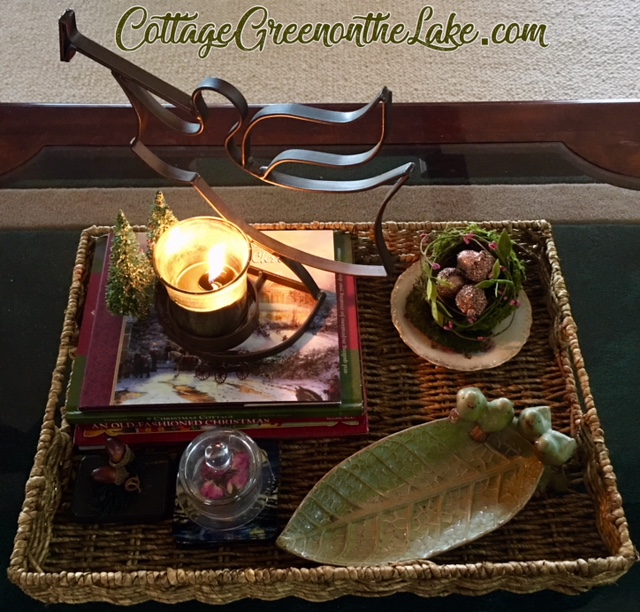
I gathered a basket full of “accouterments” for my tablescape that reminded me of Scotland … a beautiful antique Saint Bernard to sit atop tartan napkins looked stately in front of a pair of Scottish books.
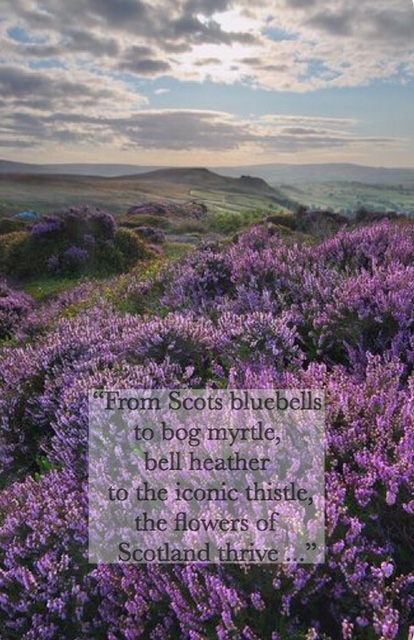
Purple Statice, placed in a little nest mimicked the purple heather and thistle that thrives in the Highlands and a clump of prickly cedar tucked beneath the candlestick represented the spiny gorse that covers the Scottish crags and glens.
“From Scots bluebells to bog myrtle, bell heather to the iconic thistle, the flowers of Scotland thrive …”
Flowers of Scotland
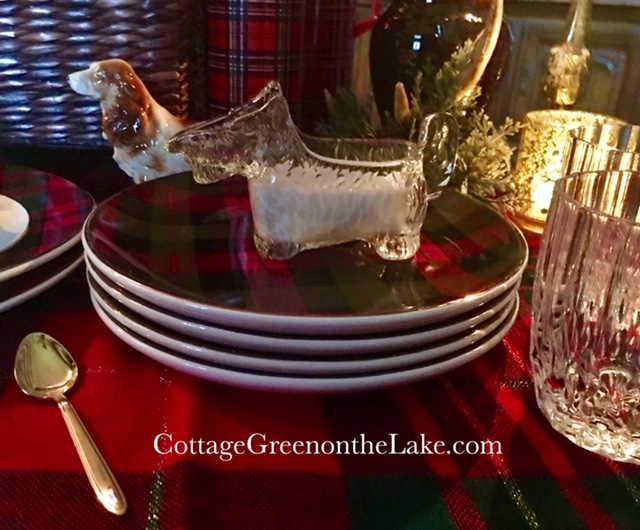
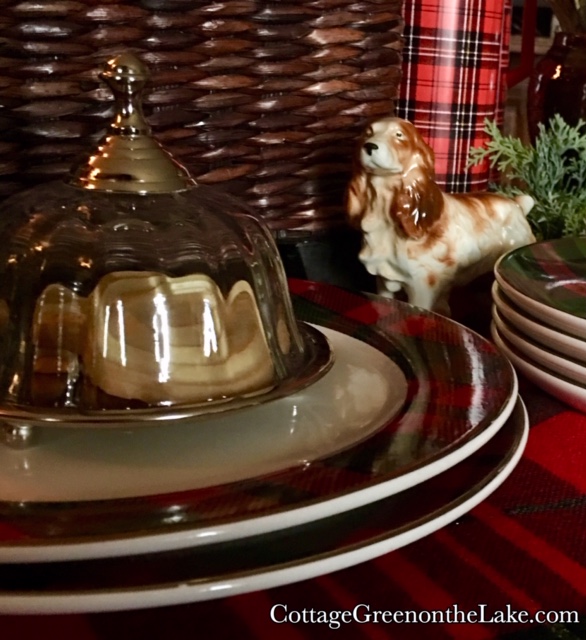
Since Scots are renowned for their love of dogs … another pair of sweet antique doggies for my tablescape; a ceramic Cocker Spaniel stands beside a glass Scottish Terrier that’s perched on a pedestal of tartan plates.
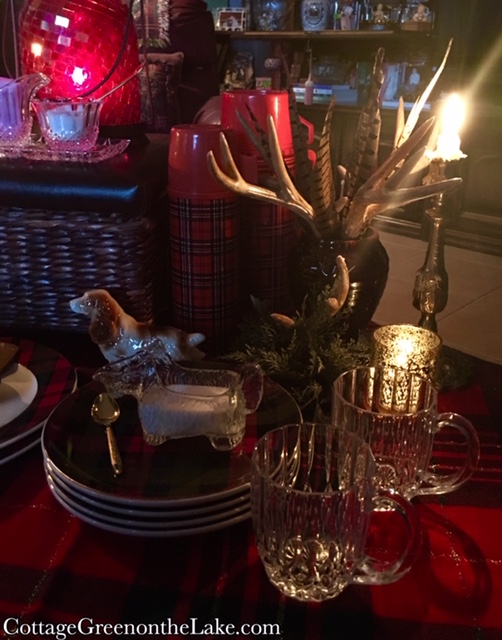
I love this whimsical “Scotty” dog cream pitcher! His perky tail is the handle of the creamer and the cream “spout” is his snout! (:
A pair of ornate candlesticks with scarlet tapers match the tartan cloth and a glazed pottery vase filled with pheasant feathers and faux antlers conjures up more Scottish flavor. Then, my favorite red thermoses add height, a perk of interest, and another layer of plaid, plus they’re perfect for keeping the tea hot … with two crystal mugs for “supping” close by!
I keep Scottish Shortbread cookies in the pantry, so I placed “just enough for two” under a domed dessert tray.
And another teatime treat, Almond Thins, circle a cheery plate rimmed in plaid.
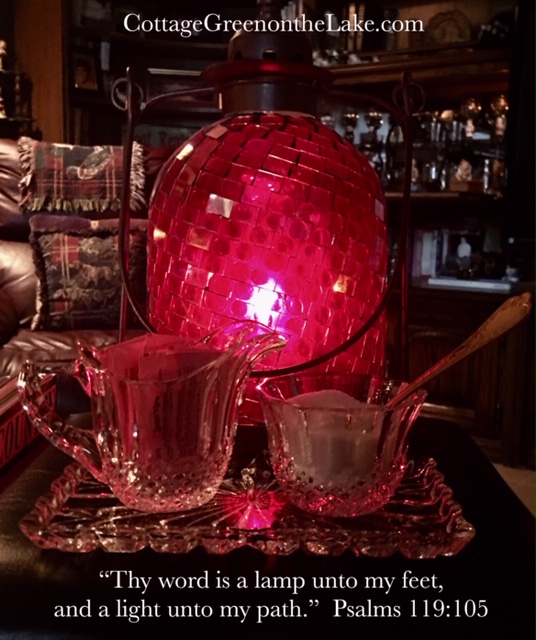
Then the last adornment’s to my tablescape … a leaded glass lantern (a loved gift from our daughter) and an antique crystal cream and sugar service glisten like jewelry atop a little wooden chest.
The welcome glow and ambiance from the lantern, candlesticks and votives add sparkle to our cloudy afternoon.
All set and ready!
The calendar proclaims that it’s almost Spring and just the other day I saw a flock of Robins in our backyard … but today it feels like “winter” so we’ll stay inside where it’s warm, indulging in our Highlander Tea! Embrace the last of the “cozy season” put on something comfy and have some tea! (:
From my cottage to yours ~ Trenda
Thank you for reading my blog! To have all my posts delivered to your mailbox, click on the FOLLOW box above and type in your email address.
Author: cottagegreenonthelake
I hope you will be charmed and delighted when you read and look at the pictures of tablescapes, home decor, seasonal decorations, floral arrangements, landscaping ideas, “potting about the shed” and the unexpected ways I use everyday items to decorate my home; I hope all will be an inspiration for you as you make your own little haven and nest … 4 the seasons!From my cottage to yours ~ TrendaView all posts by cottagegreenonthelake
With beautiful, tangible evidence of autumn in the air and a birthday to celebrate with “la famille” last weekend, I polished the brass candlesticks and started decorating the table. I always have a general idea of how I want to set my table … if I’ll be using a table runner, a tablecloth, or place mats … which plates, napkins, and cutlery I want to use … and what I’ll be using as a centerpiece, but setting a table and creating a tablescape are two different things. Sprinkles and touches of “this and that” are what magically transform a set table into a tablescape.
The definition of tablescape according to the English Oxford dictionary is … “A decorative arrangement of ornaments or other objects on a tabletop.” Embellishing Oxford’s definition of tablescape a little further … a tablescape for me is created by arranging a tabletop in an artful way by using decorative objects … decor … centerpieces … lighting … and color in combination with the items needed in the table setting to create a certain mood or theme.
To begin “building” my tablescape, I chose what colors I wanted. I envisioned the autumn shades of squatty, Cinderella pumpkins, golden wheat fields, and the colors of the leaves that were beginning to turn different shades outside. With those colors in mind, I chose a beautiful soft yellow tablecloth with borders edged with harvest bounty, autumn leaves and acorns. My choice of dinnerware was an elegant, ivory colored Wedgwood china that was rimmed with rich, harvest colors and had a deep cornflower blue border. A cluster of silk autumn leaves in dusty orange, burgundy, and golden yellow became my centerpiece mixed with faux clusters of deep purple grapes, and fresh sprigs of burgundy Loropetalum (Chinese Fringe Flower) that I tucked in among the leaves from bushes Richard had just trimmed outside.(click here to see pictures and instructions)
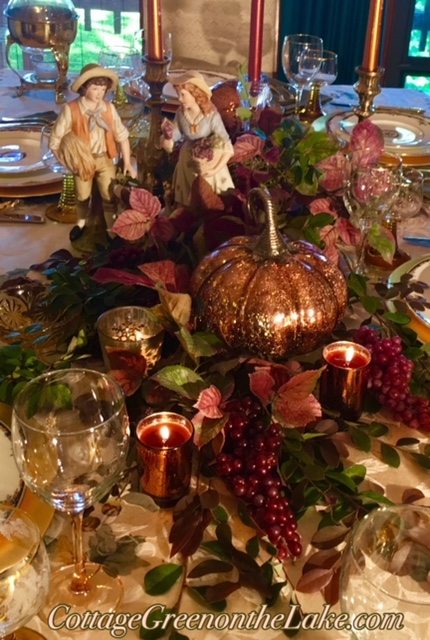
When creating a tablescape, it’s important to imagine what idea, mood, or theme you are trying to convey. In my mind I pictured a French villa on a warm autumn afternoon that overlooked a valley of the French countryside. As I visualized what I wanted my table to look like, I knew the French provincial figurines in my kitchen hutch. (click here to see) would look perfect on the table and voilá! … with the placement of Pierre and Belle, my table was suddenly transformed into the beginnings of a tablescape!
Then, the fun really began as I begin to sprinkle in a little “magic” … “this and that” … “the jewelry” to make our table gleam: brass and crystal candlesticks were placed, tall against my autumn foliage and copper and gold votive cups were tucked among the foliage and grape clusters for sparkle.
Goldware glistens atop sage green napkins and next to gold chargers …
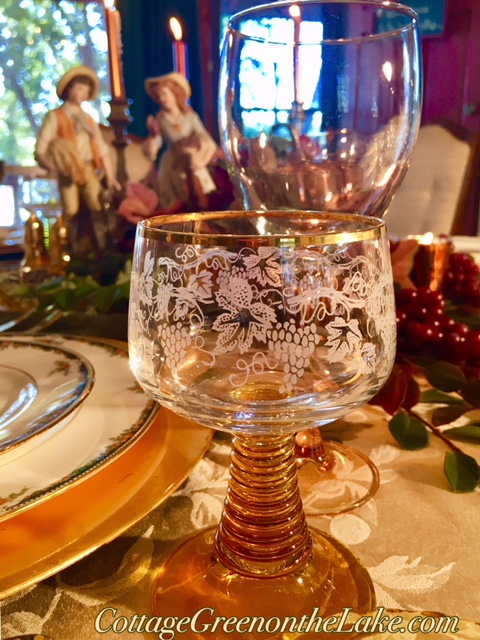
Antique berry bowls and grape clustered German stemware with golden rims and pedestals,
Blush and gold colored stemware …
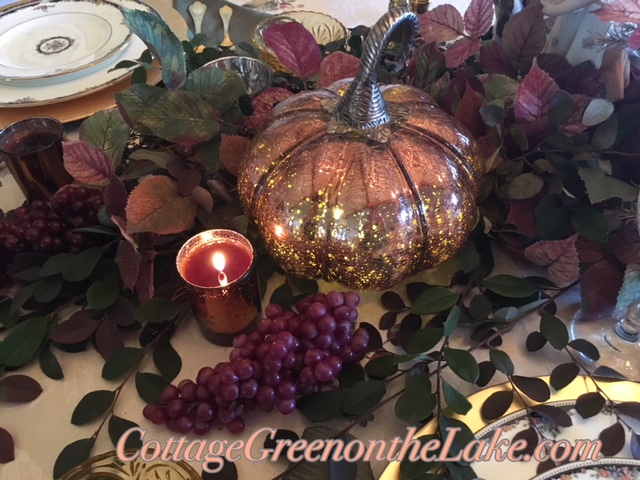
A copper colored votive and a twinkling Cinderella pumpkin are placed among burgundy leaves and purple clusters of grapes …
“Salagadoola mechicka boola
Bibbidi-bobbidi-boo
Put them together and what have you got
Bibbidi-bobbidi-boo …”
~ Walt Disney’s “Cinderella”
The autumn afternoon is ready and waiting for the family …
Chandelier draped in autumn finery … rose hips, colored leaves, grape clusters and strings of gilded acorns.
“Salagadoola mechicka boola
Bibbidi-bobbidi-boo
It’ll do magic, believe it or not
Bibbidi-bobbidi-boo …”
~ Walt Disney’s “Cinderella”
“It’ll do magic, believe it or not” creating your own tablescapes, when you use these tips … bibbidi-bobbidi-boo! (:
From my cottage to yours ~ Trenda
I was reminded of this scripture when we were out on our boat last Saturday and saw this spectacular view of the eastern sky at sunset … “For as lightning that comes from the east is visible even in the west, so will be the coming of the Son of Man.” Matthew 24:27
Thank you for reading my blog! To have all my posts delivered to your email address, just click FOLLOW in my post above … or click on my site: cottagegreenonthelake.com
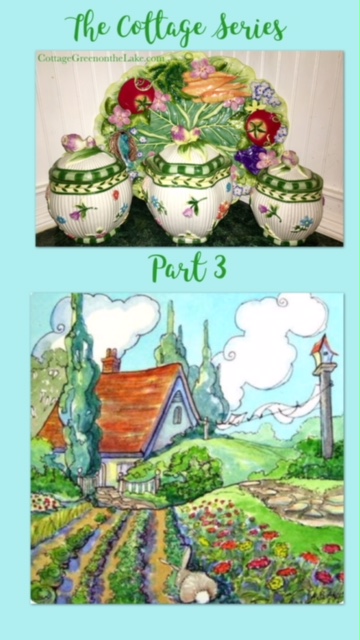
Cozy and cottage go together like peas and carrots and a way to add some “cozy” to your home is to display the things you love to collect. In my first chapter of The Cottage Series and also in The Cottage Series Part 2 I’ve shown you some of the collections inside the crooks and crannies of Cottage Green and given you some decorating tips on how to add the “cottage look” to your home. My kitchen cupboards display a lot more than just the usual dishes! Nestled and peeking out among the plates and dishes of my kitchen hutch, you’ve seen an assortment of things I love to collect … salt cellars, silver spoons, Staffordshire creamers, thatched roofed sugar bowls, miniature tea sets, and Boyd’s Bear collectibles.
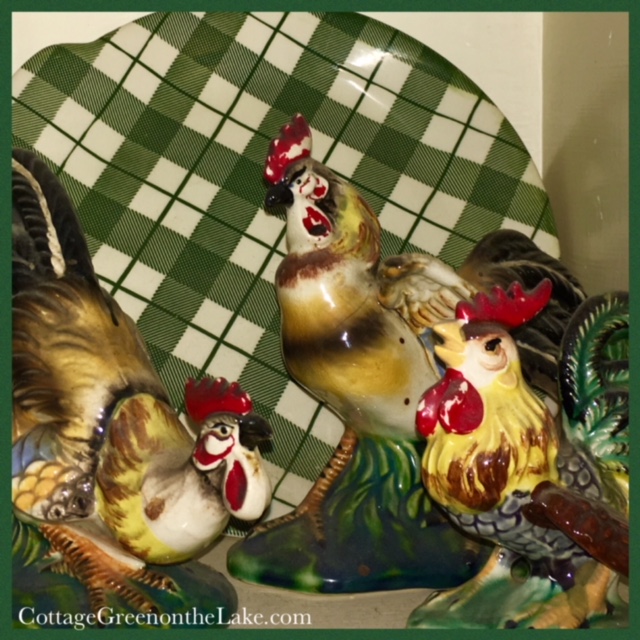
I have a collection of “farmyard fowl” that all began after my mother-in-law gave me the rooster and hen set I’d always admired that she kept on a little shelf in her kitchen. My husband said “as long as he can remember” this rooster and hen were displayed in their kitchen. I love that she gave them to me and I now have them in a little cubby Richard made in our kitchen, that I fondly call “the chicken coop.”
The coloring of the smaller rooster on the right, matched perfectly with the antique rooster and hen my mother-in-law gave me, so I grouped them all together. I can never resist antique dishes in green and white and I loved this plaid plate when I saw it! Though there was only one and I didn’t know yet, how I would use it … I bought it. After Richard made my little “coop” I placed the plate in the back of the shelf and loved the bold background and the way it contrasted with the colors of the roosters and hen.
The middle shelf is anchored with a quaint coffee mill, another cherished gift from Richard’s mother. A music box we bought in Switzerland – is not something you would usually find in a kitchen (; It plays the sweet tune of “Edelweiss” and is wood carving of a young boy in overalls, holding his pet rooster in one arm and a pail of feed in the other … with a trail of chickens behind him. The music box looks perfectly quaint, centered on the coffee mill and right at home in the kitchen with some smaller hens, ducks, baby chicks and geese I’ve collected and “scattered” for company on the shelf. Another plaid plate propped behind the farmyard scene is another orphaned plate I found!
Make sure your shelves don’t appear top heavy or out of balance. Decorations on your top shelf should appear visually “lighter” and simpler than the items placed on your lower shelves. A French inspired hen by Villeroy and Bach and a Colonial Homestead plate by Royal China is a simple and sophisticated “finial” perched above the other shelves.
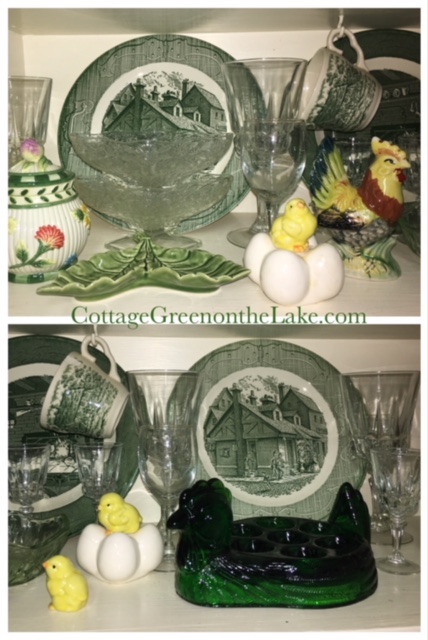
On the other side of the kitchen, Richard removed the doors from these cabinets so I could display my collection of antique green and white dishes and other cherished pieces. The dishes are a mixture of patterns … Currier and Ives “The Old Curiosity Shop” … Old Colonial Homestead … and Green and White transferware from England but they’re lovely “mixed together” all in the same shades of greens.
Stacking dishes in your cabinets not only creates visual interest, but also gives you more room … a double bonus! (:
More roosters, ducks, chicks, and even eggs are a punctuation point on each shelf and a re-occurring theme. Each season, I replace these accent pieces with different decor. Red, white, and blue Americana is getting ready to replace the hens and roosters … which will later be replaced by autumn decor … which will be replaced by antique Thanksgiving turkeys … which will be replaced by Christmas treasures.
A beautiful pierced aluminum antique ceramic casserole dish belonged to my mother and was a present, I was thrilled she gave to me. The beautiful matching brass-handled casserole dishes on the top shelf were a gift from Richard, 40 years ago. ❤ Sweet memories I get to look at every day that are easily reached and are practical and useful decor!
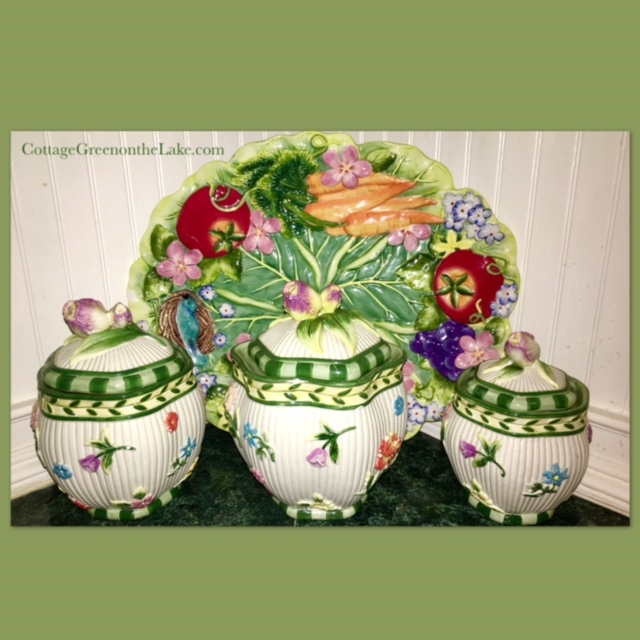
Visually uniting my cabinets to my counter tops, I placed a Fitz and Floyd platter on the counter top that matched both the French Country cabbage serving bowl and the storybook, goat-topped dish in my cabinets. The canisters match the sugar and creamer set and the ceramic colander on the shelves.
By the way, open shelves are easy to “create” in your home by removing your cabinet doors, filling in the holes left from the hinges with wood filler, and then painting. Though open shelves definitely add a “cottage feel” to any home, I also use these decorating tips “behind closed doors.”(; It is delightful to open a cabinet door and see a vignette made up of sparkling dishes, artfully arranged.
From my cottage to yours ~ Trenda
Thank you for reading my blog! To have all my posted delivered to your email address, just click FOLLOW in my post above … or click on my site: cottaagegreenonthelake.com
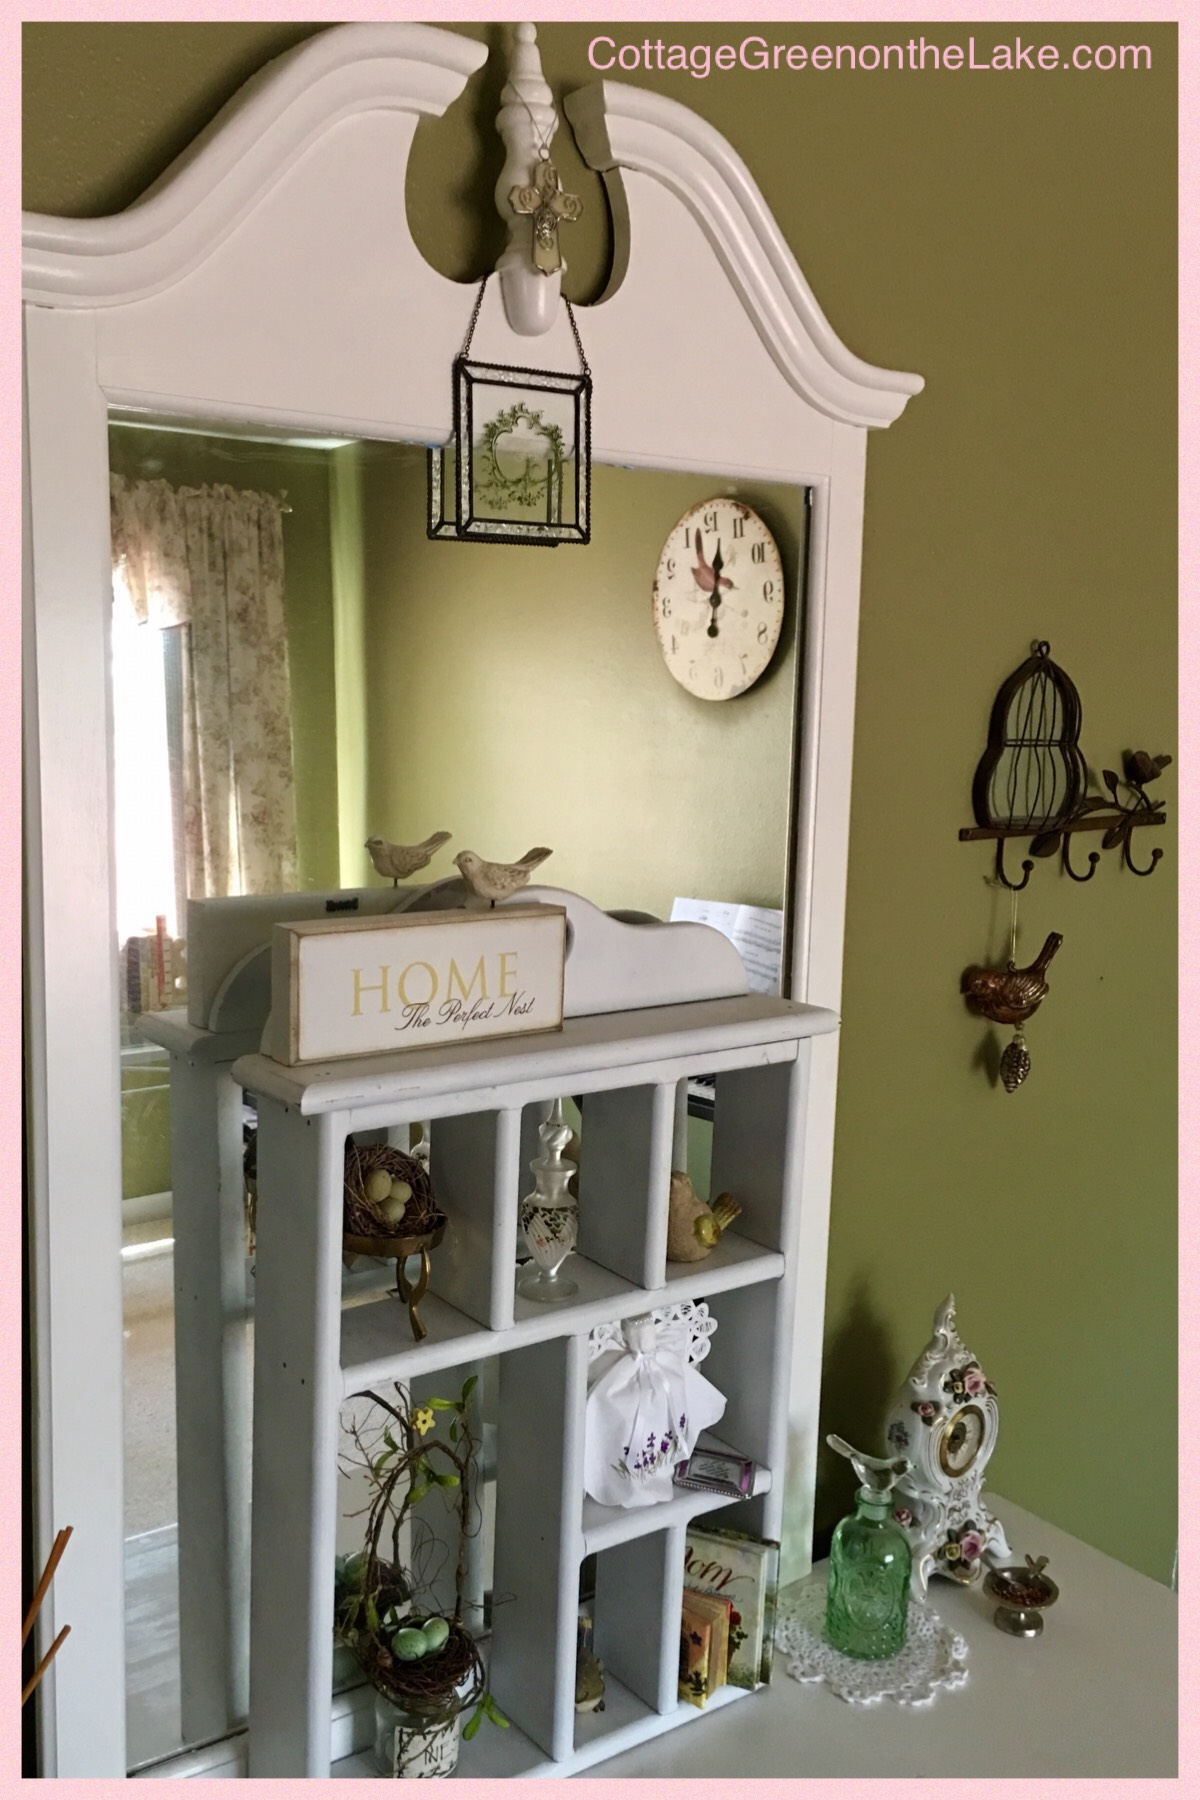
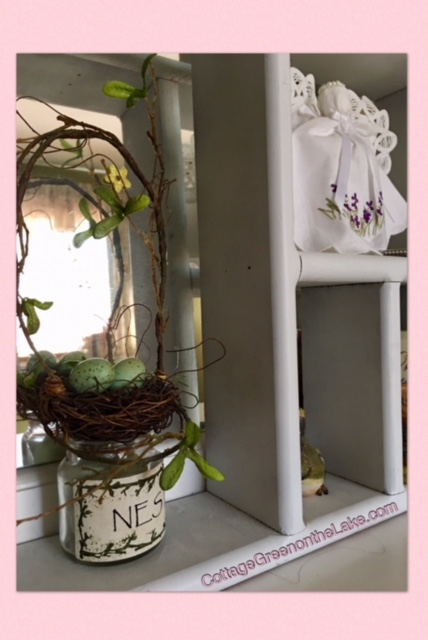
Spring has arrived in Texas in a profusion of azalea blooms, perky bluebonnets and the unfurling of spring green leaves. Sweet trills and twittering’s are heard throughout the day as birds flit about gathering building materials for their new homes. Just like outside, it’s time to dress your home in Spring decor! It’s easy to do with touches of romance, charm and whimsy tucked in unexpected places. Little nests placed in crystal bowls … a gathering of eggs in decorative containers … fresh flowers “about the house” and the use of bright and pastel colors suggest all things Spring-y.
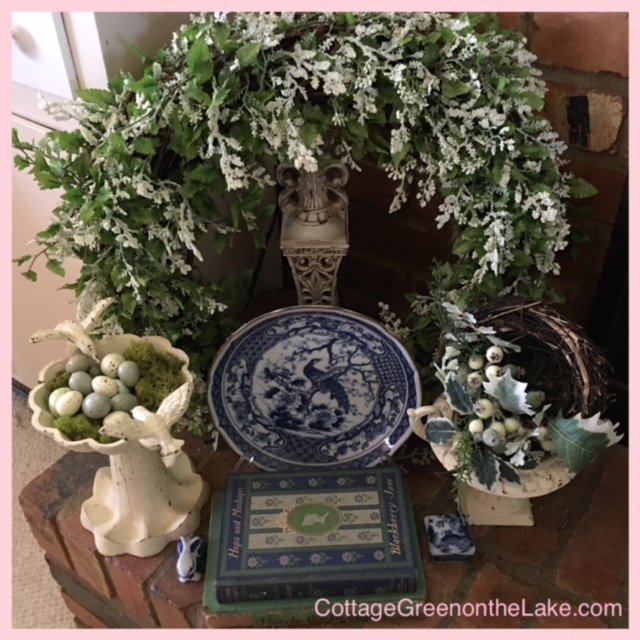
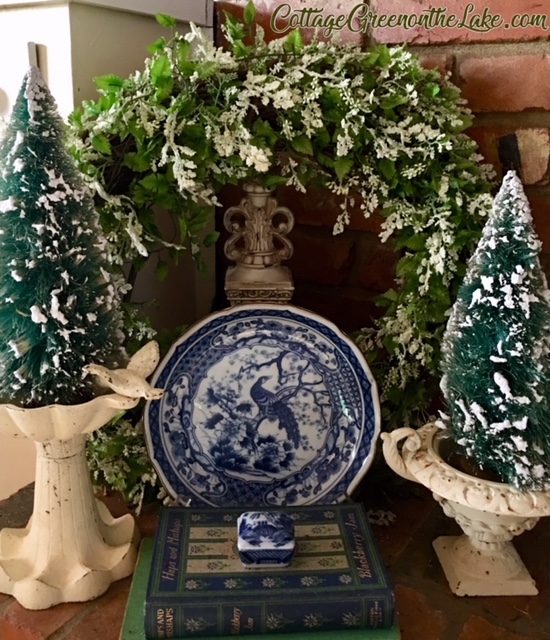
Spring wreath and birdbath filled with moss and speckled eggs.
An etched cache with blown glass finial is filled with Spring proffering’s … some spongy moss and sweet little eggs. A crystal Frog Prince and favorite childhood books are reminiscent of fairy tales and magical possibilities.
A little pewter bunny on a chartreuse pedestal … a matching chartreuse bird … and a little bird’s nest woven with spring leaves and blossoms perched on a chunky urn herald Spring’s arrival.
All things bird- y! (:
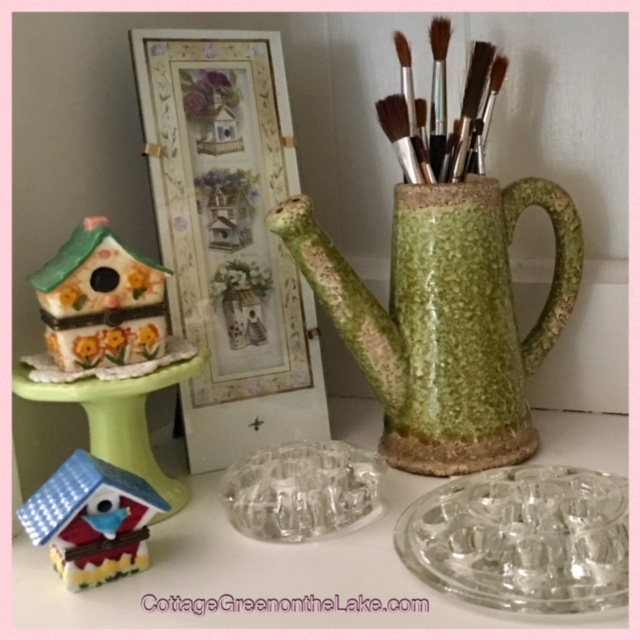
A desk corner in my music room is filled with “suggestions” of Spring and some “of my favorite things.” A mottled watering can filled with a collection of paintbrushes … antique glass frogs for flower arrangements … miniature hinged birdhouses from a precious son … and a favorite miniature from a dear daughter that says, “A Mother’s love is what make a house a home.” ❤
A chippy mirrored frame holds a picture of a pair of White-breast Nuthatches atop a twig-y silver easel.
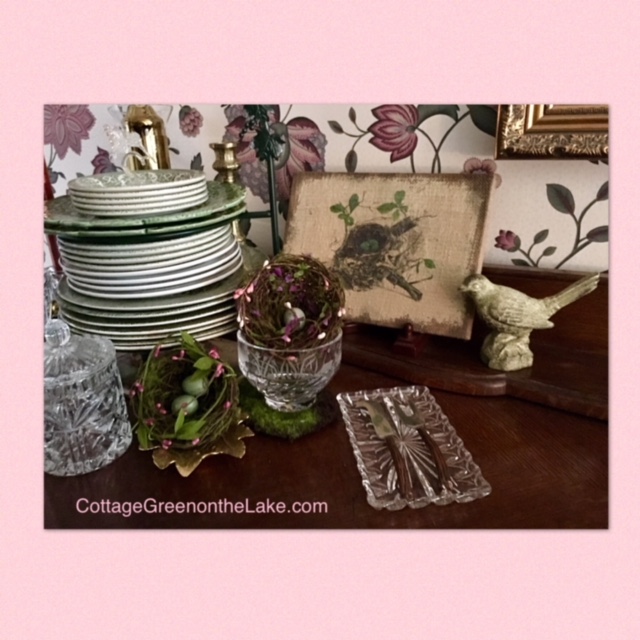
A miniature wooden easel holds a rough textured canvas of an egg-filled nest among leafy boughs … a collection of bird nests are perched, nearby.
Books, eggs, and birds … ❤
A pair of lovebirds gaze into a mirror … a spring green bucket is filled with carved wooden pencils and a spool of twine is easily reached and handy.
What was just a resting spot for this sweet, what-not shelf (while I went to get a nail to hang it) became the new, permanent location and a favorite spot once I saw how all the “lovelies” on the shelves were reflected in the mirror. Treasures from our children, my grandmother, two of my dearest friends … fill these compartments and are looked on each day with fond memories.
Reflection …
Gazing beyond the window at blue skies and spring blossoms, and inside … lace-y tree branches reflected on my grandmother’s glass-topped table … a dreamy place to work!
Have fun finding special ways and little nooks to “bring” Spring into your home!
From my cottage to yours ~ Trenda
Thank you for reading my blog! To have all my posts delivered to your email address, just click FOLLOW in my post above … or click on my site: cottagegreenonthelake.com
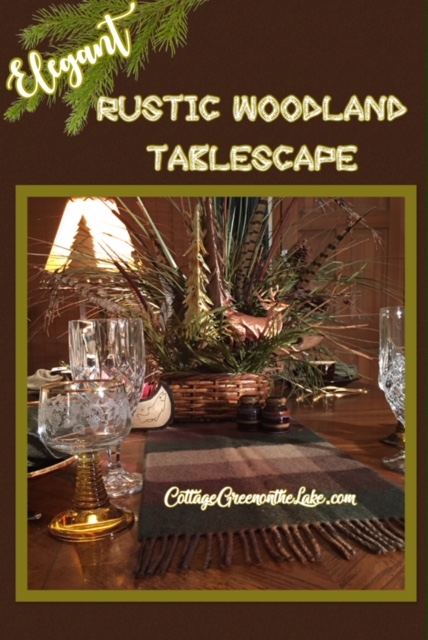
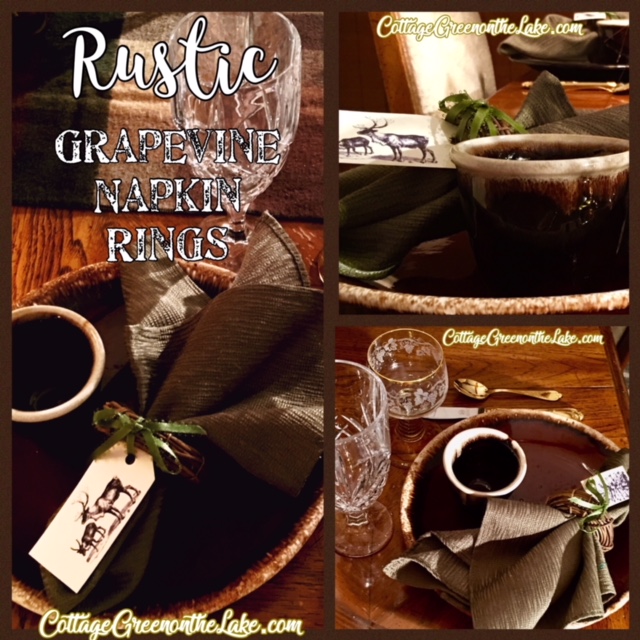
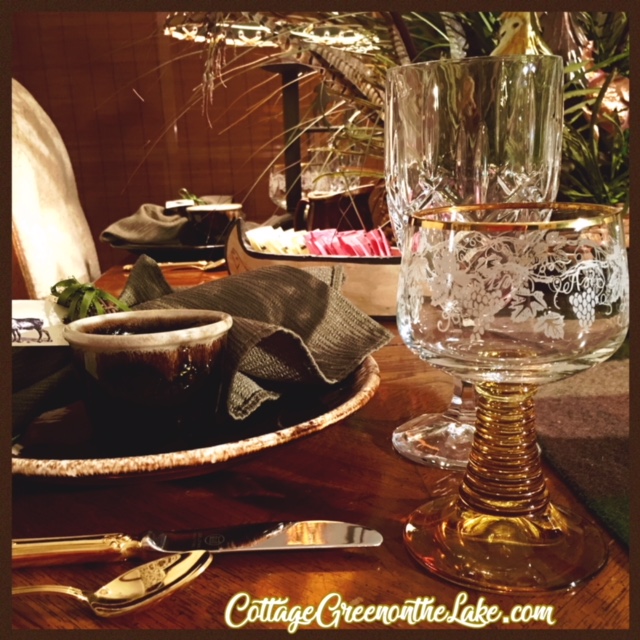
I enjoyed doing some tabletop decorating last week and I combined two different decorating styles in my table setting. I love the look of fragile crystal and goldware mixed with chunky pottery, natural grapevine napkin rings and woven baskets. “Elegance meets Rustic” and “opposites, do indeed attract” (; … as this duo is lovely together and the contrast of styles makes a cozy woodland tablescape.To make the woodland centerpiece I took the plastic covering off of 2 blocks of floral foam and hot glued them into the bottom of a woven basket I had. Then I began filling the basket with a collection of grasses, cattails, pine cone floral stems, pheasant feathers and birch twigs I had “amassed” over the years. The tallest part of any arrangement should be in the center, so after anchoring my tallest pieces I began “fanning down” both sides from the center of the arrangement, inserting my filler into the florist foam. The last addition and focal point I added to the arrangement was a metal art piece … a copper stag among metal fir trees. For my place settings I used pieces of vintage Hull and Pfaltzgraff pottery, a treasure that Richard found and bought for me at an auction he went to with his brother, Bob. The dishes are a sweet remembrance for both of us since Bob passed away this past October. ❤ The pattern on this stoneware is known as “Brown Drip” pattern, a favorite of both the Hull and Pfaltzgraff Stoneware Companies during the 1930’s.These simple, rustic napkin rings are made using mini-grapevine wreaths. I downloaded my free woodland tags from Decorator’s Notebook by Bethan John. After printing and cutting out my tags, I punched a hole in each tag using a standard hole punch. Then I inserted a moss-green satin ribbon into the hole of each tag and tied the ribbon into a bow to the grapevine, making sure the tag was facing out as I pulled my knot of the bow, tight.I love these darling little bean pots and keep collecting them whenever I see them at antique stores. They look charming holding BBQ beans for autumn wiener roasts … filled with Chili con Carne on cold winter evenings … brimming with Stuffed Pepper Soup on breezy Spring picnics … or in the summer, filled with colorful Cajun Beans (recipe coming at a later date!) alongside grilled steaks! Crystal glasses and little goblets from Germany are etched with grapevines and are rimmed in gold and have golden bases. I love the look of the fragile crystal contrasting with the heavy pottery and the comparison makes the crystal seem even more delicate. And this hand painted canoe makes a darling caddy for sweeteners!A mixture of metals … the copper stag and the goldware add gleam to all the forest browns, moss greens and the deep brown dishes. For a final touch of coziness, I added this little lamp that looks like it was made for my woodland tablescape! The golden lampshade matches the carved canoe and also highlights the goldware and golden goblets while the dark silhouettes of the spruce trees and moose on the lamp shade adds more “depth” to my rustic theme.You know how I love using every day objects in unusual ways?! I pulled Richard’s cashmere muffler from the closet and thought it made the perfect table runner for my woodland tablescape! The softness of the muffler contrasted with the rough basket centerpiece and it’s color … the same browns and moss-green colors found in the forest!Juxtaposition/definition by Merriam-Webster: the act or an instance of placing two or more things side by side often to compare or contrast or to create an interesting effect. Hmmm … crystal next to pottery, textured, woven centerpiece sitting atop soft, luxurious cashmere, and rustic grapevines mixed with elegant goldware??? I love juxtaposition decorating! (:P.S. We saw 2 Bald Eagles, yesterday!!! Neither Richard or I had ever seen one except in books or film! Then, we saw 2 in one day! The first eagle we saw around noon just nonchalantly sitting in a tree and the second one we saw in a totally different area, near sunset, also perched in the top of a huge Sycamore Tree. After our second Bald Eagle flew off, our “Blue, Super Moon” was just begin to rise and it was gorgeous! I couldn’t help but think of the scripture I had just read that morning …“Praise the Lord, O my soul. O Lord my God, you are very great; you are clothed with splendor and majesty. He wraps himself in light as with a garment; he stretches out the heavens like a tent and lays the beams of his upper chambers on their waters. He makes the clouds his chariot and rides on the wings of the wind.” Psalms 104:1-3
From my cottage to yours ~ TrendaThank you for reading my blog! To have all my posts delivered to your email address, just click FOLLOW in my post above .. or click on my site: cottagegreenonthelake.com
What a special season Christmas truly is. It’s not just one day, but a culmination of days. Days of … cookie making, shopping and wrapping, decorating the house, watching Hallmark movies, drinking hot cocoa, setting up the manger, being with family and friends, caroling, and worship . Then, hanging up stockings, putting out cookies for Santa, sprinkling reindeer food on the lawn, and finally (there’s a sermon in here!) “joy, comes in the morning.” It’s a season of busyness, frenzy, stress, wonder, love, sadness of “memories of happy years gone by” gratitude, reflection, and marvel. Here’s a last tribute to our Christmas season and moments at Cottage Green. There’s lots to re-cap and lots of pictures, so get yourself a “cup of cheer” and make yourself comfy!
Silent night, holy night. All is calm, all is bright …
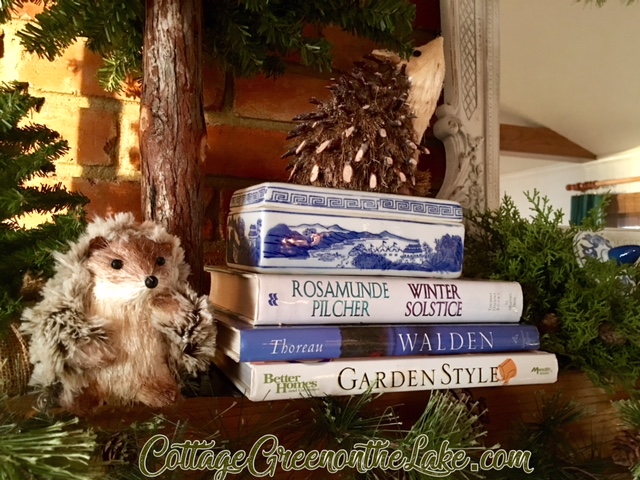
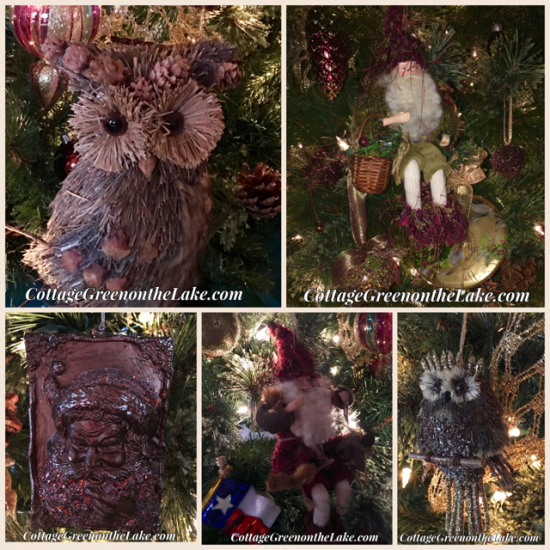
“Not a creature was stirring, not even a …” porcupine!
… or a hedgehog! (:
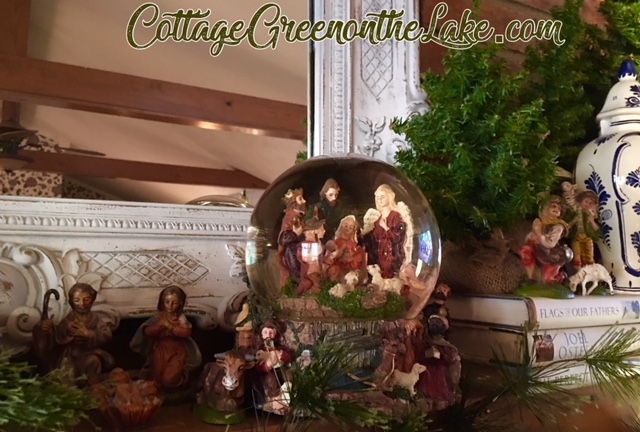
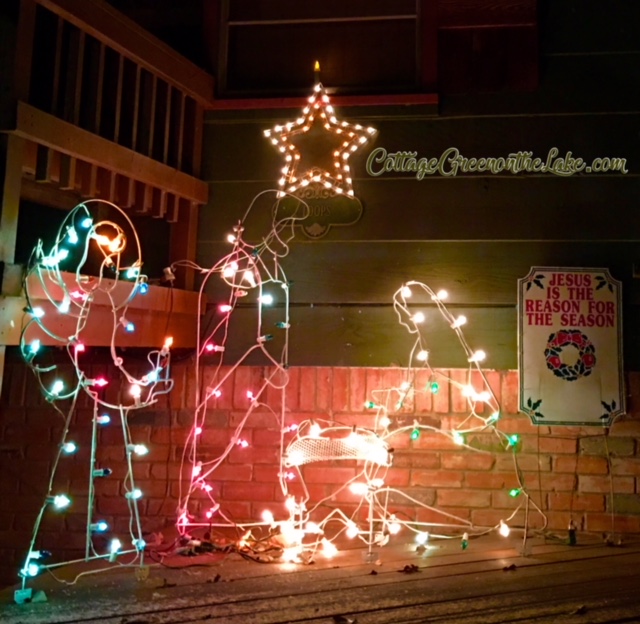
“Away in a manger, no crib for a bed. The little Lord Jesus lay down His sweet head.”
“The stars in the sky look down where He lay The little Lord Jesus asleep on the hay.”
“Angels we have heard on high, sweetly caroling o’er the plains.”
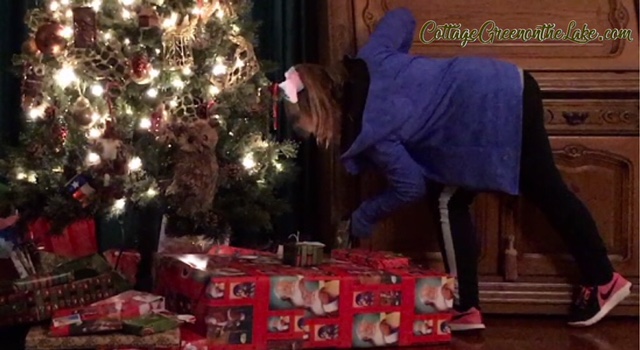
“Oh, there’s no place like home for the holidays”
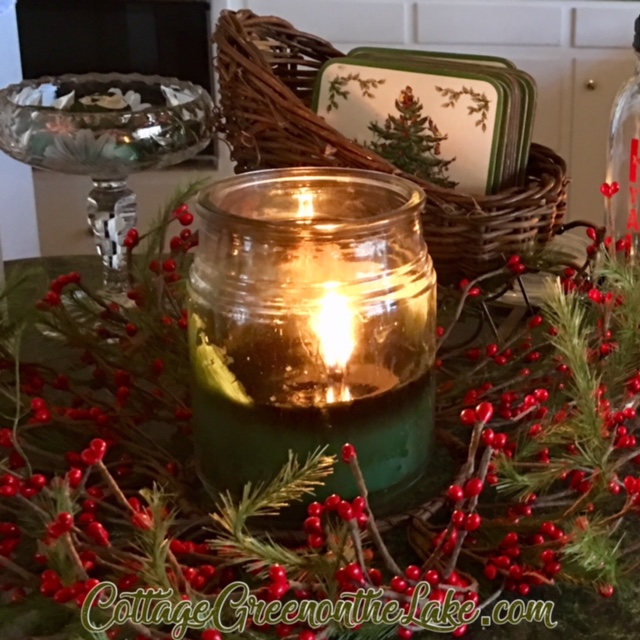
“O Christmas Tree, o Christmas tree how lovely are thy branches …”
“Rockin’ around the Christmas tree …”
“Santa Claus is coming to town …”
“It’s a marshmallow world in the winter …”
“I’ll have a blue Christmas without you …”
“The holly bears a prickle, as sharp as any thorn, and Mary bore sweet Jesus Christ, on Christmas Day in the morn”
“Here we come a-wassailing …”
“Chestnuts roasting on an open fire …”
Then … family photos with little and big kids! ❤
“When it’s Christmas time in Texas …”
“It might just look like a summer day There may not be snow in San Antonio But it’s a Texas Christmas to me.”
“Thank God for Kids”
“Thank God for kids there’s magic for a while …
(grand son <3)
A special kind of sunshine in a smile …
(grand daughter <3)
Do you ever stop to think or wonder why? The nearest thing to Heaven is a child.” “Daddy, how does this thing fly?”
“And a hundred other where’s and whys …”
(dear daughter-in-law DDIL <3)
“You really don’t know but you try, thank God for kids …”
(grand daughter and daughter <3)
“When you look down in those trusting eyes that look to you, you realize …”
It’s a love that you can’t buy thank God for kids.”
Thank God for kids, there’s magic for a while …
A special kind of sunshine in a smile …
Do you ever stop to think or wonder why? The nearest thing to Heaven is a child
When you get down on your knees tonight To thank the Lord for his guiding light And pray they turn out right, thank God for kids Thank God for Kids” ~ songwriters: Edward Futch/Edward G. Futch
(our kids <3)
Oh, I hope you enjoyed seeing our Christmas at Cottage Green and I hope you had a wonderful, blessed Christmas filled with moments that will warm your heart throughout the year. Our grand daughter told me, “Grandma, I’m sad Christmas is over” … I’m sad Christmas is over, too, but I promised God I am keeping Christmas in my heart, all year long! ❤
From my cottage to yours ~ Trenda
Thank you for reading my blog! To have all my posts delivered to your email address, just click FOLLOW in my post above … or click on my site: cottagegreenonthelake.com
"Deck the halls again now...For we need a little Christmas
Right this very minute
Candles in the window
Carols at the spinetAnd we need a little Christmas
Right, this very minute
We need a little Christmas now."~ written by Jerry Herman for the Broadway musical Mame
The countdown to Christmas has begun and these miniature envelopes you make yourself (use free link below) are a charming way to mark off the days until Christmas.
“… the gentle caress of autumn steals the sultry heat of summer …” author unknown
Autumn comes gently in the South with the days slowly becoming cooler and just the tips of burnished leaves can be seen shining in the golden sunlight.
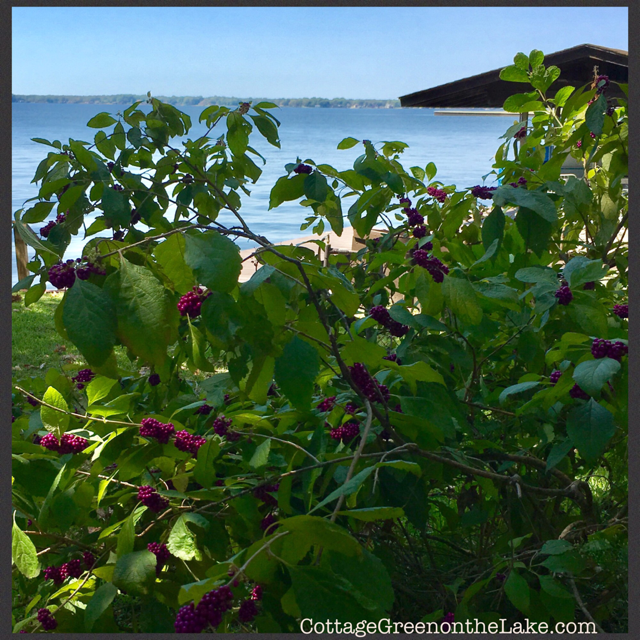
Our Beauty Berry Bush is laden with brightly colored berries in a gorgeous shade of purple … autumn delicacies for our “feathered friends.”
A little birdhouse tucked among the leaves and blooms of an Encore Azalea that is putting on it’s “final act” with brilliant autumn blooms. A flying squirrel, while house-hunting, decided this little house was going to be his new home with it’s green roof, lichen covered walls, and view of the lake. Without waiting for “a showing” he gained entry by nibbling his way into the opening and took up residency! (;
The sunlight in autumn highlights the green of the grass and leaves against the azure blue lake and sky.
Lantana with harvest gold and red blossoms, red periwinkles, and Marguerite (ornamental sweet potato vine) “glow” in the autumn light.
“The gentle caress of autumn” can also be seen inside our cottage as I add some touches of the season.
Copper glittered ACORNS rest on golden leaves …
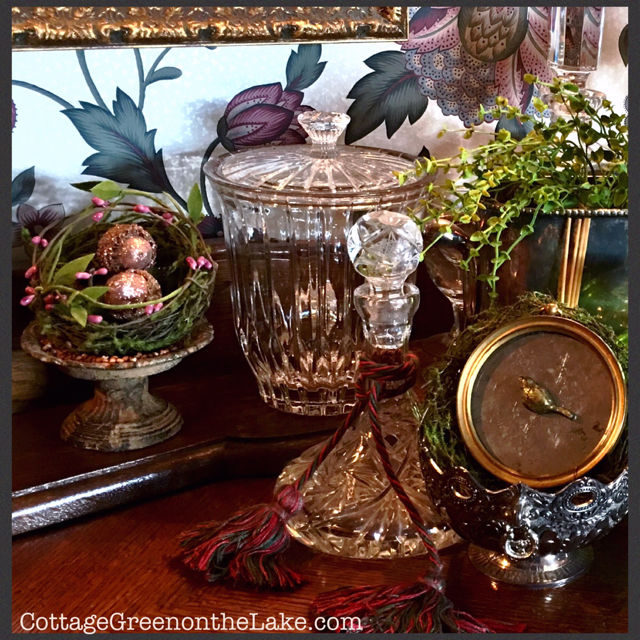
Are tucked into moss-lined nests …
… dangle from a display stand and top a Fitz & Floyd “trinket box.”
An array of soaps in scents of pumpkin “and spice and everything nice.”
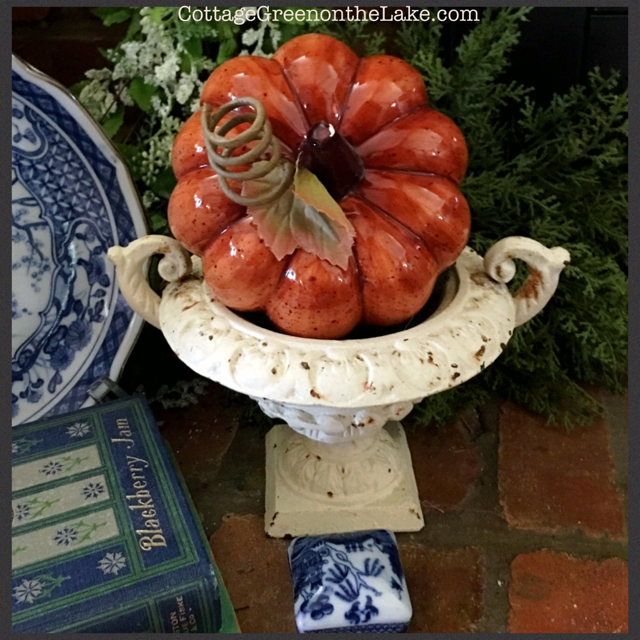
Glossy pumpkins perch on chunky urns …
And contrast strikingly with blue and white Ginger jars …
And in the kitchen … a Swarovski crystal squirrel “gathers” provisions! (:
I love adding whimsical touches and reminders of the season to our home … and for all of us, this is just the beginning of all things pumpkin and harvest to come! Have fun using your imagination and “putting some autumn jewelry” on your house!
From my cottage to yours ~ Trenda
Thank you so much for reading my blog today! This week I’m joining:


 The definition of tablescape according to the English Oxford dictionary is … “A decorative arrangement of ornaments or other objects on a tabletop.” Embellishing Oxford’s definition of tablescape a little further … a tablescape for me is created by arranging a tabletop in an artful way by using decorative objects … decor … centerpieces … lighting … and color in combination with the items needed in the table setting to create a certain mood or theme.


 On the other side of the kitchen, Richard removed the doors from these cabinets so I could display my collection of antique green and white dishes and other cherished pieces. The dishes are a mixture of patterns … Currier and Ives “The Old Curiosity Shop” … Old Colonial Homestead … and Green and White transferware from England but they’re lovely “mixed together” all in the same shades of greens.
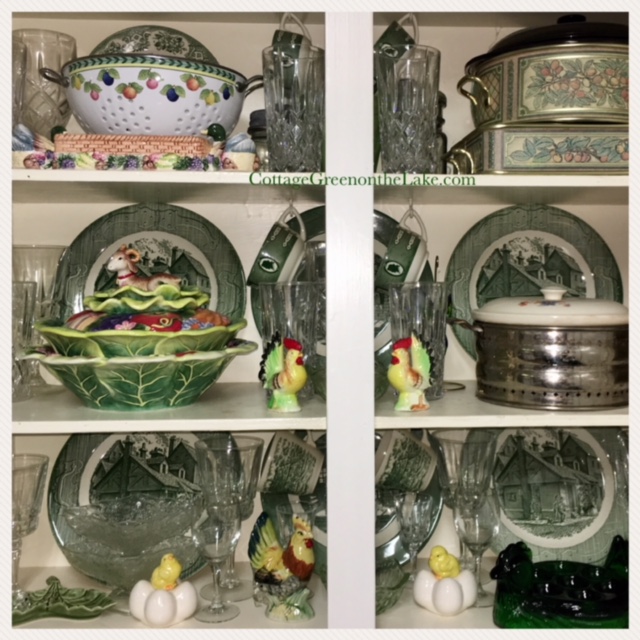


 Gazing beyond the window at blue skies and spring blossoms, and inside … lace-y tree branches reflected on my grandmother’s glass-topped table … a dreamy place to work!


 “I’ll have a blue Christmas without you …”
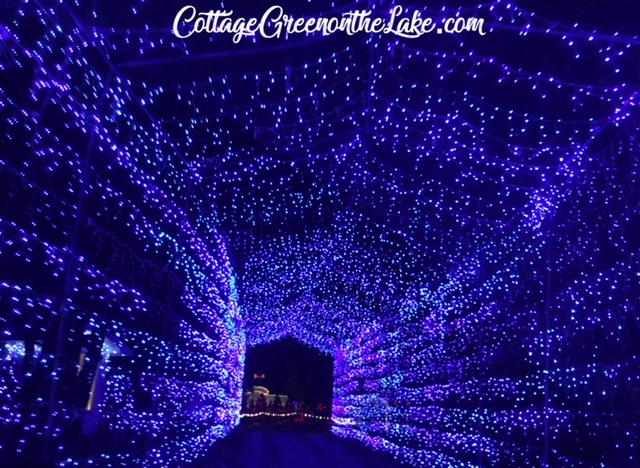
 “Here we come a-wassailing …”
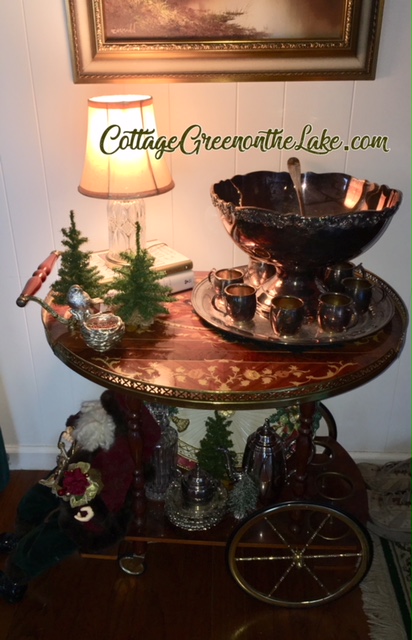


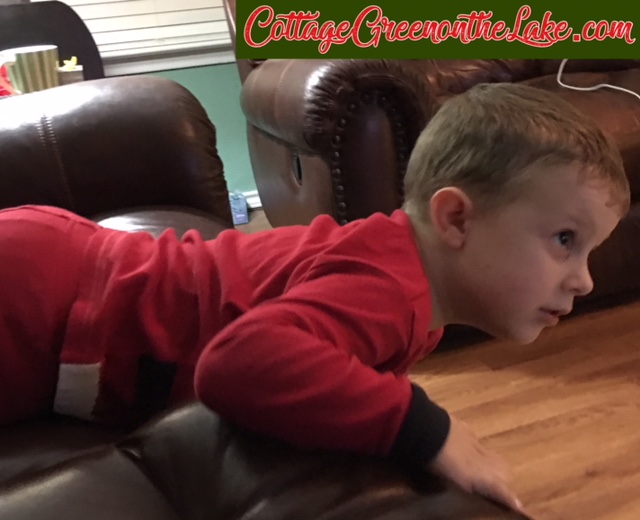

 “Daddy, how does this thing fly?”
 “And a hundred other where’s and whys …”
 “When you look down in those trusting eyes that look to you, you realize …”
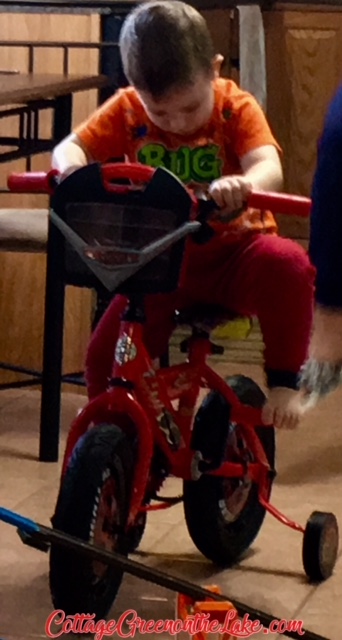

 Do you ever stop to think or wonder why? The nearest thing to Heaven is a child
 Oh, I hope you enjoyed seeing our Christmas at Cottage Green and I hope you had a wonderful, blessed Christmas filled with moments that will warm your heart throughout the year. Our grand daughter told me, “Grandma, I’m sad Christmas is over” … I’m sad Christmas is over, too, but I promised God I am keeping Christmas in my heart, all year long! ❤


![PicCollage[8584].png](https://cottagegreenonthelake.com/wp-content/uploads/2017/09/piccollage8584.png)