DIY “Jolly Jack-o-Lantern” Halloween Wreath … by Trenda

“A Halloween of Memory Past” by Trenda  In just a little over a “fortnight” we will have a host of little ghosts and goblins coming to our doorstep.  Once, not really so very long ago, I was one of those happy “trick or treater’s” … traipsing down the streets, I peered to see out of my plastic mask that was always askew, had eye slots that were cut too small to properly see and was held in place by a thin rubber band that pulled my hair and I was always afraid would snap and pop me in the face!  I made sure I stayed close to my strong, broad shouldered father and seeing his comforting silhouette outlined in the shadows was particularly assuring on a night called All Hallows’ Eve!  My father carried a railroad lantern to lead his little band and family of mix-matched character’s … a hobo, a skeleton, 2 gypsies, and a clown … and I remember the red glow cast by his lantern, added to the mystique of the evening. (to be continued)piccollage


Remembering that feeling, I love to make our home as welcoming as possible on Halloween and enjoy creating an expectant atmosphere, befitting the night, that the children can sense as they climb up each step to our door.

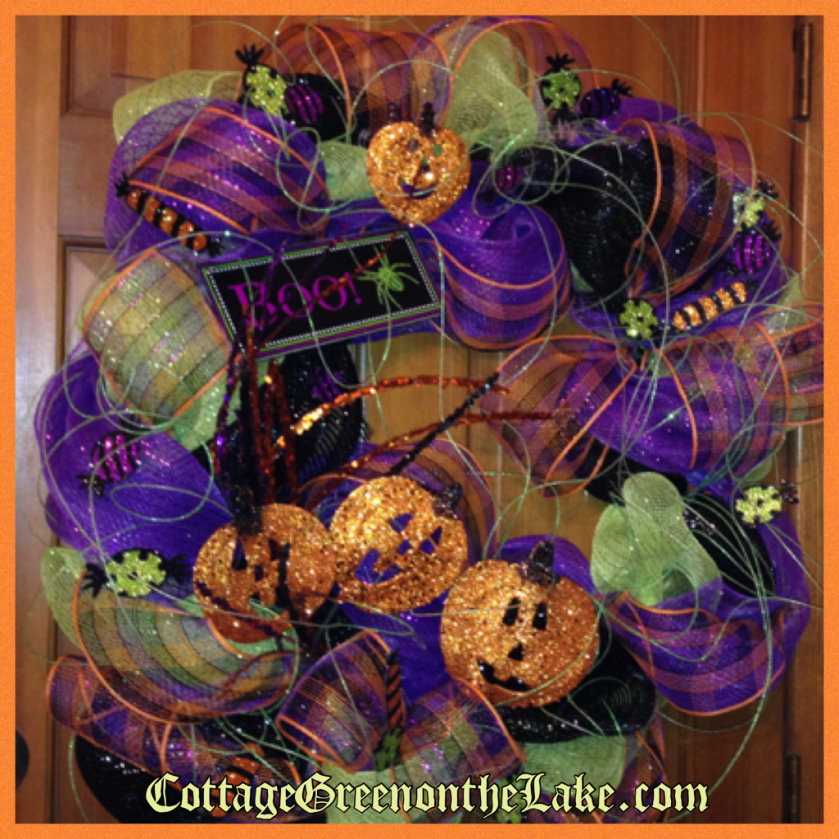
Now with all that in mind … today I am writing the DIY instructions for this Jolly Jack-o-Lantern Halloween wreath that you can make and hang on your front door to welcome each of your little visitors!  The “jewel and sparkle” a wreath adds to your door, is like adding a necklace to your outfit! (: 

piccollage422

Below, is a list of supplies you will need to make your wreath.

Materials needed:

  •  metal wreath form
  • up to 3 rolls of mesh in your choice of Halloween colors
  • pipe cleaners
  • glue gun and glue sticks
  • assorted Halloween decorations
  • scissors & wire cutters

Instructions:

First, make a simple loop hanger using a pipe cleaner and wrap it around the back of the wire wreath form.  This is the hanger you will use to display your wreath on your door, but it is also convenient to use while constructing your wreath.  TipI always use  pipe cleaners that match the colors I am using in my wreath.  Then, when I am finished they aren’t easily seen and “blend” right into the decorations and colors of the wreath.   Take your first color of mesh and go around the form of your wreath, bunching the mesh loosely.  To form a “poof” or segment, wrap a pipe cleaner around the mesh and wire wreath form to secure the mesh to the form.  I trim my pipe cleaners off at this point to keep things neat and so they won’t get “in the way” and snag my material.  Continue bunching and securing mesh around the perimeter of your wreath form.  Don’t be timid!  There’s no wrong way to do this! (:   

PicCollage[412].png

Then, do the same thing again with the next color you have chosen for your wreath.  Gather and bunch your mesh and secure it with pipe cleaners to your wreath form.  Be sure and “stagger” where you bunch and secure your mesh, not conforming with the same pattern you used with the first color.  This will make your wreath fuller.  See picture below.

PicCollage[414].png

Repeat the same procedure again, using your last color of mesh and making sure to weave and bunch your mesh in areas you see that need more fullness.  Note:  It is up to you how many colors of mesh you use.  Sometimes, I use only 2 fabrics or even one color of mesh or burlap.  Just make sure when you are using fewer colors that you bunch your fabric tighter, so you have a full wreath.

PicCollage[417].png

Now, the fun part begins!  Take your decorations and just hot glue them to your wreath.  I add my biggest items first … next, any smaller items I have.

PicCollage[424].png

PicCollage[429].png

Then … I add my “filler” last.  Filler is added to your entire wreath and “pulls” the look of your wreath together, unifying and blending all your colors and decorations on the wreath.  Filler can be any material – it adds texture and conformity.   In the photo below … see how I’ve used my neon green curly twigs as filler.

piccollage

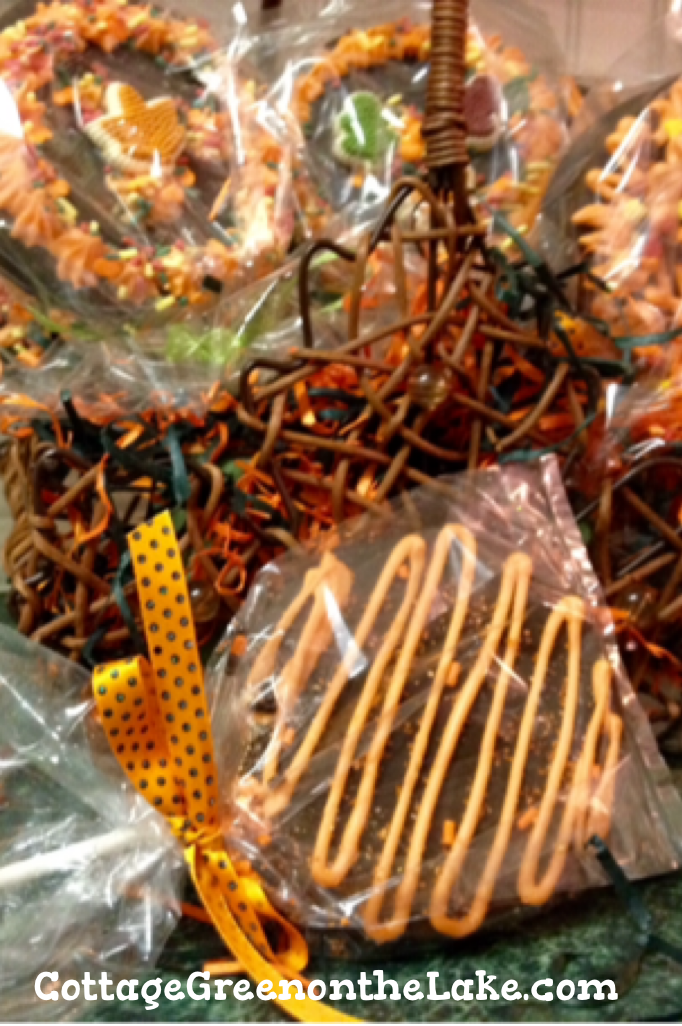
Then, I added a few “bursts” of accent with a ribbon that incorporated all the colors of my 3 different mesh … a purple, orange and black plaid.  Wherever I wanted a little more color, I cut some random lengths of my plaid ribbon and “wove it” into the mesh ribbon, and hot glued the ends to hold.  The final step was gluing some sparkly wrapped paper candies … table confetti, that I found at Hobby Lobby for only $1.50 … in just my colors of purple, orange, and neon green! 

PicCollage[422].png

Now when …

“Silent phantoms

of the night

In their robes

of ghostly white.

They are always to be seen

On the night of Halloween.”

come to your door, they will be delighted to see the wreath you made welcoming them to your haunt! 

PicCollage[434].png

PicCollage[432].png

Thank you so much for spending some time with me today!  I’d love to hear from you and I am truly delighted, reading what you have to say.  Please leave a comment, below.  Don’t be alarmed when your comment doesn’t post, immediately.  Word Press makes sure each post I send or that I receive hasn’t any SPAM attached … “it’s a good thing!” (: 

From my cottage to yours  ~  Trenda


Along the lake shores on an autumn afternoon by Trenda

It was a glorious afternoon for cruising around the lake in our pontoon boat.  The water had just the slightest ripple from the autumn winds that would randomly “sigh” … just to playfully stir and rustle the leaves and the water. <!–more –>

Before we “set sail” we carried a picnic down to the dock and couldn’t help but marvel, once again, at God’s artistry as we gazed at the panoramic view of the beautiful, blue lake in front of us.

PicCollage[350040].png

Our lunch (always delicious when served … “a la dock!”) was Ham & Swiss cheese/spinach/& roasted red pepper wraps … homemade chicken soup … and crisp apples with a creamy dip of peanut butter and honey.

piccollage

Look at this spectacular show we were thrilled to have front seats for … dinner and a show!  These black, point-y beak “diving waterfowl” are Double-crested Cormorants and though some reside here permanently (choosing our lake to be their “forever home”) … most migrate here and arrive in large numbers in autumn to enjoy our delightfully mild winter’s!   Their departure in late spring always makes me a little despondent, so their arrival is always a welcome sight and another reminder of autumn’s return!  Yesterday, they swooped in unexpectedly, right in front of our dock, chasing a school of minnows and enjoying an “all you can eat” buffet!

piccollage

After we finished, we threw some saved tortilla pieces and brushed the crumbs from our laps into the water (to the delight of some waiting ducks!) and climbed aboard “Bentley”[yes, we name all our transportation conveyances! (; ] … adjusted our American flag, and backed up into the waiting blue.

PicCollage[352261].png

Our first stop was to visit our goose friends who immediately recognized our boat and eagerly came to greet us with friendly honks and flapping’s!

PicCollage[352829].png

As we threw each tidbit from our bread supply (a collection of heels, stale croissants, and an occasional half-eaten sweet roll we keep frozen for just this purpose!) our feathered friends rushed and fought to nab each morsel. They often over-stepped their neighbor’s personal zone and weren’t bothered a bit when they batted “their brother” in the face with their wings or greedily grabbed their portion. (:

PicCollage[352402].png

Shaking the last of our bread offerings into the lake, the geese honked their disproval … or was it their thanks? (: … when we headed out and away from their cove.

Sights along the shoreline…

The Loch Ness monster of Cedar Creek Lake …

piccollage

Towering Oaks and majestic Bald Cypress’ along the water’s edge …

PicCollage[359092].png

A gorgeous setting  for this white heron posing in front of burnished Bald Cypress Trees that are just beginning to show their tinges of autumn splendor.

PicCollage[322604].png

A mermaid, ready to dive into the waters below, appears mystical and believable in the magic twilight hour.

PicCollage[336288].png
 Heading back home in the pink and golden glow of an autumn sunset.

PicCollage.png

“Then sings my soul …”

piccollage363043

From my cottage to yours  ~  Trenda


Autumn from the back deck … by Trenda

cropped-piccollage177597.pngIt’s been a beautiful week and as I went out on the back deck today, there was a coolness in the air that suddenly made me wish I had my sweater … a few golden leaves were floating, drifting on the lake … and autumn tinges could be seen, peeking from the trees.  The bright, golden sunlight, particular to this time of year, made the blue of the sky and the blue of the lake an intense background against the last green’s of the season. <!–more–>

piccollage

Our Beauty Berry Bush (aptly named!) is almost glowing in autumn and can be seen from our upper deck and was given to us, by a dear neighbor.  Our son planted it for me (in just the right spot!) next to our bonfire pit and near the lake, so we all enjoy it’s autumn brilliance while having wiener roasts and toasting marshmallows. It’s looks like a beautiful banquet spread and splayed out for the birds, with berries in a gorgeous shade of purple!  PicCollage.png

Right beneath our upper deck is a bed of hydrangea bushes, which bloom in early summer.  Now, in autumn they are putting on their “second act” and the “mopheads” have dried and the papery blossoms have transformed from all shades of blue, to a muted green; the blossoms are now perfect for clipping and “will be appearing” in autumn arrangements or tucked among fir boughs for their “final act.”

piccollage

My husband played in a golf tournament today and as the day slipped by and the outside beckoned, I decided to surprise him with an Autumn Afternoon Tea, on the deck. For our “tea party” I whipped up some Apple Cider Muffins with a Walnut Streusel Topping and brewed some spiced tea. The muffins were as delicious as they sound and I simply opened a ready-mix package of Martha White’s Apple Cider Muffin Mix, added some milk, and made them … “according to directions.”

PicCollage.png

However, before putting the muffins in the oven I made a batch of streusel topping … a mixture of butter, flour, brown sugar, and walnuts and generously topped each muffin, instantly transforming my “mix” muffins into gourmet muffins, with very little trouble.  I’ve included the directions to my Brown Sugar and Walnut Streusel below.

Brown Sugar and Walnut Streusel

Ingredients:

1 cup brown sugar, packed

1/3 cup cup flour

1 cup chopped walnuts

1/4 cup butter (melted)

Combine brown sugar, flour, nuts and melted butter in a mixing bowl.  Top each muffin with a generous spoonful of streusel, keeping the amount added, below the top rim of the muffin pan.

Tip: This recipe makes more streusel than needed for 1 batch of muffins and I always put the remainder in a labeled Ziploc bag and keep it in my freezer … ready to add to any muffins or coffee cakes I make!

Then I had the fun of “decorating” the table outside for our Autumn Tea and began by spreading a dark green tablecloth, covered with pictures of seed packets and produce, over the table.  For the centerpiece, I filled a Marcrest antique pitcher that my mother gave me, with yellow broom weed.  Nestled below the pitcher I placed a little iron urn filled with millet and a wee little bird, who’s having his fill of bird seed!  I put the Apple Cider muffins on an autumn-colored plate decorated with leaves and topped the plate with one of my cloche’s … I love to collect! and to ward off any unwanted guests.  Incidentally, have you ever noticed how everything looks more delectable under a glass dome? (:                         I used a wire basket to hold our napkins and an old log planter that is one of my favorite antique finds that I use here in our cottage lake house … to hold sweeteners.                                                                                                                                                      By the way, my husband loved our Autumn Afternoon Tea and the muffins! (:

piccollage266191

This is the “twilight view” off our deck … same angle as those early morning pictures I took which were “bathed” in golden sunlight and in a background of blue sky and blue lake.  This evening, the setting sun has beautifully tinged the sky in shades of pink … the water, shades of purple.

piccollage 
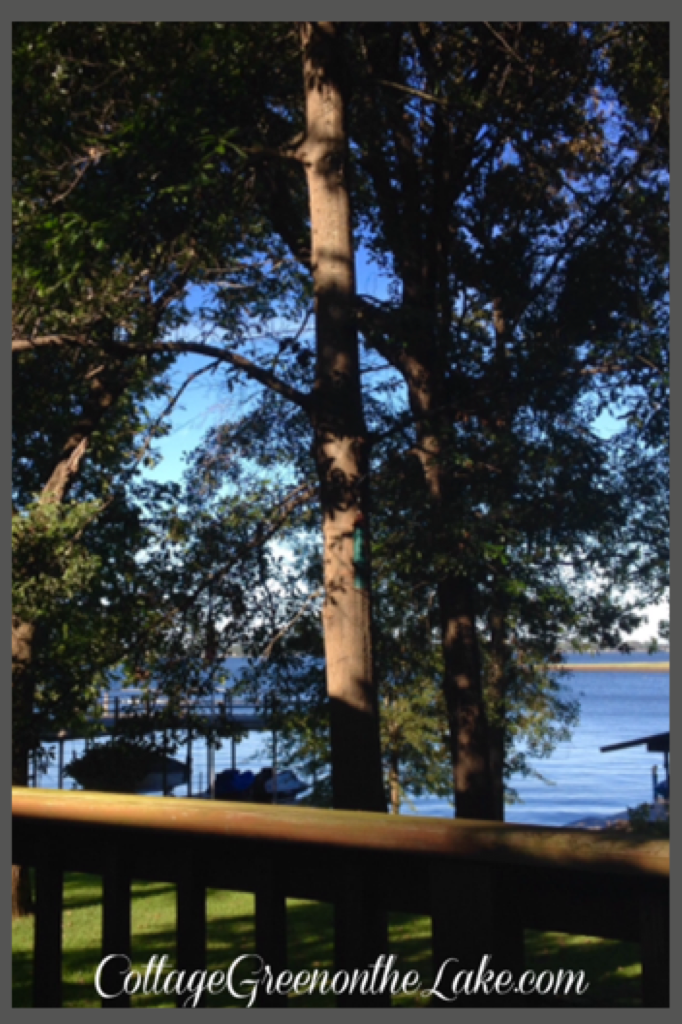
“Splendor of ended day, floating and filling me!”  ~ Walt Whitman

piccollage

Thank you so much for spending some time with me today!  I’d love to hear from you and I am truly delighted, reading what you have to say.  Please leave a comment, below.

From my cottage to yours ~  Trenda


“Fall” … in love & Harvest Moon Pies by Trenda from Cottage Green on the Lake

“Fall” … in love with the autumn season, colored leaves, cooler days and all things cozy.  Here in Texas, September is just the prelude of the overture to come, but change is in the air; hayfields are filled with freshly baled hay, the little winter coots have returned and last night a gorgeous “harvest moon” rose slowly over the lake. <!–more–>

Now, I think you are going to “Fall” … in love with these darling treats … Harvest Moon Pies.   This idea is from a past addition of Southern Living Magazine and I was delighted to find that these desserts were easy to assemble and  almost too cute to eat!  I know we’re going to need more Moon Pies for Halloween  … to decorate with all things spooky!

piccollage

These decorated Moon Pies are a fun addition to any holiday and are a wonderful project for you and your children to enjoy doing together.  Have fun decorating each Moon Pie differently and you’ll finally have a use (if you’re like me!) for all those adorable holiday sprinkles, that seem to amass in your cabinets! (:piccollage1085342.png

I used a wire Maple leaf basket I had tucked away in my “4 the seasons” closet – my sweet hubby built for me!  I put a block of florist foam in the bottom of the basket to anchor and display my Harvest Moon Pies and covered the foam with some shredded black and orange paper I had.  Then, I wrapped each of my decorated Harvest Moon Pies in a cellophane favor bag. (I bought my cellophane bags from Hobby Lobby, they were located on the candy-making aisle along with the Wilton Candy Melts and “lollipop” sticks) and added autumn-colored ribbons around each handle.

I love the novelty of this charming and creative centerpiece, but I also love that they can be given as party favors, since I individually wrapped each of my Harvest Moon Pies!

piccollage

HARVEST MOON PIES/ LEVEL: EASY/  YIELD: 1 DOZEN

INGREDIENTS AND ITEMS NEEDED:

piccollage108309

INGREDIENTS & ITEMS NEEDED:

  • 12 lollipop sticks
  • 2 packages Chocolate Flavor Moon Pies (6 to each small package)
  • 1 package vanilla candy melts – orange colored (I used Wilton’s Candy Melts)
  • 1 zip-type plastic bag or cake decorator bag  
  • scissors
  • wax paper
  • assorted sugar cake decorations (I used Wilton’s leaf shaped decorations)
  • assorted seasonal sprinkles
  • ribbon in autumn colors
  • Decorator Icing

DIRECTIONS:

  1. Insert 1 lollipop stick, 2 to 3 inches into marshmallow center of Moon Pie
  2. Microwave candy melts in a glass bowl at Medium (50 percent power) 1 minute or until melted, stirring once. (read detailed instructions on the back of candy bag) Spoon into your plastic bag or cake decorator bag, push air out and seal.
  3.  Snip a small hole in 1 corner of the bag; pipe melted candy around where the lollipop stick meets the Moon Pie to hold it securely in place.  Lay flat on wax paper and let stand until firm.  *SEE NOTE BELOW
  4. Pipe a fun border of melted candy around the edges of the Moon Pie or pipe squiggles across the top; then add sprinkles, cake sugar or attach candy decorations (ie: candy corn, pumpkins, etc.) using melted candies or frosting

*Be sure and help your little ones insert the candy stick into their Harvest Moon Pie and pipe melted candy around lollipop stick for them. 

I hope you “Fall” … in love with these Harvest Moon Pies  and enjoy making and eating them, as much as we did! (:

There are so many thing to love about Fall!

img_6439118184

“Fall … in love with all things pumpkin!

piccollage116899

“Fall … in love with harvest moons and breezy nights

piccollage77783

“Fall” … in love with hay bales gleaming.

piccollage145315

 “Fall” … in love with yellow leaves, lying on the grass.

piccollage149117

“Fall” … in love with children playing … laughing, giggling.

piccollage79285

“Fall” … in love with FALL!

piccollage152939

From my cottage to yours ~ Trenda