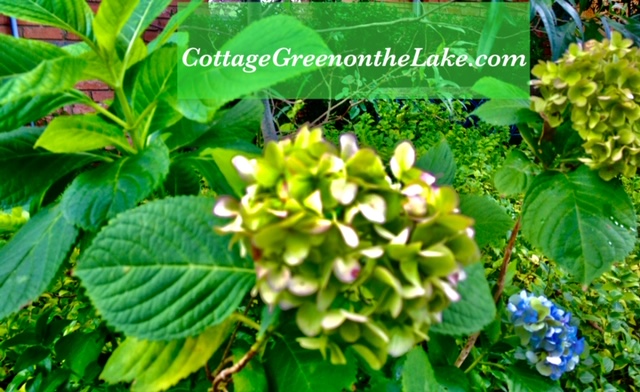
I love hydrangeas and each spring I look forward to the gorgeous purple-blue blooms that fill our bushes. However, between the weather and furry folks, my hydrangea hedge has dwindled down to one lone bush. When I looked on-line to order more hydrangea’s, the nursery selections were limited and costly. With both those incentives, it seemed like the perfect opportunity to propagate some hydrangea cuttings from my Mophead Hydrangea … something I’ve wanted and meant to do every summer. It was a delightful day for working in the cottage greenhouse. Breezes from the north swept past the greenhouse door and I could see the lake winking at me while I worked at my garden desk.

Before beginning my propagation project I ordered a set of peat pot trays, though I could have used a pot or any other container for my cuttings, provided they had good drainage. My seedling trays came with a set of bedding plant markers. I was disappointed when I opened my package and saw the plant markers were made of plastic and were stark white. I had envisioned something a little more “earthy” and rustic for my first greenhouse project. Undaunted, I went out in the yard, gathered up some twigs, and whittled my own set of charming plant markers!
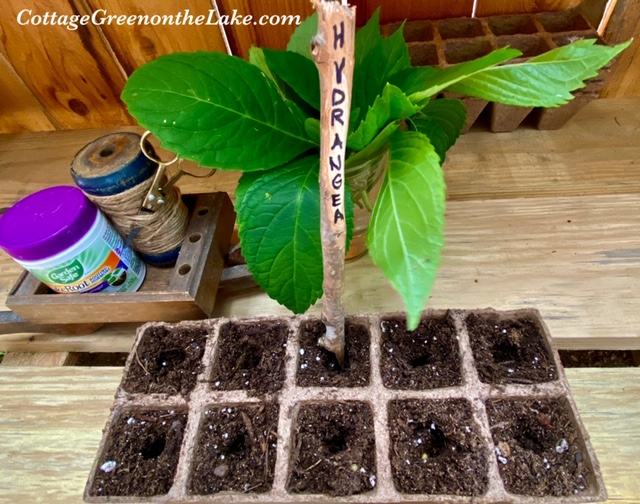
These plant markers made from twigs are just what I had envisioned, they are so rustic and winsome … AND so simple and fun to make! The only thing you’ll need for this project is twigs, a pocket knife for whittling, and a permanent marker. Are you ready? (: …. Go outside and pick up some twigs that are all about the same length and diameter, and that are reasonably straight (though some crooks and knot holes in your twigs add character!) Then sit down and begin whittling away the bark at the wider end of your stick. Carve enough bark away on your twig to expose the smooth wood underneath. You’ll only want to whittle away enough of the rough bark so you can easily write the names of the plants or seeds on your twig marker for identification. In the little red pail below, are ALL of the twig plant markers I made. I wrote Hydrangea and Morning Glory on 2 of them and I left the other markers with empty “nameplates” for future projects. Before I made these plant markers, I had never whittled anything in my life. I found the task mesmerizing and had to stop myself from carving away too much of the twig! P.S. – See the white plastic marker that came with the seedling trays that I placed next to my twig plant markers! (:

PROPAGATING HYDRANGEAS … SUPPLIES NEEDED:
- seedling trays or other container w/good drainage
- Potting Mix (I used Miracle Gro)
- pruners
- container of water
- rooting hormone (I used Garden Safe Rooting Hormone)
- Sharp stick or pencil
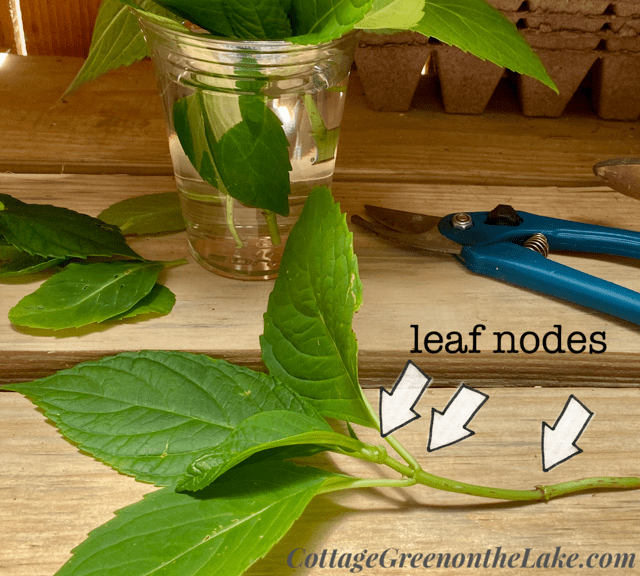
The best time to take “cuttings” from a hydrangea is around the first day of summer. The first day of summer is the longest day of the year in the northern hemisphere and is also known as Summer Solstice … and this year Summer Solstice is today, June 20th! Around this time is when the leaves of the hydrangea are lush and green and it’s also the fastest time for the hydrangea to begin generating roots. Starting your hydrangea cutting’s at this time allows enough time for the cuttings (also known as strikes) to develop root systems before the hydrangea’s go dormant in the fall. Look for new, tender green limbs, known as “soft wood” on your hydrangea, as opposed to the brown, rigid woody sticks known as “old growth.” Cut 3″- 5″ stems, making the cut right below a leaf node (leaf nodes are horizontal segments on the stem where the leaves grow out) and include 3 leaf nodes in the stem you cut.
Carry a cup or container of water with you as you make your cuttings and place your hydrangea cuttings in the water so they won’t become taxed or wilted.

After you have as many cuttings as you want, trim your cuttings, taking off all the leaves except for the top 2. If your leaves are very small, you can leave them whole. However, if you are propagating large leaf hydrangea varieties, cut these leaves to about 1/4 of their original size so the cutting won’t be strained trying to supply water to the large leaf. Return your cuttings to the water after cutting the leaves. Fill your seedling trays or other container with potting mix and use a pencil (I used the the sharp end of my new whittled twig plant markers!) to poke a hole into the potting mix … 1 hole for each of your cutting’s, then dampen your potting mix before inserting your hydrangea cuttings.
Dip each wet hydrangea stem into the rooting hormone and insert cutting, coated with rooting hormone into your prepared potting mix. At least one set of leaf nodes, preferably 2, need to be covered in the potting mix since the nodes and stem are where the new roots will begin growing.

Gently push the potting mix around the cutting to hold it firmly in place, and continue until all cuttings are planted, then water thoroughly until the water flows freely from the drainage hole. If you use peat pots or trays like I did, I watered my cuttings until the sides of the tray were sodden. Keep your cuttings in a bright, warm place, but out of direct sunlight, and make sure your potting mix is moist at all times.

Don’t disturb your hydrangea strikes and continue to let them grow in your container or trays, making sure they are kept moist; I watered mine once each day. In 4 weeks your hydrangea cuttings, or strikes, should have produced new roots. At this time you can transfer your hydrangea’s to a bigger container. When you feel like your new hydrangea plants have become strong enough, or they have outgrown their container, they can be planted in your yard. This method of propagation works for all varieties of hydrangeas. I planted 10 hydrangea cuttings which hopefully will grow into 10 more Mophead Hydrangea bushes for our yard. Did you know a 1 gallon plant of Endless Summer Mophead Hydrangeas cost $29.99 on Amazon?!!! Go get on your garden gloves! (:
I love puttering around in my cottage greenhouse and below I have included some pictures of some of the knick-knacks I’ve added for some greenhouse charm. This wrought iron chair under my garden desk ~ is 1 of 4 that belongs with a beautiful glass topped garden table that my grandmother always had on her covered front porch. My mother gave the cherished table set to me and Richard sweetly sanded it and gave it a new coat of white paint. Now, I keep the table inside and use it in my music/craft room. I have dear memories of my grandmother and me sitting on her porch as she worked with her plants, sitting in this very chair! ❤
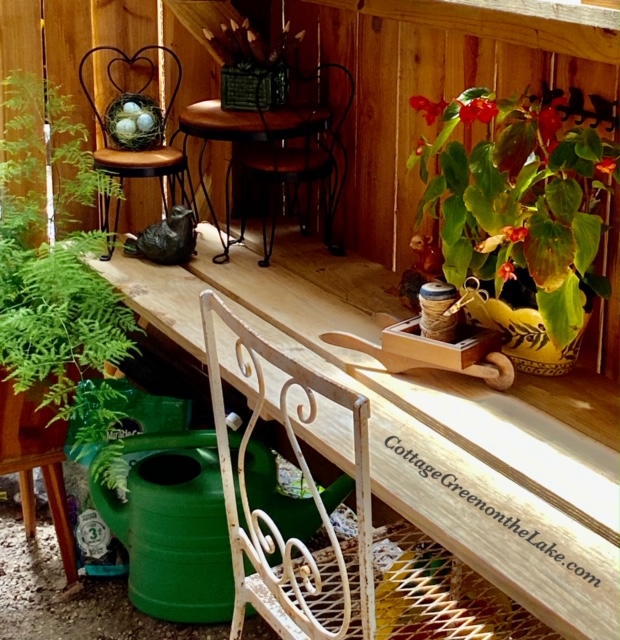
An Angel Wing Begonia looks beautiful tucked in a planter until I have the time to transplant it to an antique washtub outside my Potting Shed. See the sweet antique planter with the little bear sitting on top of the log? I love to find and collect these whimsical planters when we go antiqu’ing, and I have them in all kinds of unexpected places, not only in the greenhouse!

A grapevine wrapped pencil cup holds carved colored pencils and a chunky votive burns citronella and vanilla candles when I’m in the greenhouse. Here’s another one of my antique planters … a sweet little birdhouse with a red roof and a little birdie perched by the front door.

An old handmade wheelbarrow holds a spool of jute and scissors ready for tying up plants and other garden projects.

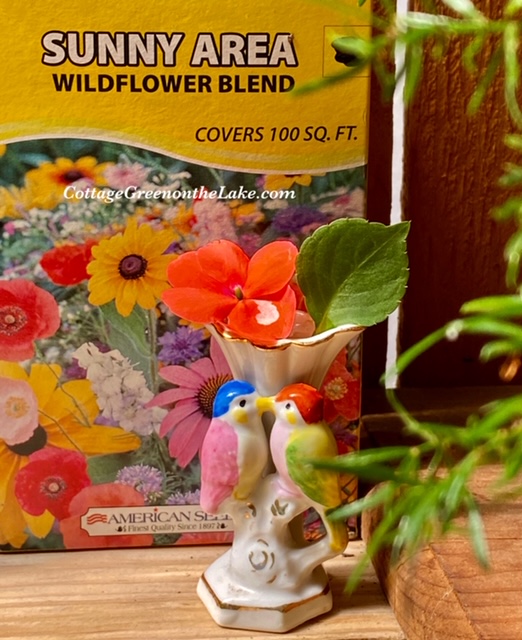
I love this tiny little flower vase with the kissing birds and I love to tuck tiny flowers inside. The colors of the birds and the coral-orange of the impatien’s bloom match perfectly with the box of wildflower seeds.
This is the canvas I told you about in my post “Charcuterie Charm” (click here to see) that my dear friend, Patricia made from the picture I sent her of the metal table I covered with broken pieces of blue and white pottery. Patricia told me she had this canvas made for me to hang in my greenhouse. I love it (and the giver) ❤ Doesn’t it make a great backdrop for my folksy handmade windmill with adjoining planter that holds an Asparagus Fern?

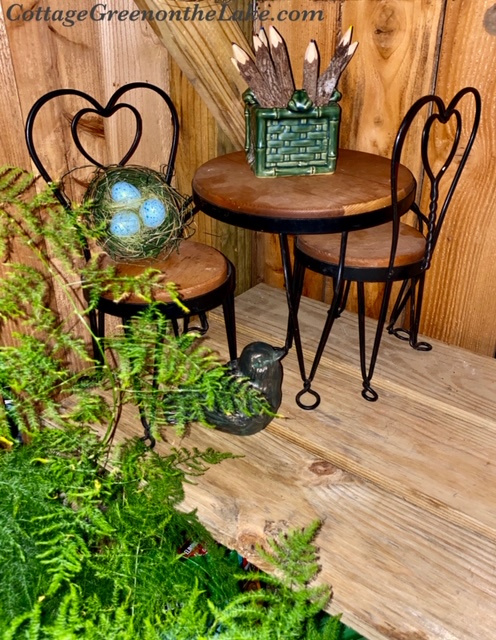
This miniature bistro table belonged to our daughter when she was little. ❤ The tabletop was always set with her Beatrix Potter tea set, ready for impromptu Teddy Bear Tea Party’s. I couldn’t think of parting with it, or the memories of sweet days gone by. Now, I love seeing it on my garden desk with a nest propped on one of the bistro chairs, a little bird keeping watch from the feathery fronds of a Plumosa Asparagus Fern, and another planter topped with little frogs, and filled with carved colored pencils.
Hope you enjoyed your day … your Summer Solstice, and the beginning of summer! Look who obligingly walked right into the picture below as I was taking our beautiful sunset. A Great Blue Heron we’ve fondly named Whiskers. He comes to our backyard buffet every evening, looking for dinner!
From my cottage to yours ~ Trenda

Thank you for reading my blog. To have all my posts delivered directly to your email address, just click on FOLLOW in the post above … or click on my site: cottagegreenonthelake.com
Follow me on PINTEREST at Trenda@cottagegreenonthelake.com

.